Chapter 10B – Managing Databases with Oracle Database
Page 10B-121
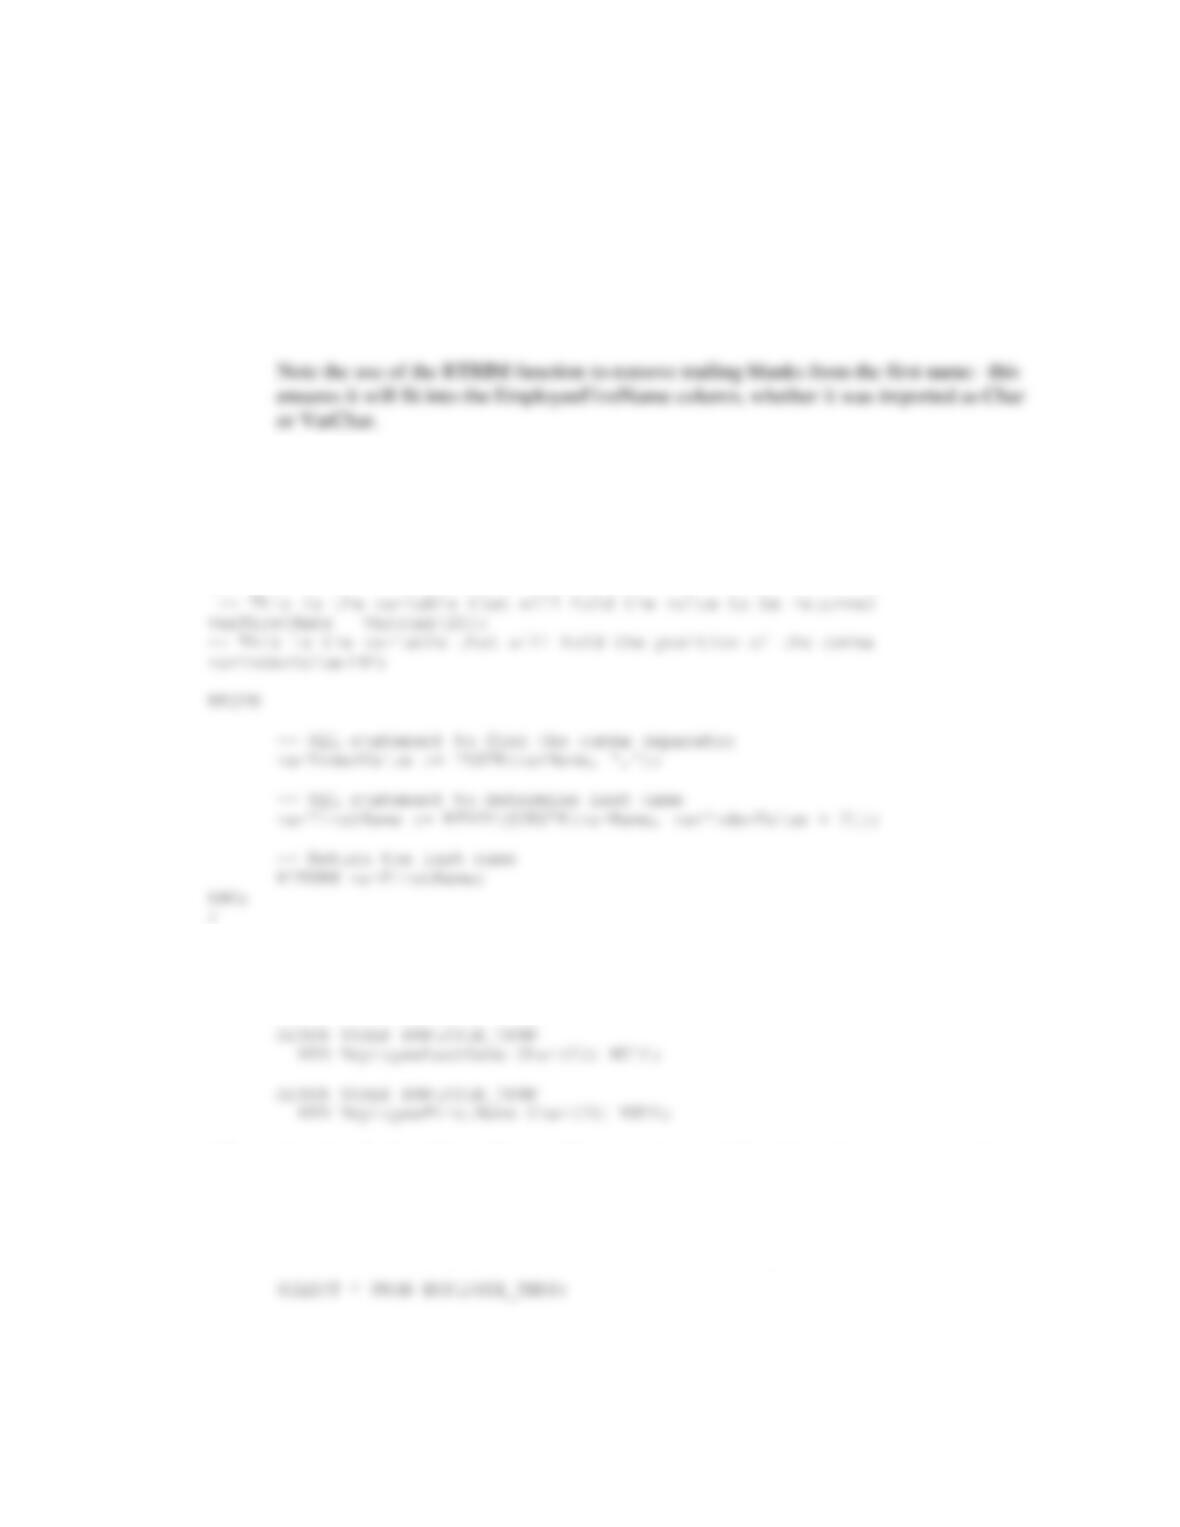
— Return the last name
RETURN varLastName;
END;
/
Z. Create a user-defined function named GetFirstNameCommaSeparated that will
return the first name from a combined name in last-name-first order, with the
names separated by a comma and one space.
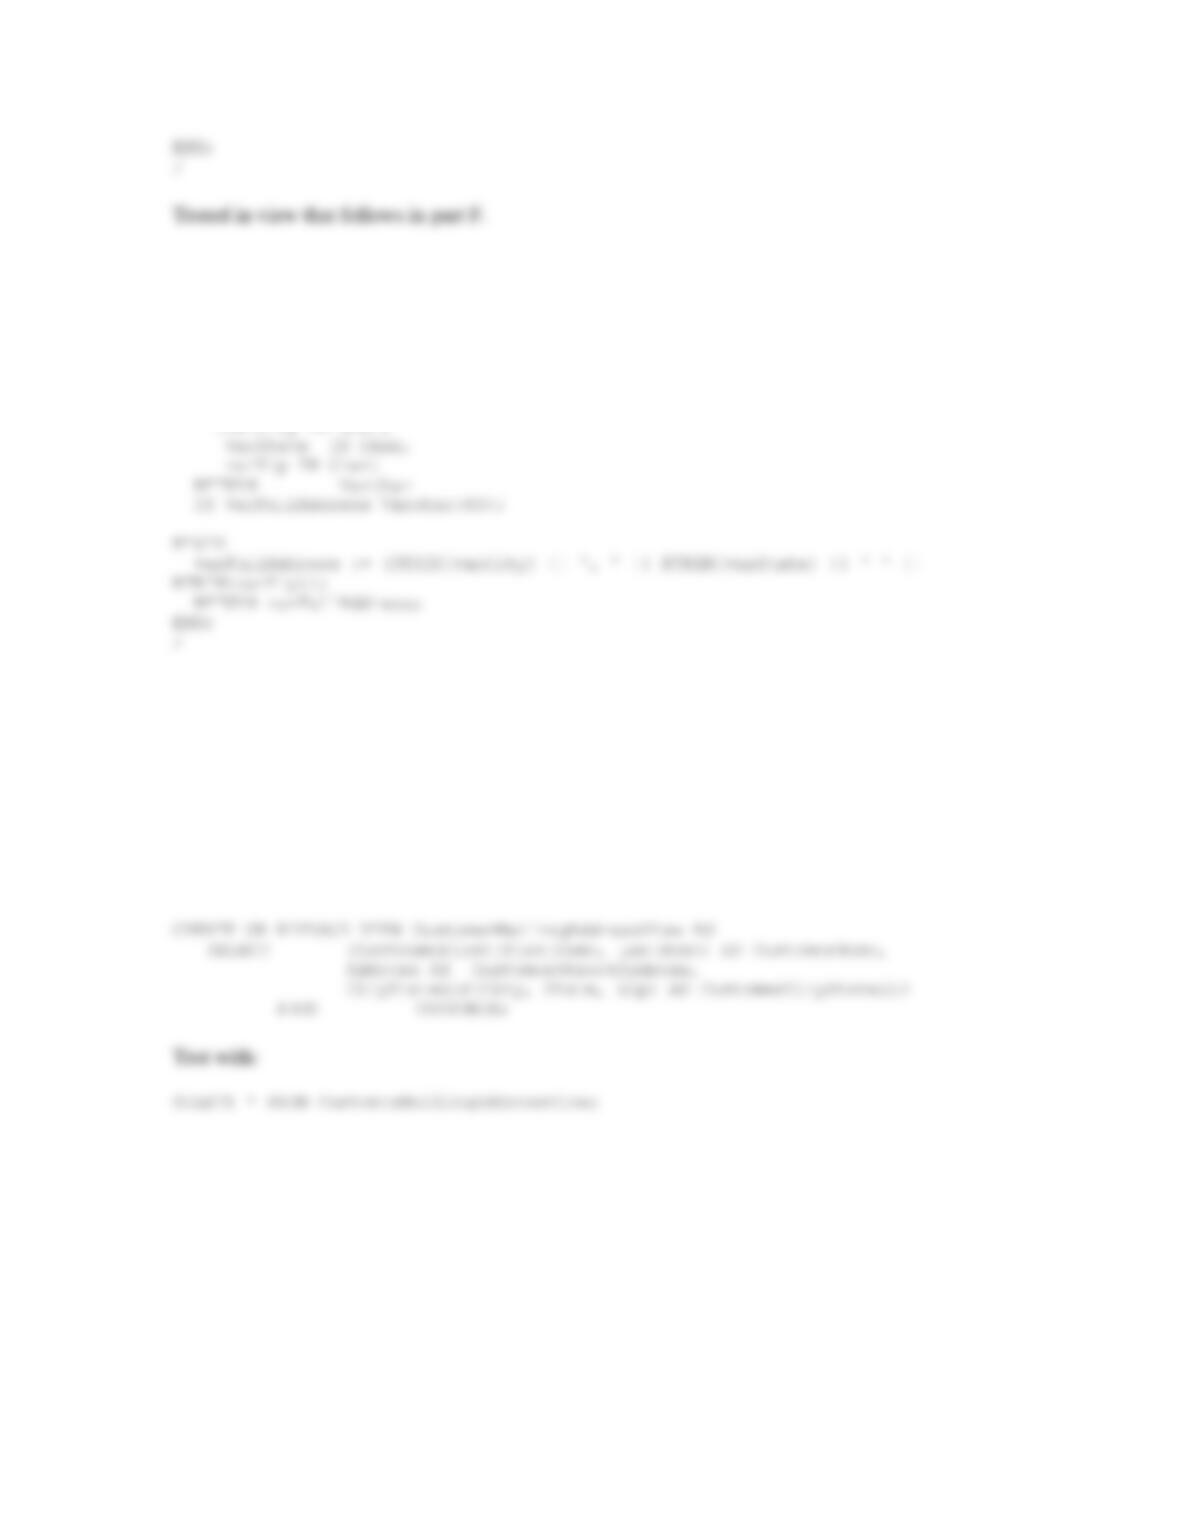
CREATE OR REPLACE FUNCTION GetFirstNameCommaSeparated
— These are the input parameters
(
varName Varchar2
)
RETURN Varchar
IS
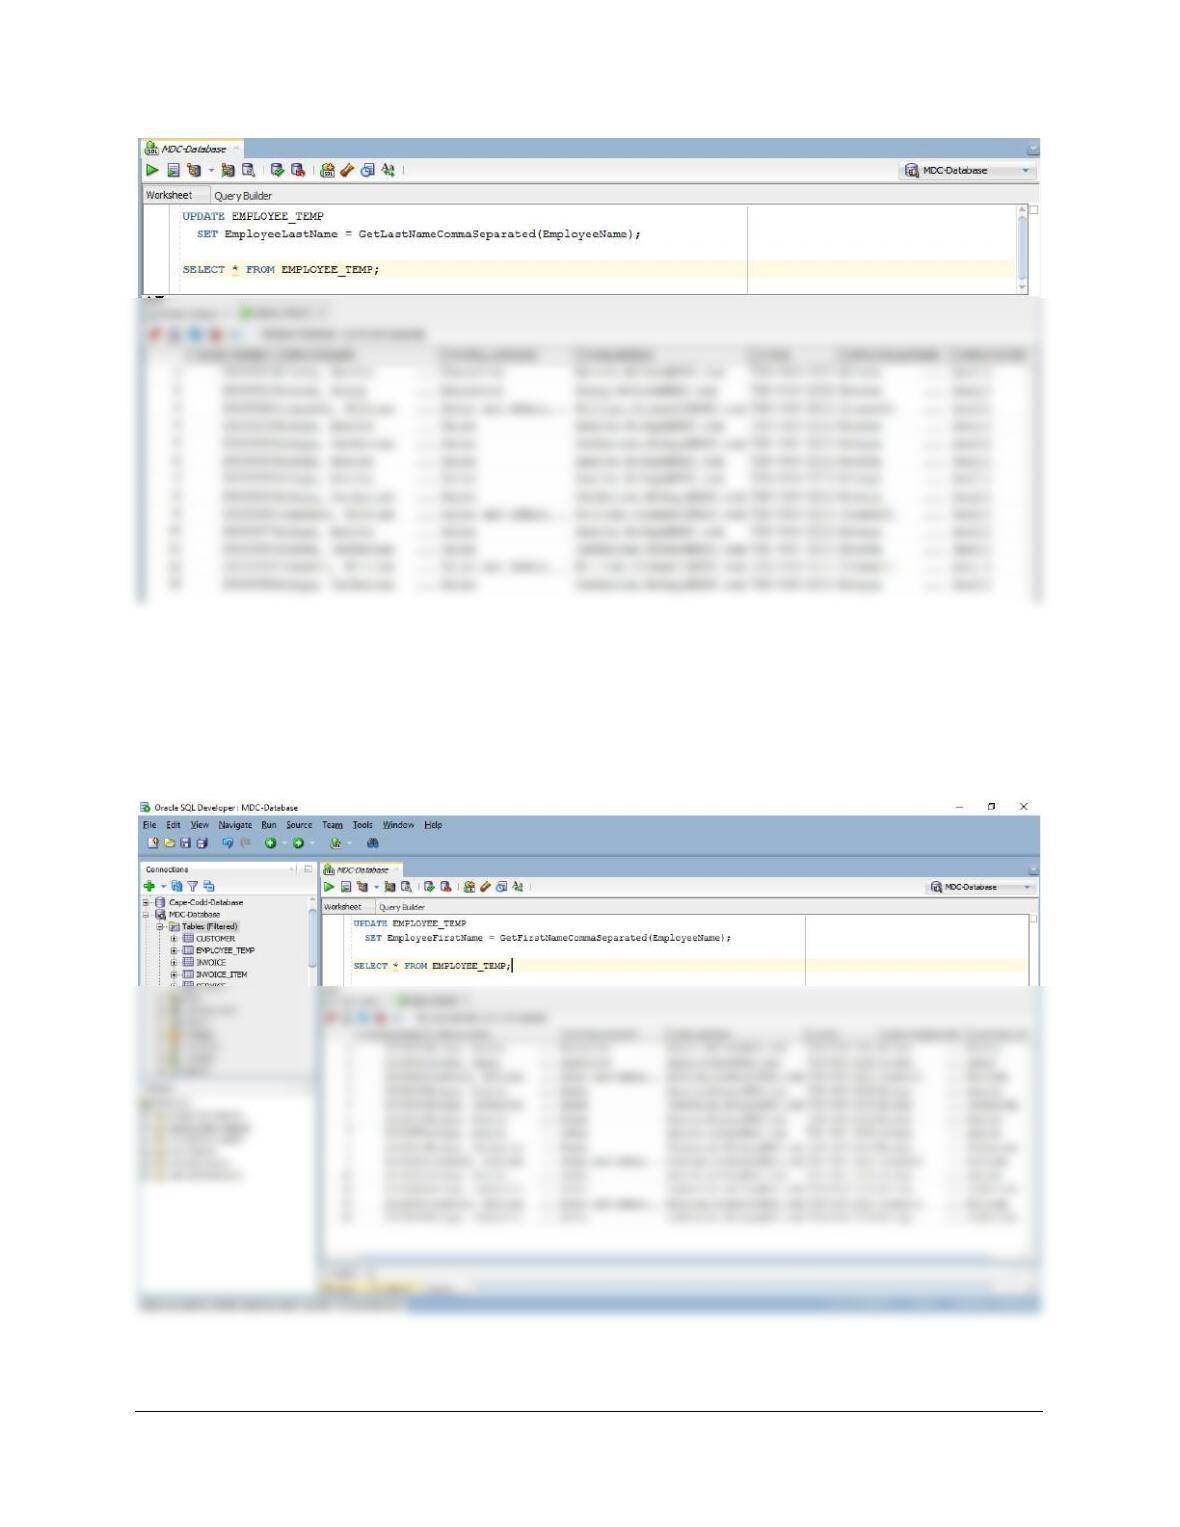
AA. Alter the EMPLOYEE_TEMP table to include EmployeeLastName and
EmployeeFirstName columns (Char(25), allow NULL values).
AB. Use the GetLastNameCommaSeparated user-defined function you created in
step Y to populate the EmployeeLastName column.
UPDATE EMPLOYEE_TEMP
SET EmployeeLastName = GetLastNameCommaSeparated(EmployeeName);
Chapter 10B – Managing Databases with Oracle Database
Page 10B-122
AC. Use the GetFirstNameCommaSeparated user-defined function you created in
step Z to populate the EmployeeFirstName column.
UPDATE EMPLOYEE_TEMP
SET EmployeeFirstName = GetFirstNameCommaSeparated(EmployeeName);
SELECT * FROM EMPLOYEE_TEMP;
Chapter 10B – Managing Databases with Oracle Database
Page 10B-123
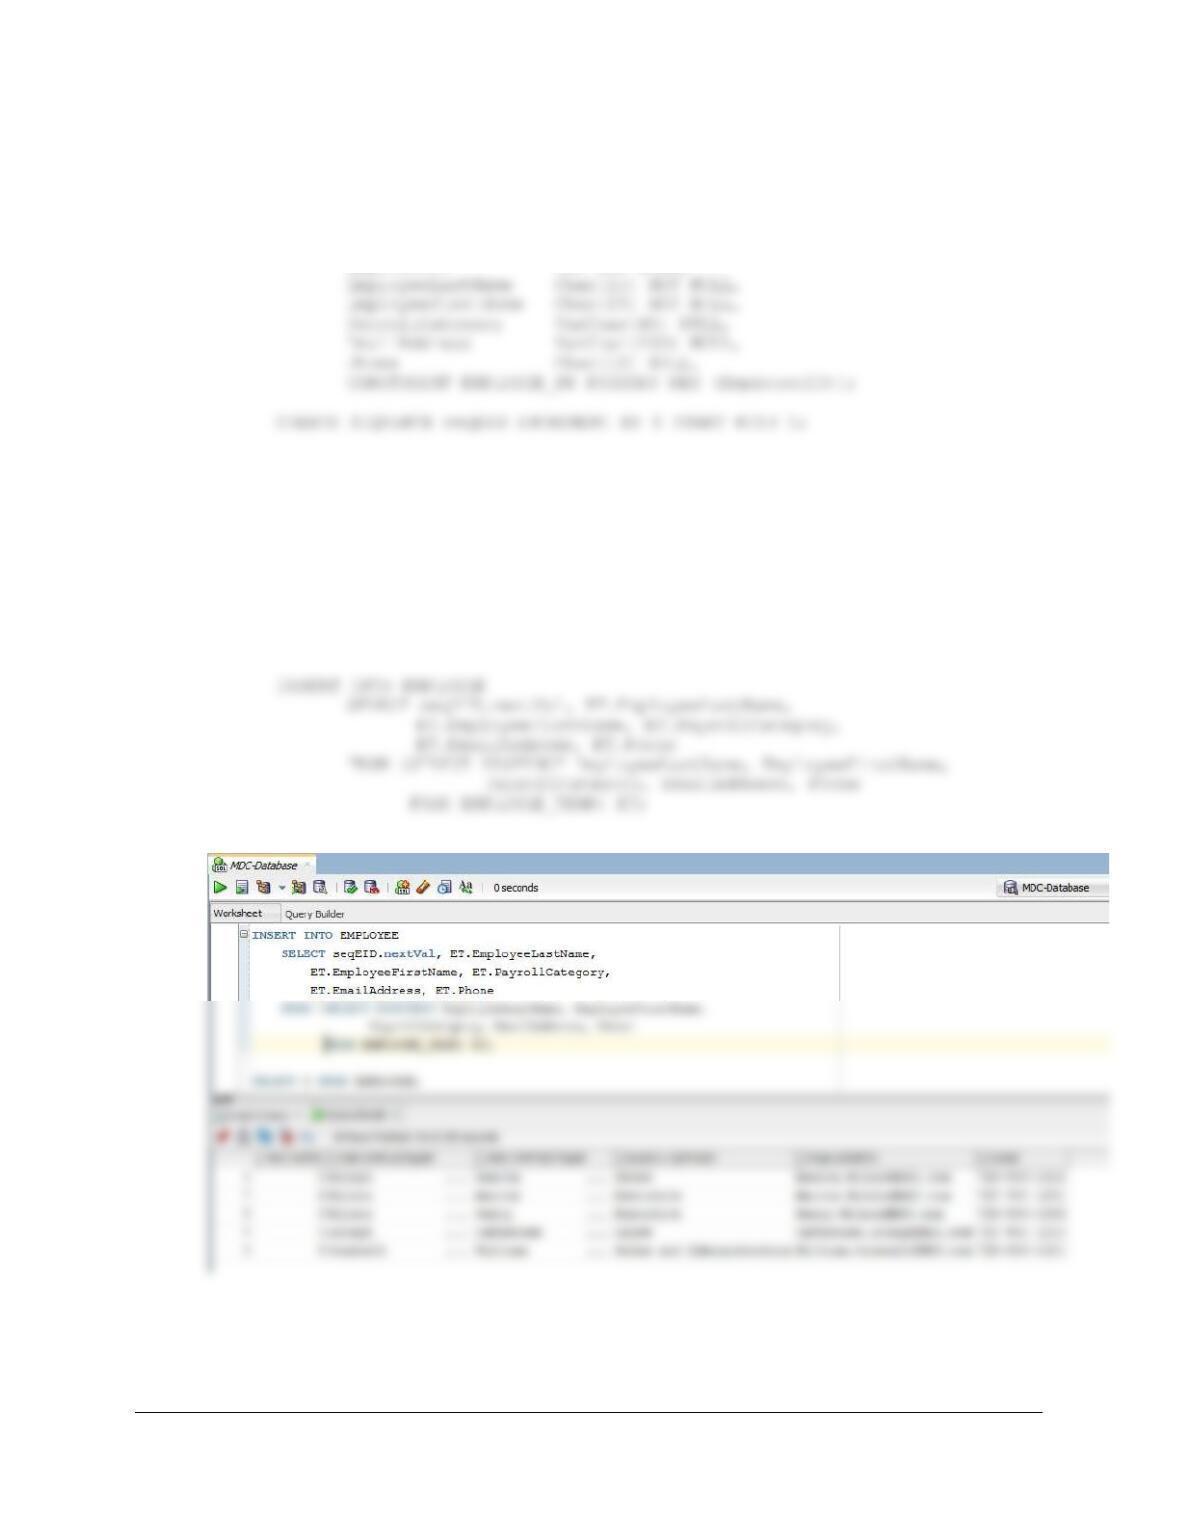
AD. Create a new table named EMPLOYEE, as shown in Figure 10B-107. Use the
column characteristics shown in Figure 10B-107, where EmployeeID is a
surrogate key starting at 1 and incrementing by 1.
CREATE TABLE EMPLOYEE (
EmployeeID INT NOT NULL,
AE. Populate the EMPLOYEE table using the data stored in the EMPLOYEE_TEMP
table. Hints: You should insert distinct data into the table, and your final table will
have only five records. Also see Exercise 10B.72G for how to manage the
sequence.
See Project Question 10.72G for a tip on how to do this using the sequence and a single
INSERT statement, as shown below.
AF. Alter the EMPLOYEE_TEMP table to include an EmployeeID column (Integer
data, allow nulls). By using and comparing the
EMPLOYEE_TEMP.EmployeeLastName and

Chapter 10B – Managing Databases with Oracle Database
Page 10B-124
ALTER TABLE EMPLOYEE_TEMP
ADD EmployeeID Int NULL;
UPDATE EMPLOYEE_TEMP
SET EmployeeID =
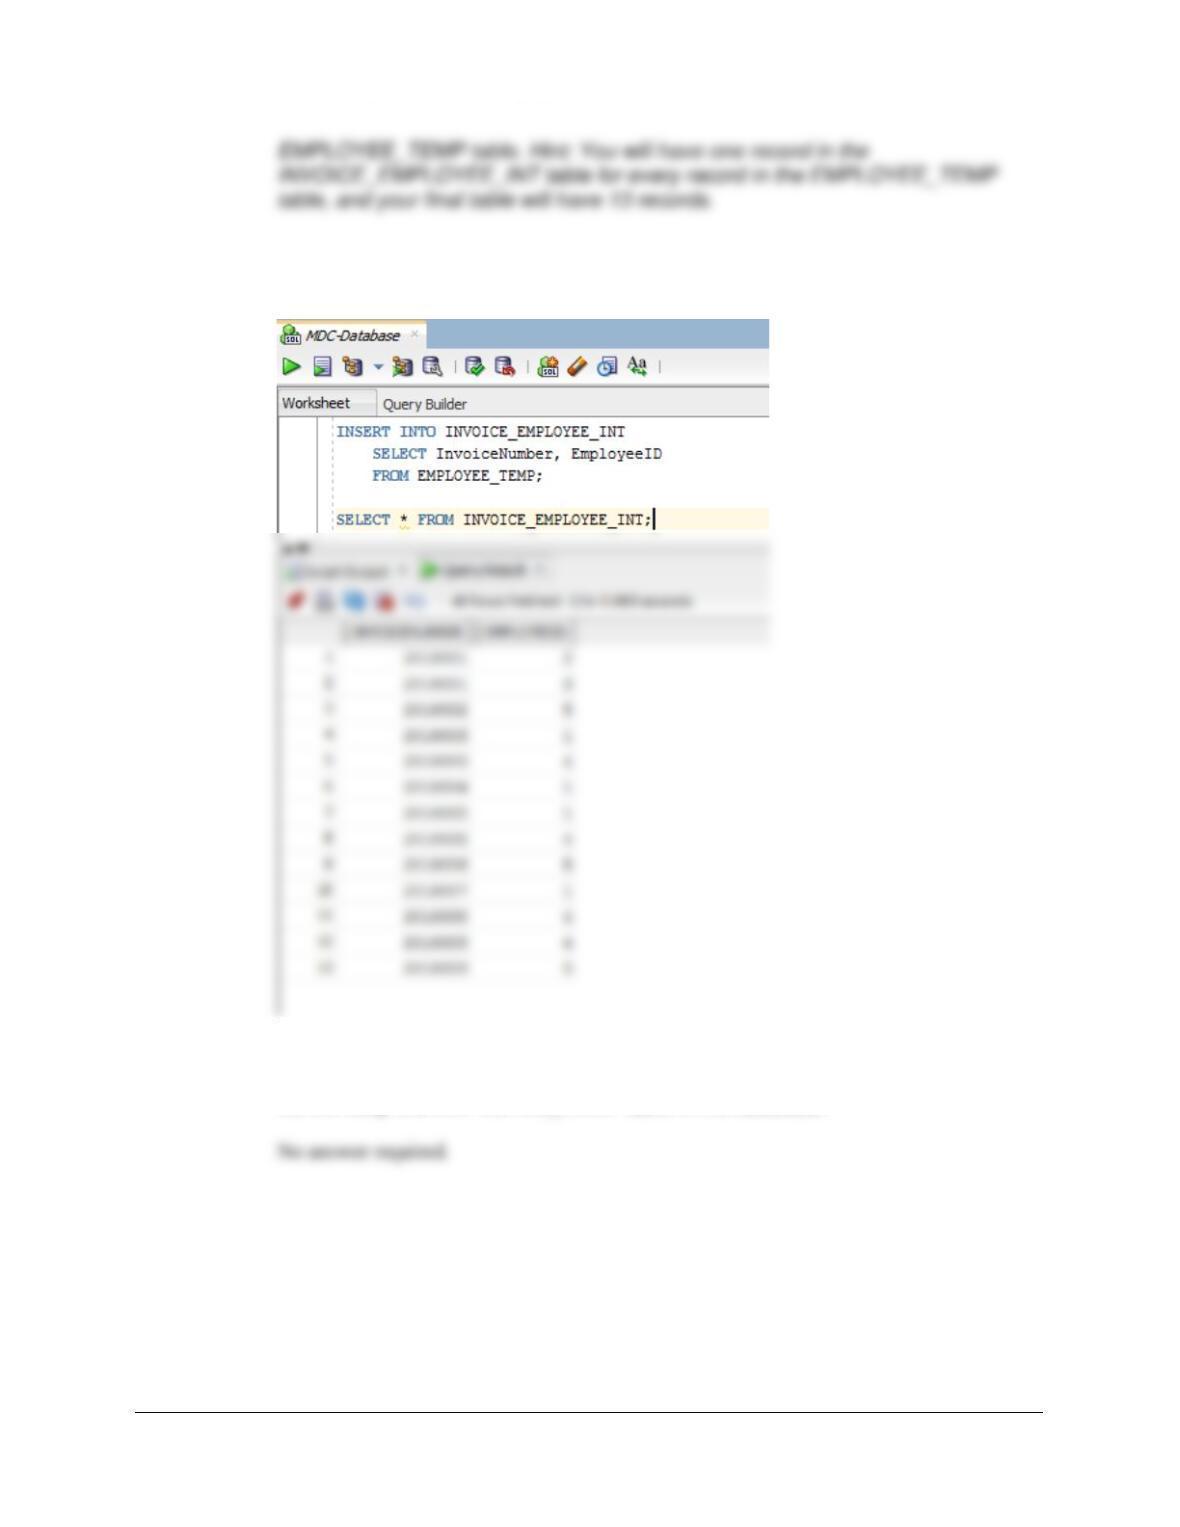
AG. Create a new table named INVOICE_EMPLOYEE_INT, as shown in Figure
10B–88. Use the column characteristics shown in Figure 10B-88.
CREATE TABLE INVOICE_EMPLOYEE_INT (
InvoiceNumber Int NOT NULL,
AH. Populate the INVOICE_EMPLOYEE_INT table using the data stored in the
Chapter 10B – Managing Databases with Oracle Database
Page 10B-125
INSERT INTO INVOICE_EMPLOYEE_INT
SELECT InvoiceNumber, EmployeeID
FROM EMPLOYEE_TEMP;
AI. We have completed the modifications of the MDC database, and are done with
the temporary EMPLOYEE_TEMP table. We could delete it if we wanted to, but
we will keep the EMPLOYEE_TEMP table in the database.

Chapter 10B – Managing Databases with Oracle Database
Page 10B-126
❖ ANSWERS TO THE QUEEN ANNE CURIOSITY SHOP PROJECT QUESTIONS
If you have not completed the discussion of the Queen Anne Curiosity Shop database at the
end of Chapter 7, work through the Chapter 7 QACS Project Questions now. Use the QACS
database that you created in the Chapter 7 QACS Project Questions as the basis for your
answers to the following questions:
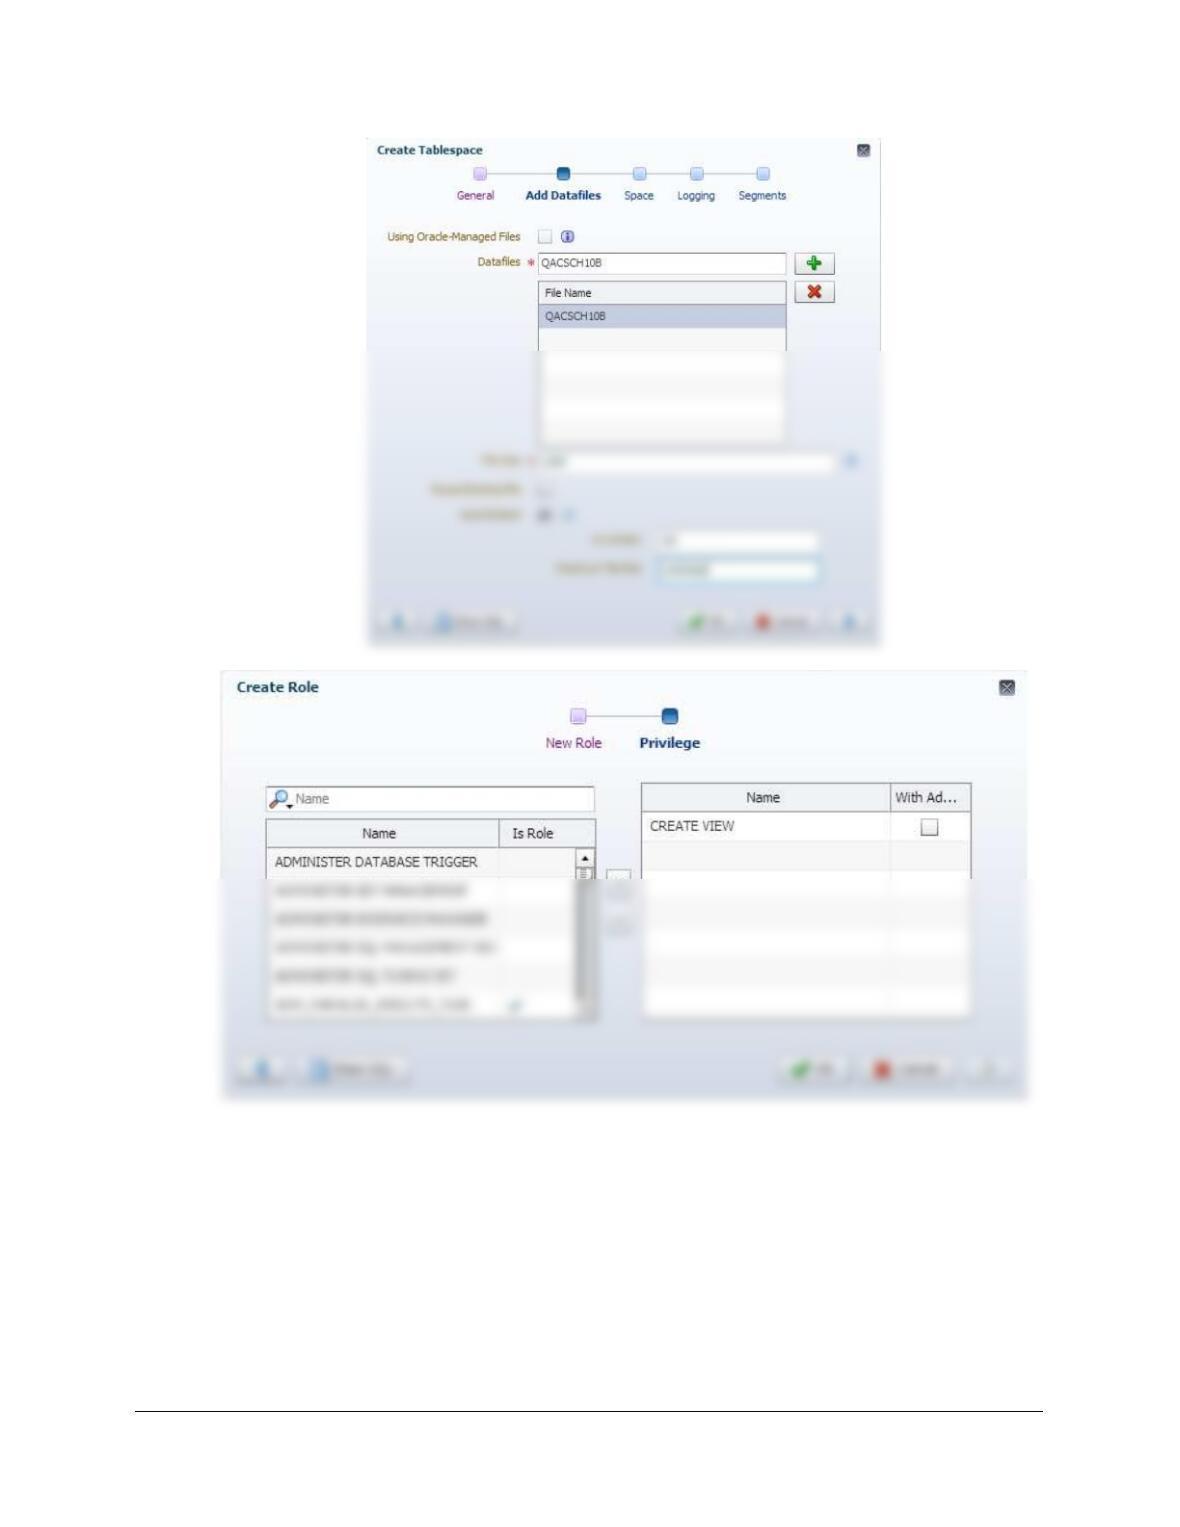
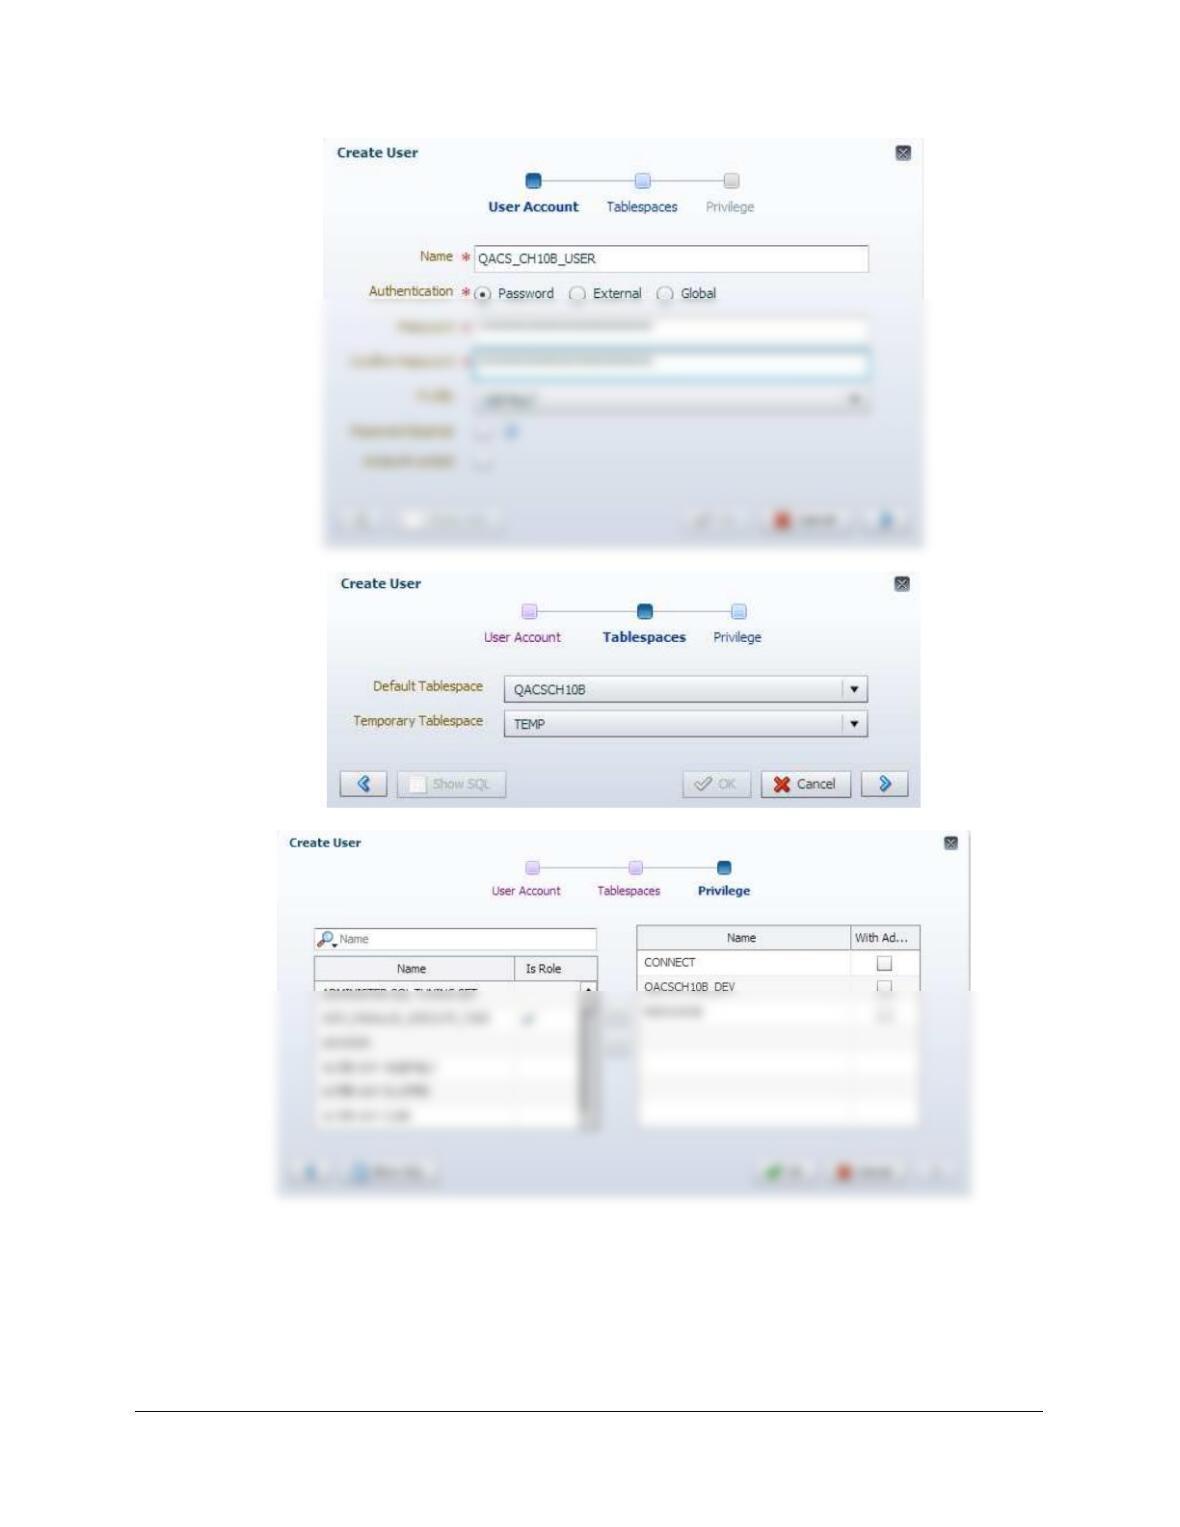
A. Using the examples in this chapter as a template:
RESOURCE, and QACSCH10B_DEV roles.
• For Oracle Database XE: Use the Oracle Database XE 11.2 Web utility to create a
QACS_CH10B workspace with user account QACS_CH10B_USER.
Solutions for 12c Release 2 are presented first, followed by solutions for XE 11.2. For Oracle
Chapter 10B – Managing Databases with Oracle Database
Page 10B-127
Chapter 10B – Managing Databases with Oracle Database
Page 10B-128
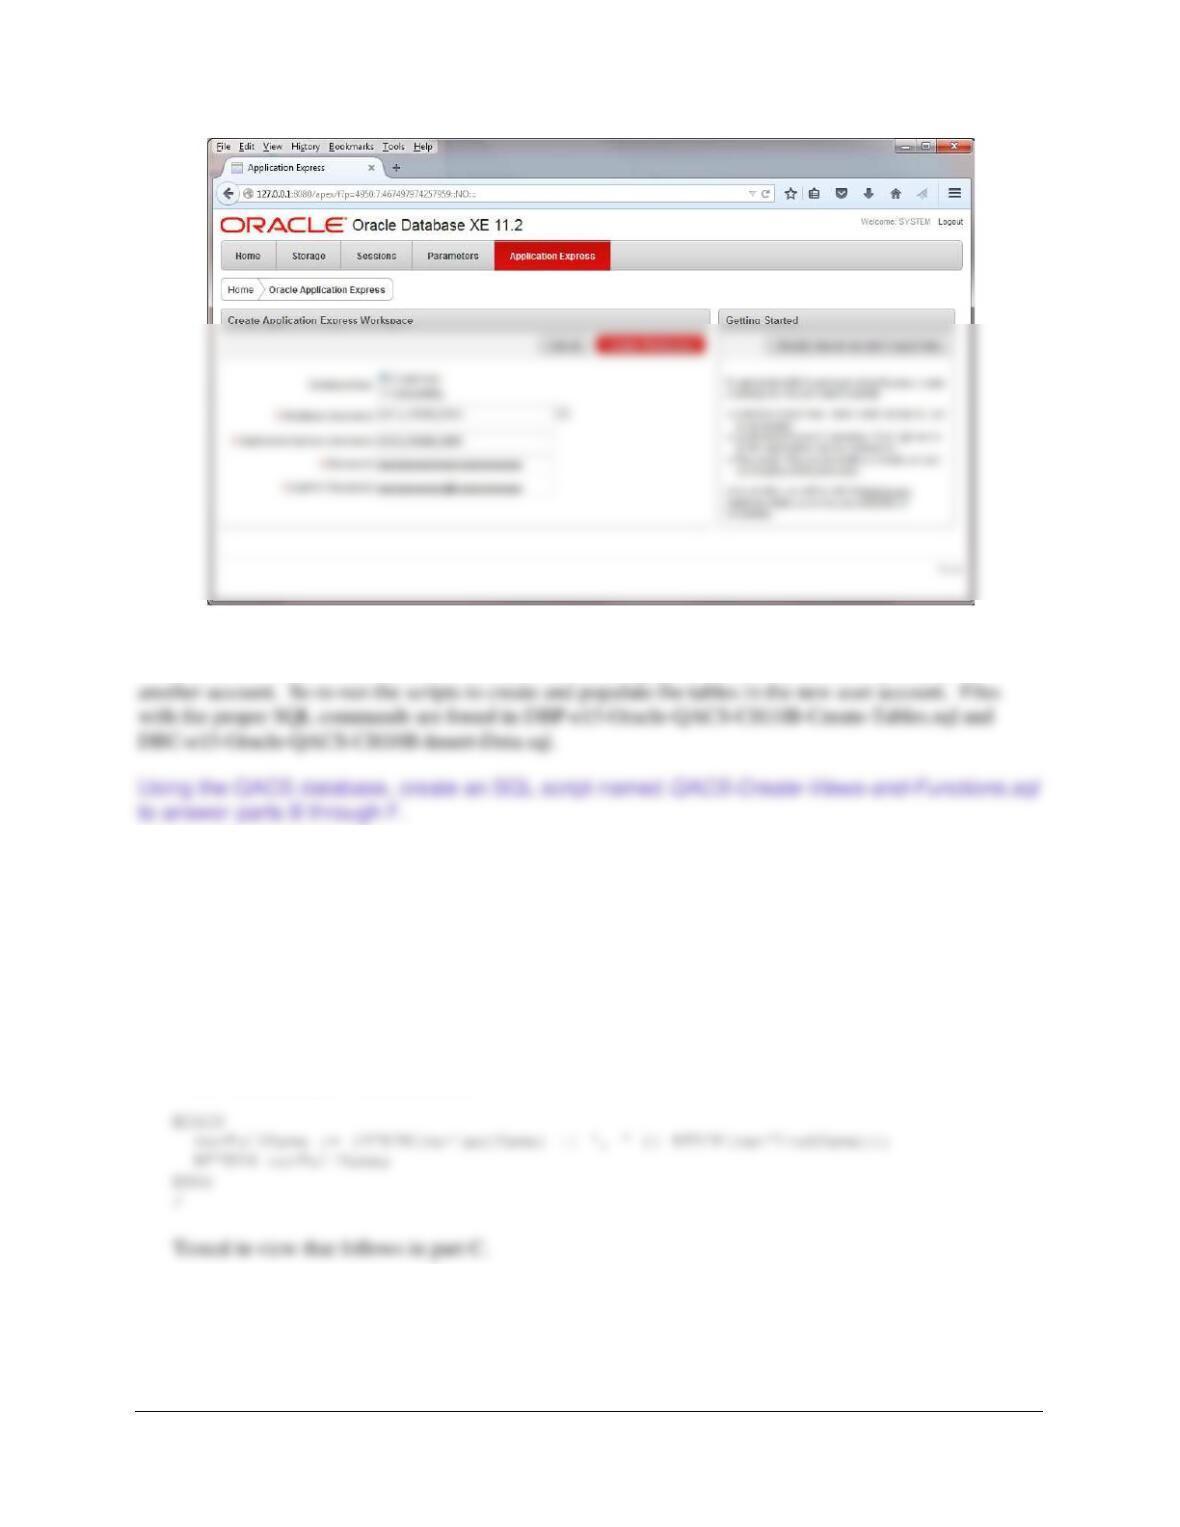
The process is simpler for Oracle Database XE 11.2: Follow the instructions on pages 10B29-
10B-33. After creating the workspace, exit the XE 11.2 Database Administration Utility. Here is
a screen shot of the crucial part of the process:
Chapter 10B – Managing Databases with Oracle Database
Page 10B-129
After creating the above user, the database will need to be created and populated with data. As mentioned
in the text, it is assumed that you have already created and populated this database, but probably in
B. Create and test a user-defined function named LastNameFirst that combines two
parameters named FirstName and LastName into a concatenated name field formatted
LastName, FirstName (including the comma and space).
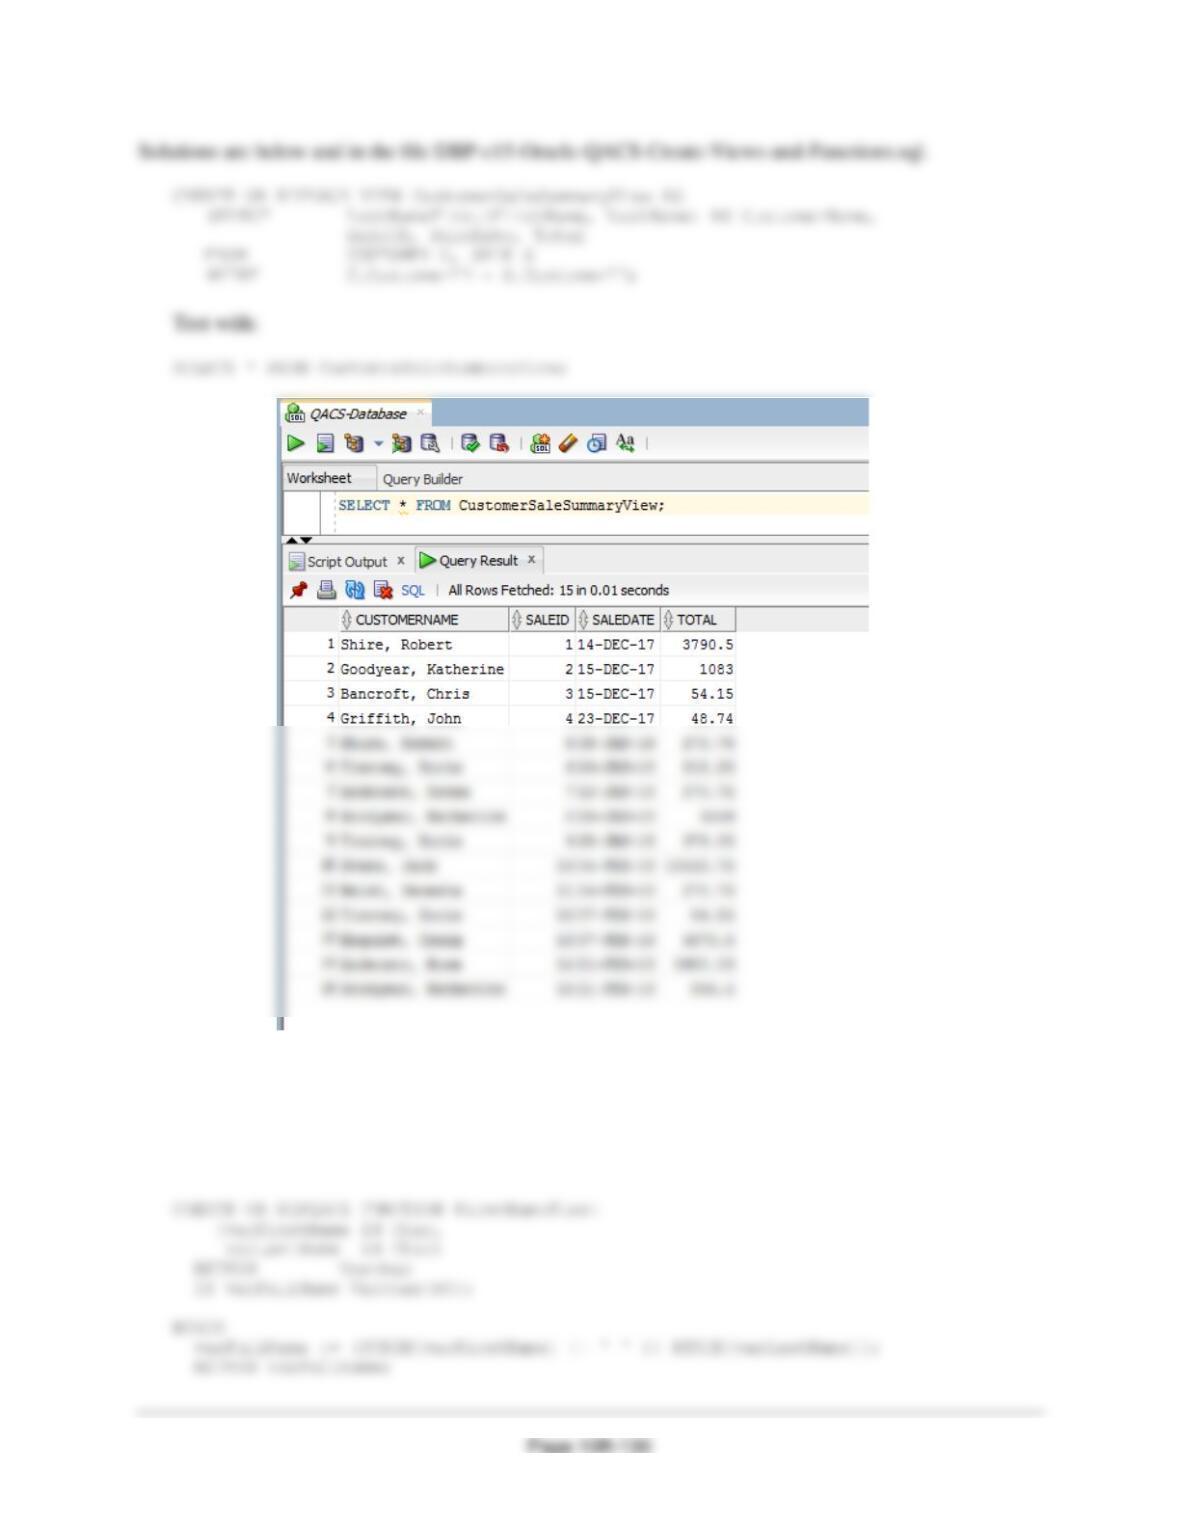
Solutions are below and in the file DBP-e15-Oracle-QACS-Create-Views-and-Functions.sql.
CREATE OR REPLACE FUNCTION LastNameFirst
(varFirstName IN Char,
varLastName IN Char)
RETURN Varchar
IS varFullName Varchar(60);
C. Create and test a view called CustomerSaleSummaryView that contains the customer
name concatenated and formatted as LastName, FirstName in a field named
CustomerName, SALE.SaleID, SALE.Date, and SALE.Total.
Chapter 10B – Managing Databases with Oracle Database
D. Create and test a user-defined function named FirstNameFirst that combines two
parameters named FirstName and LastName into a concatenated name field formatted
FirstName LastName (including the space).
Solutions are below and in the file DBP-e15-Oracle-QACS-Create-Views-and-Functions.sql.
Chapter 10B – Managing Databases with Oracle Database
Page 10B-131
E. Create and test a user-defined function named CityStateZIP that combines three
parameters named City, State, and ZIP into a concatenated name field formatted City,
State ZIP (including the comma and the spaces).
Solutions are below and in the file DBP-e15-Oracle-QACS-Create-Views-and-Functions.sql.
CREATE OR REPLACE FUNCTION CityStateZIP
Tested in view that follows in part F.
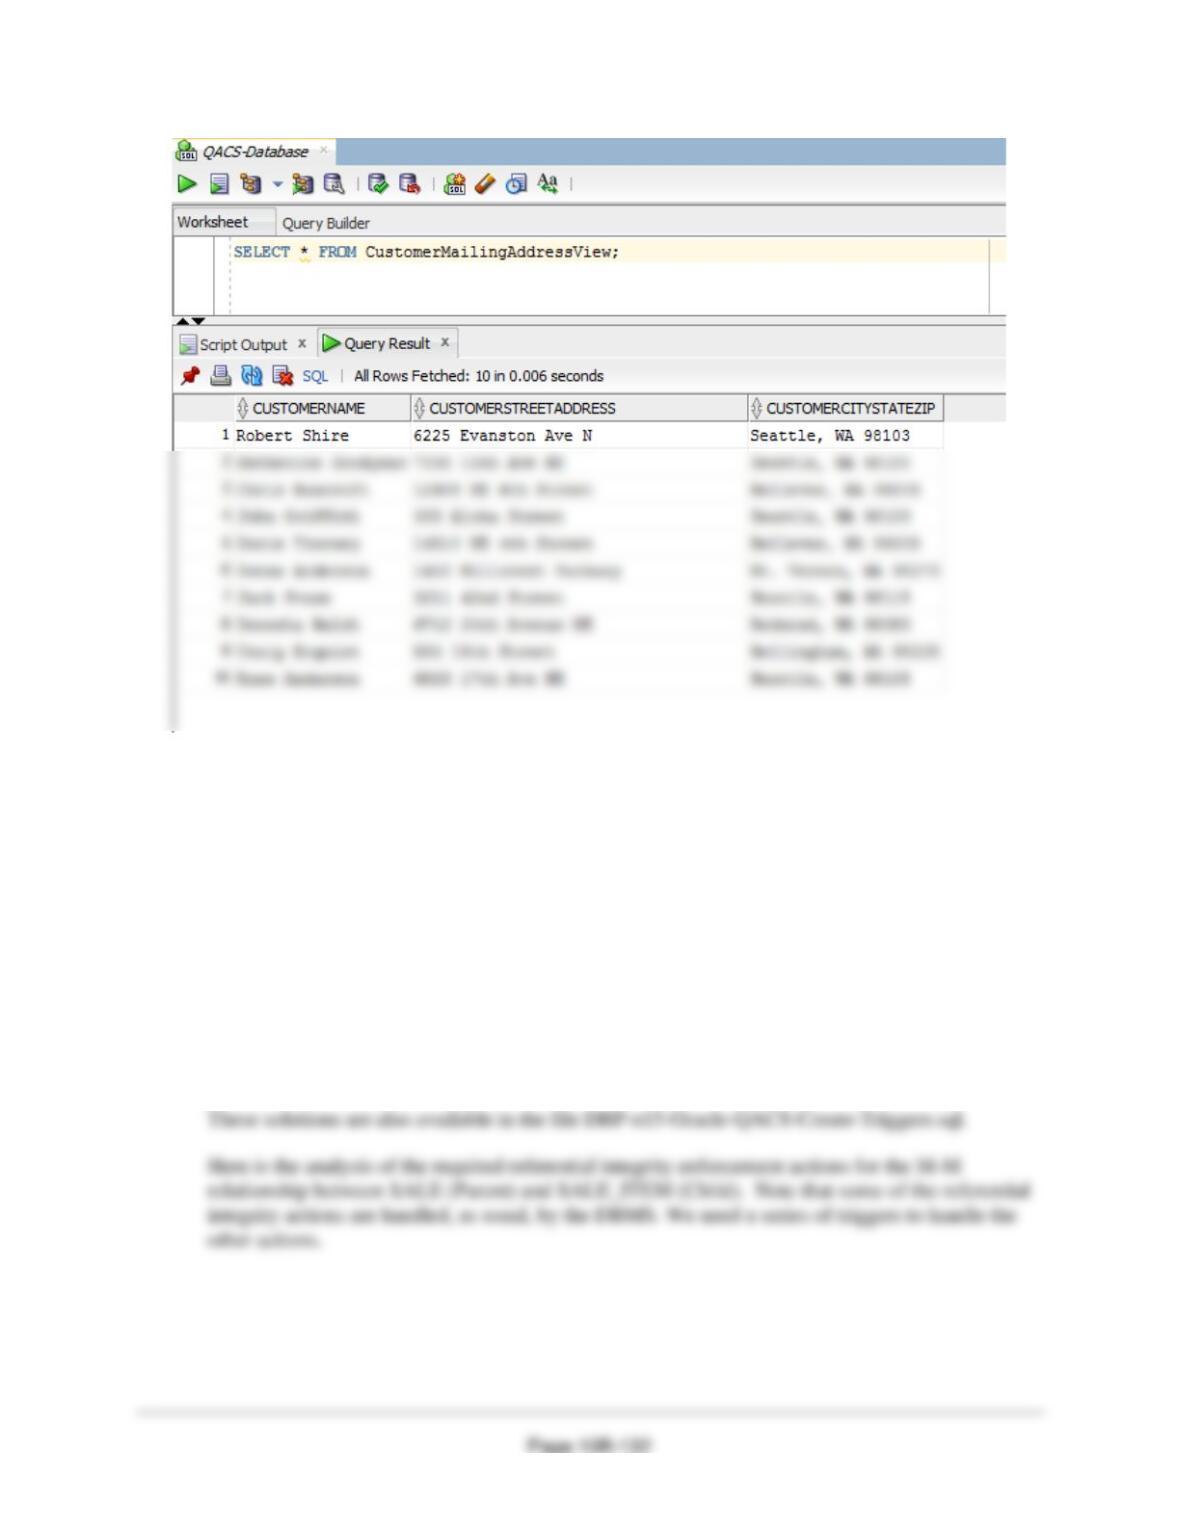
F. Create and test a view called CustomerMailingAddressView that contains the customer
name concatenated and formatted as FirstName LastName in a field named
CustomerName, the customer’s street address in a field named CustomerStreetAddress,
and the customer’s City, State, ZIP concatenated and formatted as City, State ZIP in a
field named CustomerCityStateZIP.
Solutions are below and in the file DBP-e15-Oracle-QACS-Create-Views-and-Functions.sql.
Chapter 10B – Managing Databases with Oracle Database
Using the QACS database, create an SQL script named QACS-Create-Triggers.sql to answer
parts G and H.
G. Assume that the relationship between SALE and SALE_ITEM is M-M. Design triggers
to enforce this relationship. Use Figure 10B-72 and the discussion of that figure as an
example, but assume that The Queen Anne Curiosity Shop does allow INVOICEs and
their related SALE_ITEM rows to be deleted. Use the deletion strategy shown in
Figures 7-28 and 7–29 for this case.
H. Write and test the triggers you designed in part G. Note that you may need to create views in
Oracle Database for proper operation of some of the triggers.
Note: The answers to Project Questions G and H are combined in the following discussion.
Chapter 10B – Managing Databases with Oracle Database
Page 10B-133
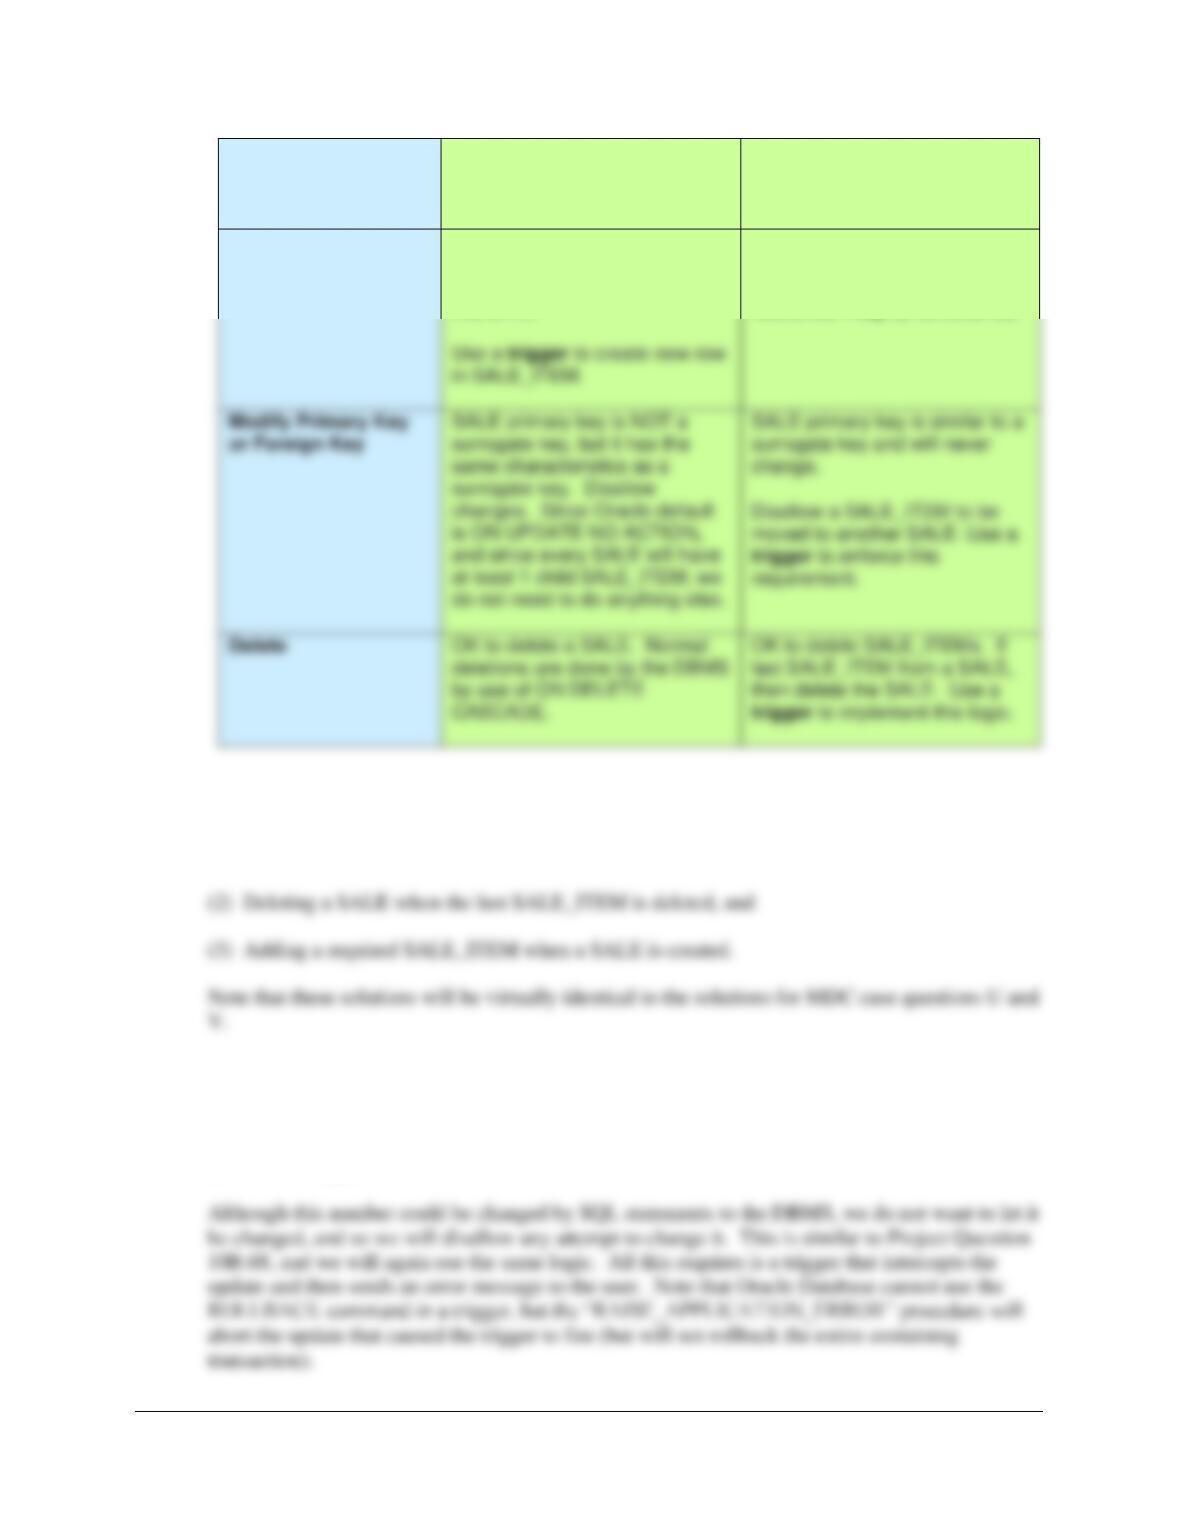
Both SALE and
SALE_ITEM are
Required
SALE
[Parent]
SALE_ITEM
[Child]
Insert
Create a new SALE_ITEM row.
Note that this row must be
numbered as SALE_ITEM 1 for
this SALE.
New SALE_ITEM row must
have a valid SALE (enforced by
DBMS NOT NULL and
referential integrity constraints).
There are thus three actions that need triggers:
(1) Denying the reassignment of a SALE_ITEM from one SALE to another
(1) Denying the reassignment of a SALE_ITEM from one SALE to another.
It makes no logical business sense to move a SALE_ITEM from one SALE to another. Note that
if this was done, both a different SALE.SaleID and probably a SALE_ITEM.SaleItemID would
have to be assigned.
Chapter 10B – Managing Databases with Oracle Database
Page 10B-134
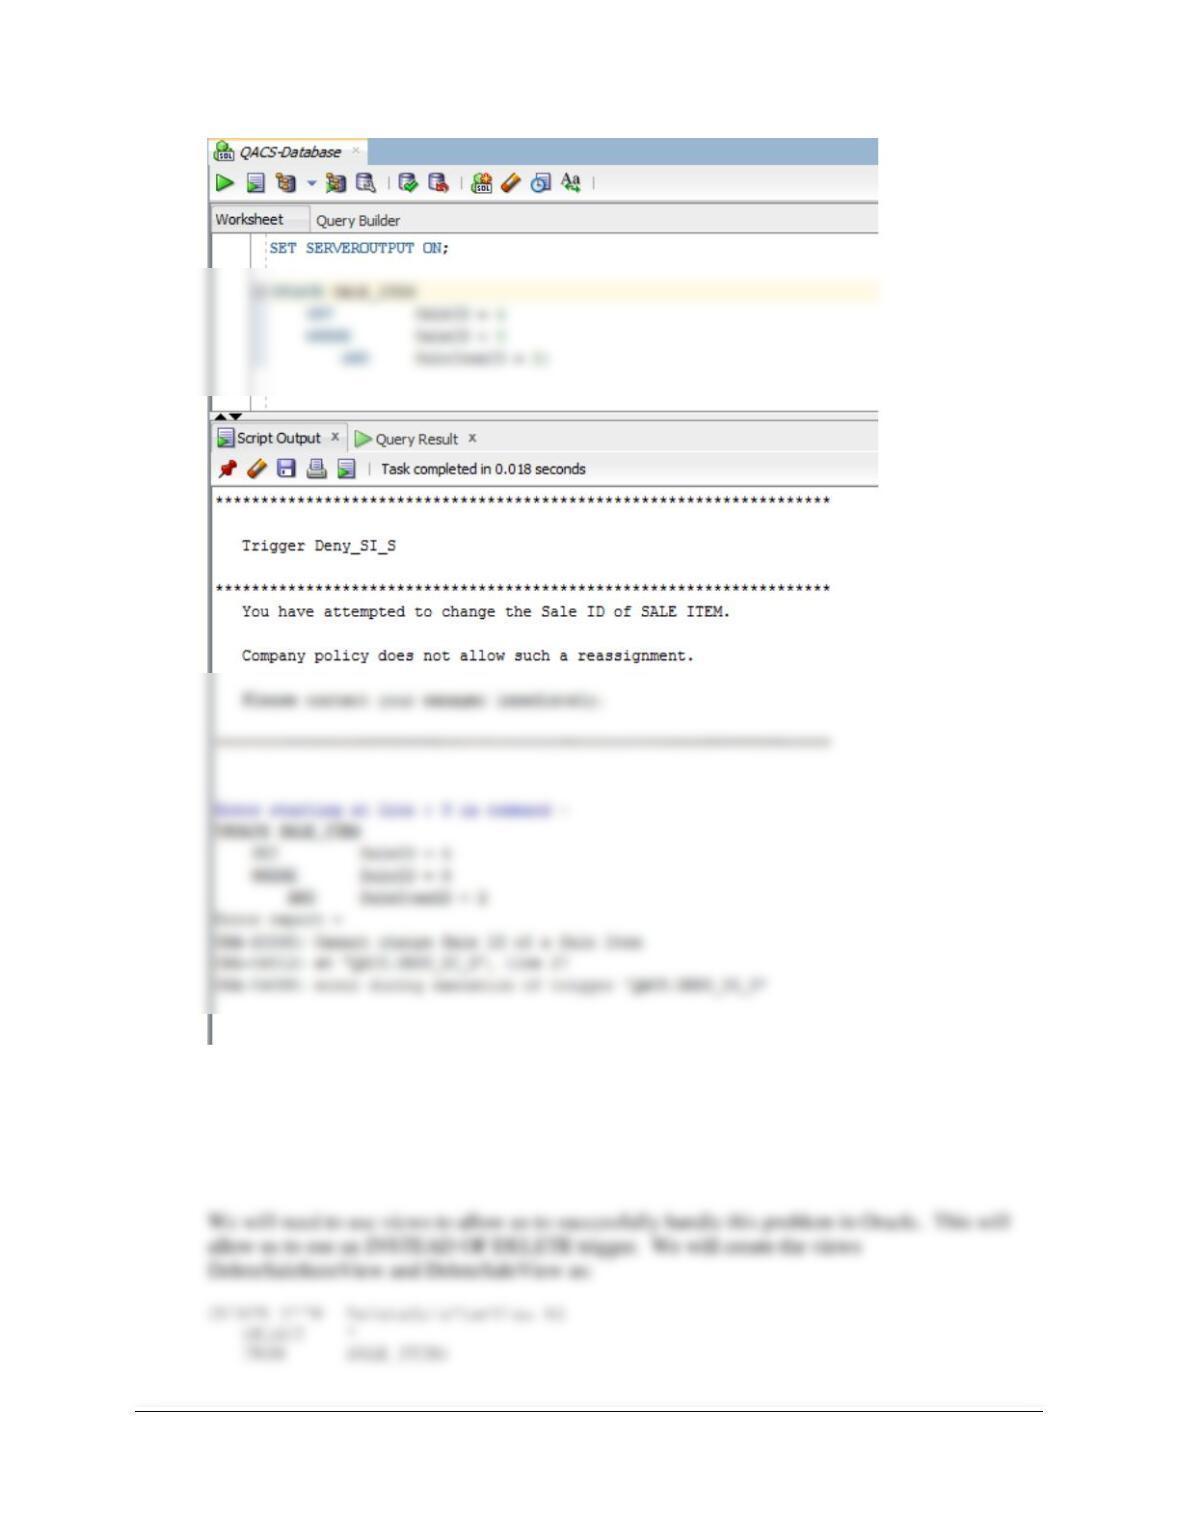
Here is the trigger code:
CREATE OR REPLACE TRIGGER Deny_SI_S
BEFORE UPDATE OF SaleID ON SALE_ITEM
FOR EACH ROW
DBMS_OUTPUT.PUT_LINE
(‘********************************************************************’);
DBMS_OUTPUT.PUT_LINE (‘ ‘);
DBMS_OUTPUT.PUT_LINE
(‘ Trigger Deny_SI_S’);
DBMS_OUTPUT.PUT_LINE (‘ ‘);
DBMS_OUTPUT.PUT_LINE
(‘********************************************************************’);
DBMS_OUTPUT.PUT_LINE
To test this trigger, use:
SET SERVEROUTPUT ON;
UPDATE SALE_ITEM
SET SaleID = 4
WHERE SaleID = 8
AND SaleItemID = 2;
Chapter 10B – Managing Databases with Oracle Database
Page 10B-135
(2) Deleting a SALE when the last SALE_ITEM is deleted.
We will use the logic in Figures 7-28 and 7-29 for this case. In this logic, one type of employee
has the right to delete SALE_ITEMs, but not SALEs, while another type of employee with more
authority has the right to delete SALEs as well.
Chapter 10B – Managing Databases with Oracle Database
Page 10B-136
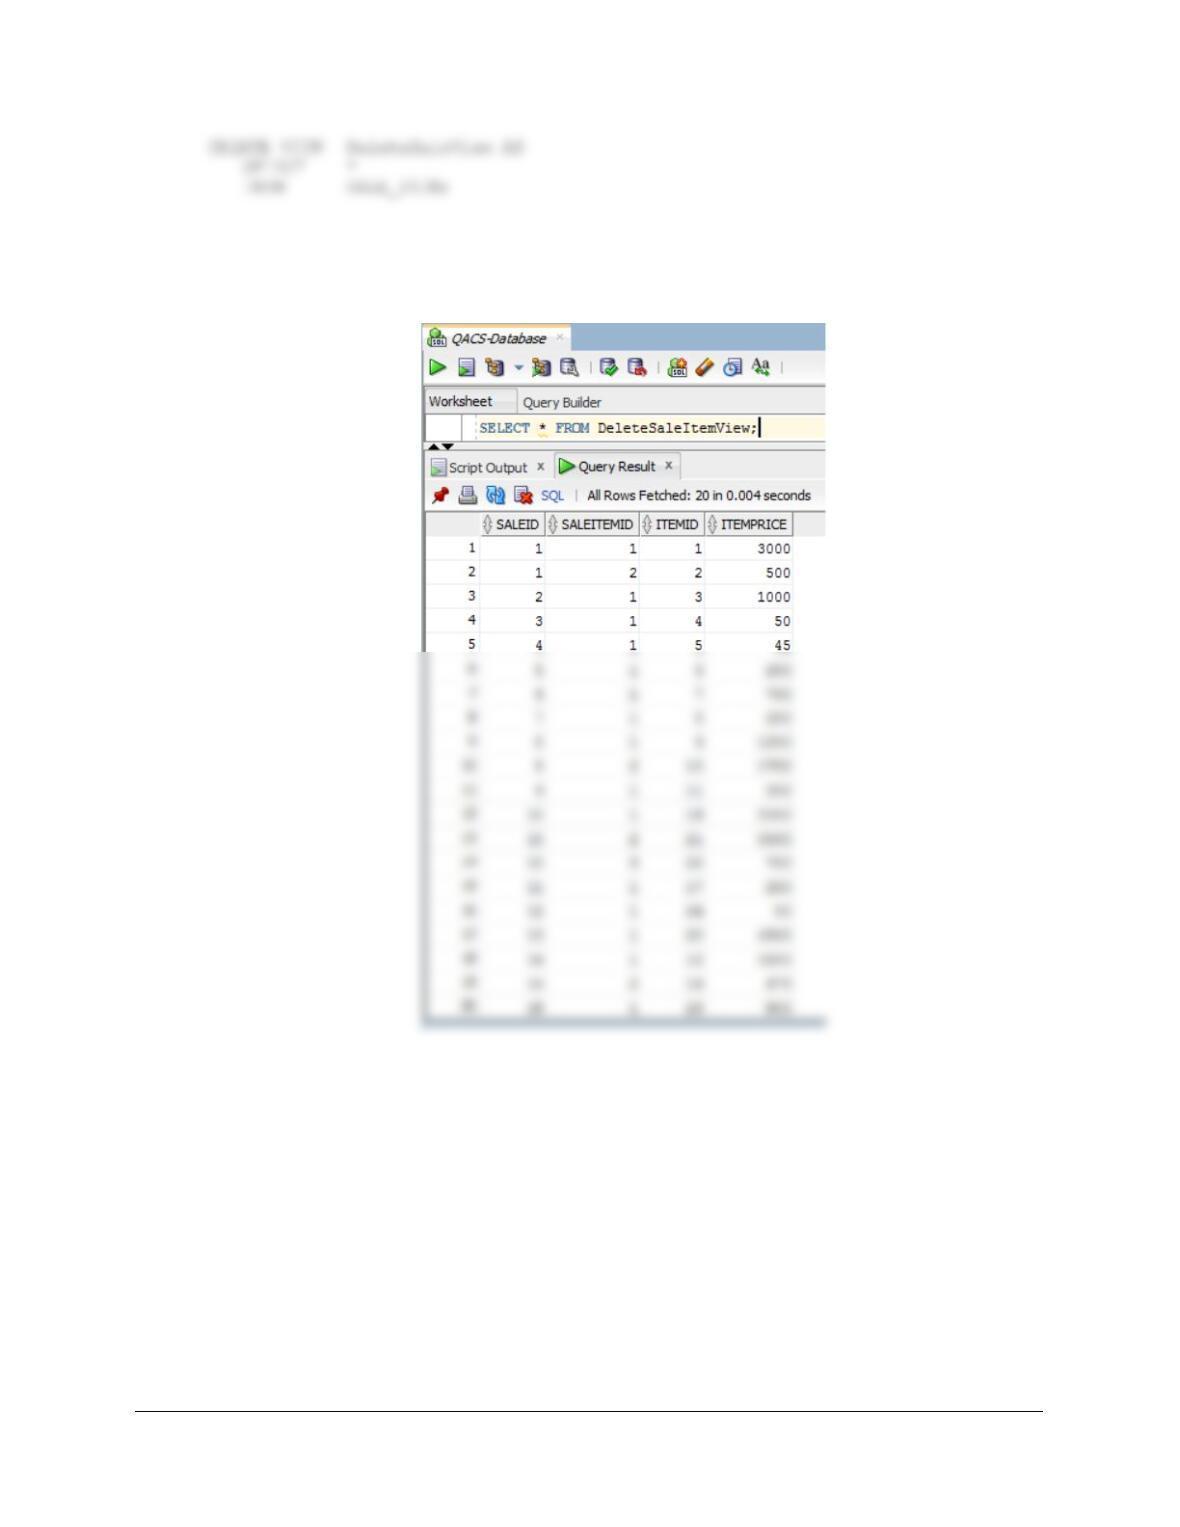
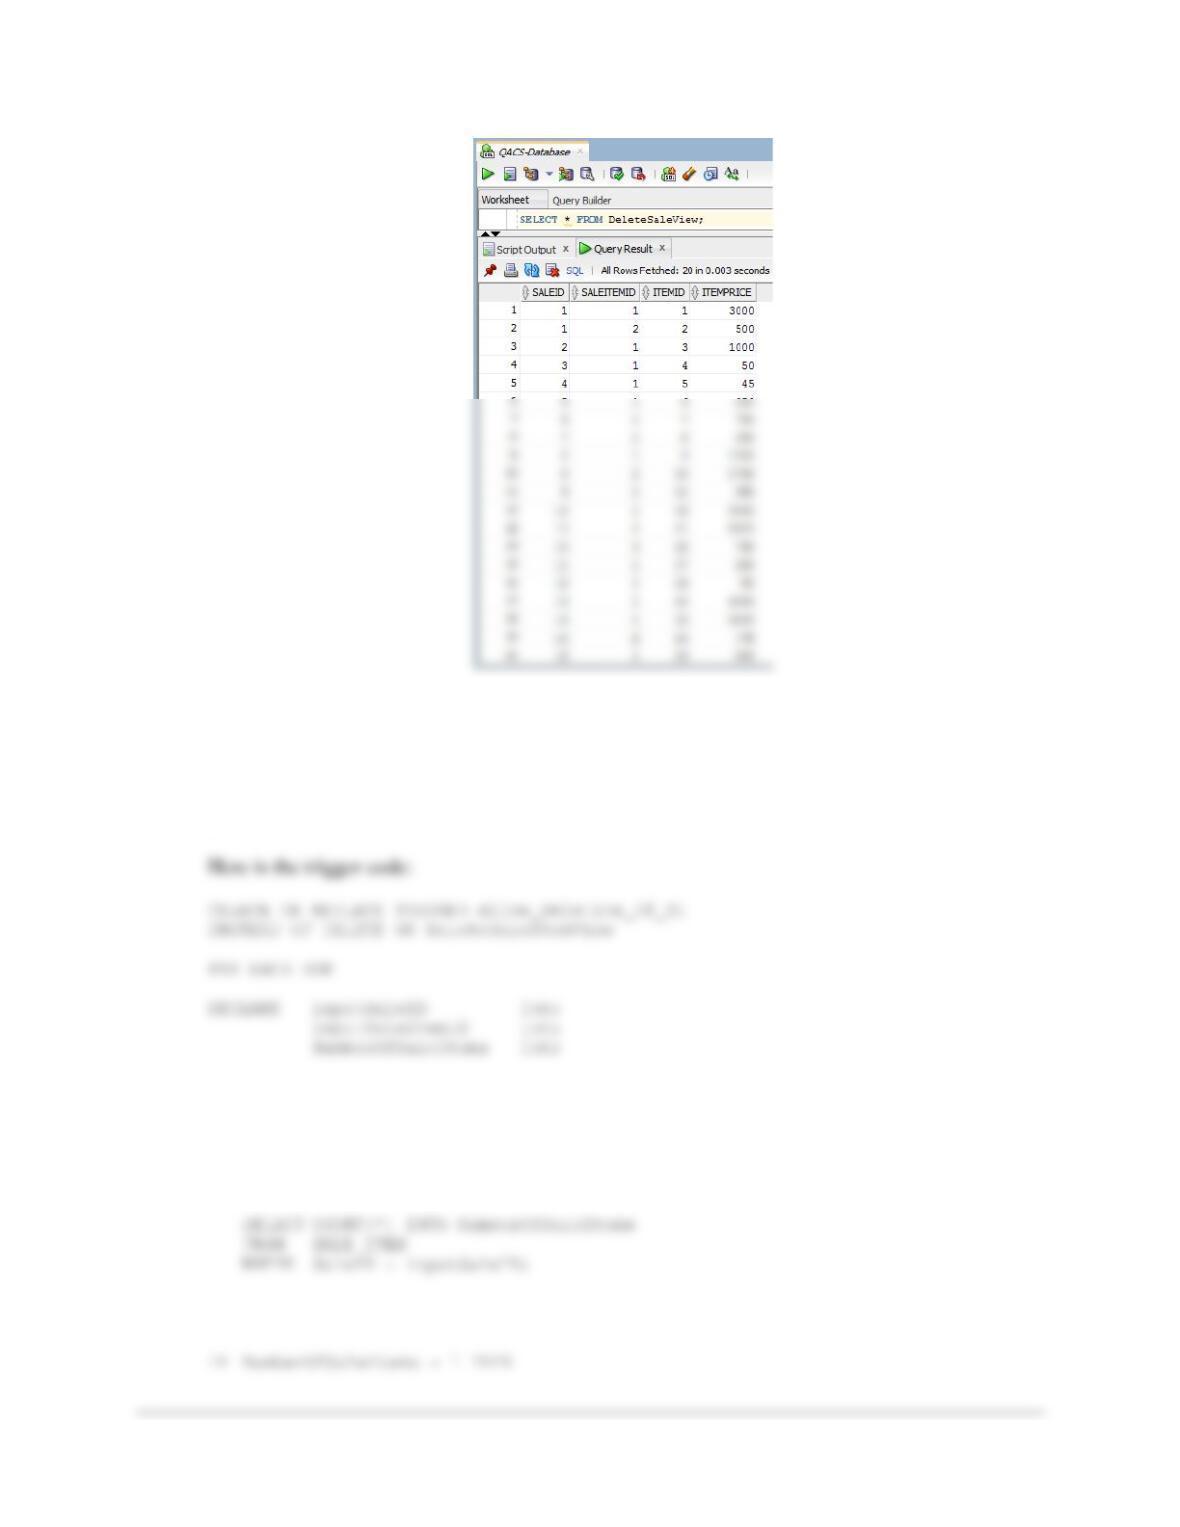
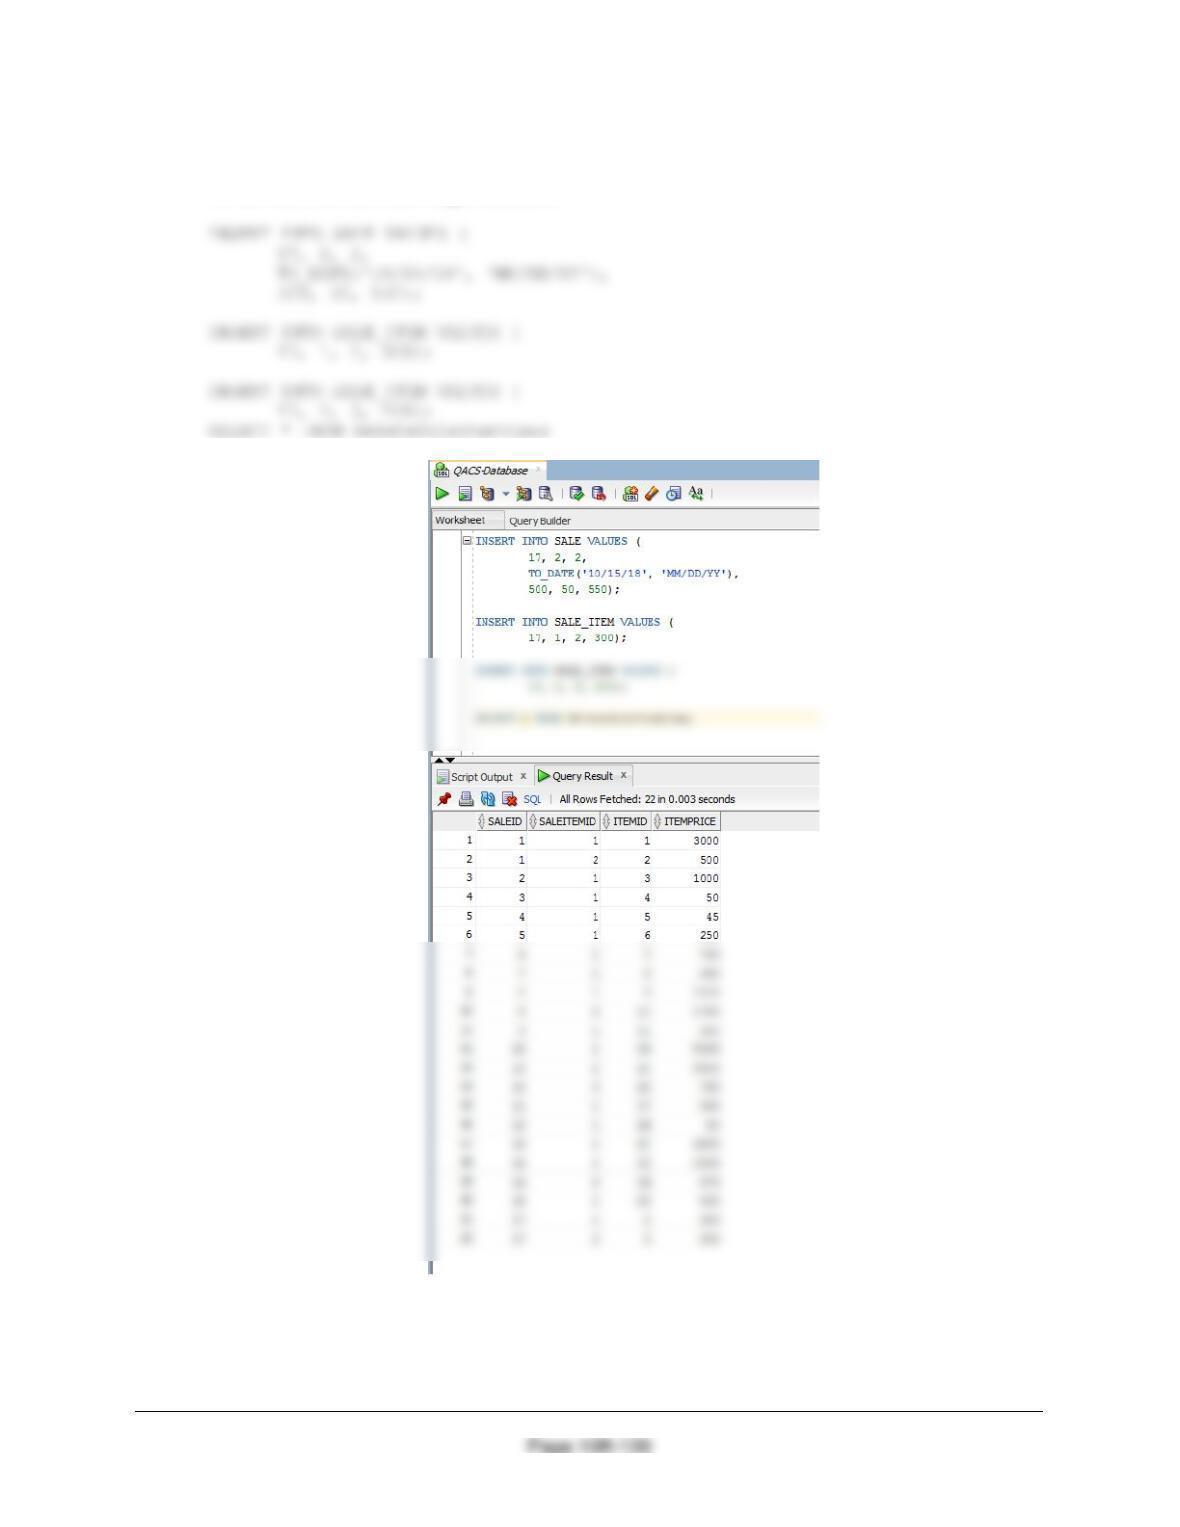
To test these, run the following commands:
SELECT * FROM DeleteSaleItemView;
SELECT * FROM DeleteSaleView;
Chapter 10B – Managing Databases with Oracle Database
Page 10B-137
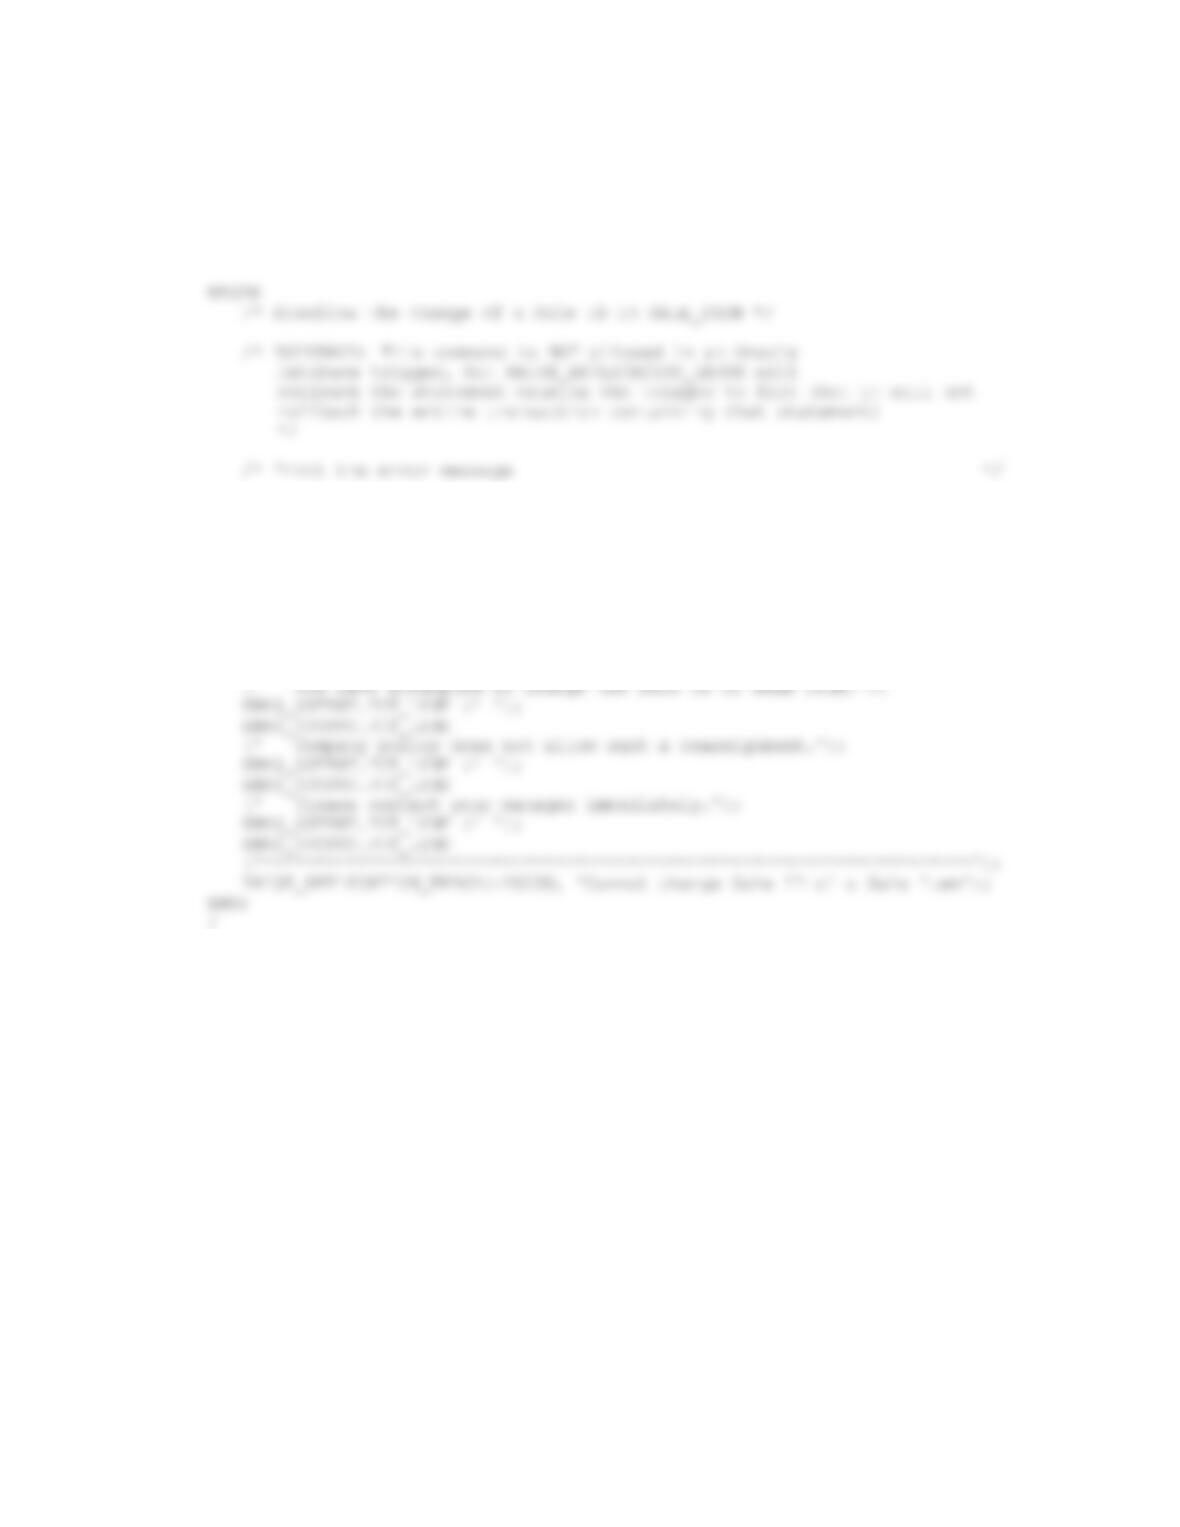
Figure 7-28 contains the logic to delete all but the last SALE_ITEM. The trigger requires us to
check the number of SALE_ITEMs in a SALE. If the number of SALE_ITEMs is greater than
one, we allow the deletion. If the number of SALE_ITEMs is exactly one, we will not allow the
deletion and then send an error message to the user, because presumably this is a user without
permission to delete an entire SALE.
BEGIN
/* Determine if this is the last INVOICE_ITEM in the INVOICE */
inputSaleID := :OLD.SaleID;
inputSaleItemID := :OLD.SaleItemID;
Chapter 10B – Managing Databases with Oracle Database
Page 10B-138
DBMS_OUTPUT.PUT_LINE
(‘********************************************************************’);
DBMS_OUTPUT.PUT_LINE (‘ ‘);
DBMS_OUTPUT.PUT_LINE
(‘ Trigger Allow_Deletion_of_SI’);
DBMS_OUTPUT.PUT_LINE (‘ ‘);
DBMS_OUTPUT.PUT_LINE
(‘********************************************************************’);
DBMS_OUTPUT.PUT_LINE
(‘ Company policy does not allow such a deletion.’);
DBMS_OUTPUT.PUT_LINE (‘ ‘);
DBMS_OUTPUT.PUT_LINE
(‘ Please contact your manager immediately.’);
DBMS_OUTPUT.PUT_LINE (‘ ‘);
DBMS_OUTPUT.PUT_LINE
DBMS_OUTPUT.PUT_LINE
(‘********************************************************************’);
DBMS_OUTPUT.PUT_LINE (‘ ‘);
DBMS_OUTPUT.PUT_LINE
(‘ Trigger Allow_Deletion_of_SI’);
DBMS_OUTPUT.PUT_LINE (‘ ‘);
DBMS_OUTPUT.PUT_LINE
END IF;
END;
Chapter 10B – Managing Databases with Oracle Database
/
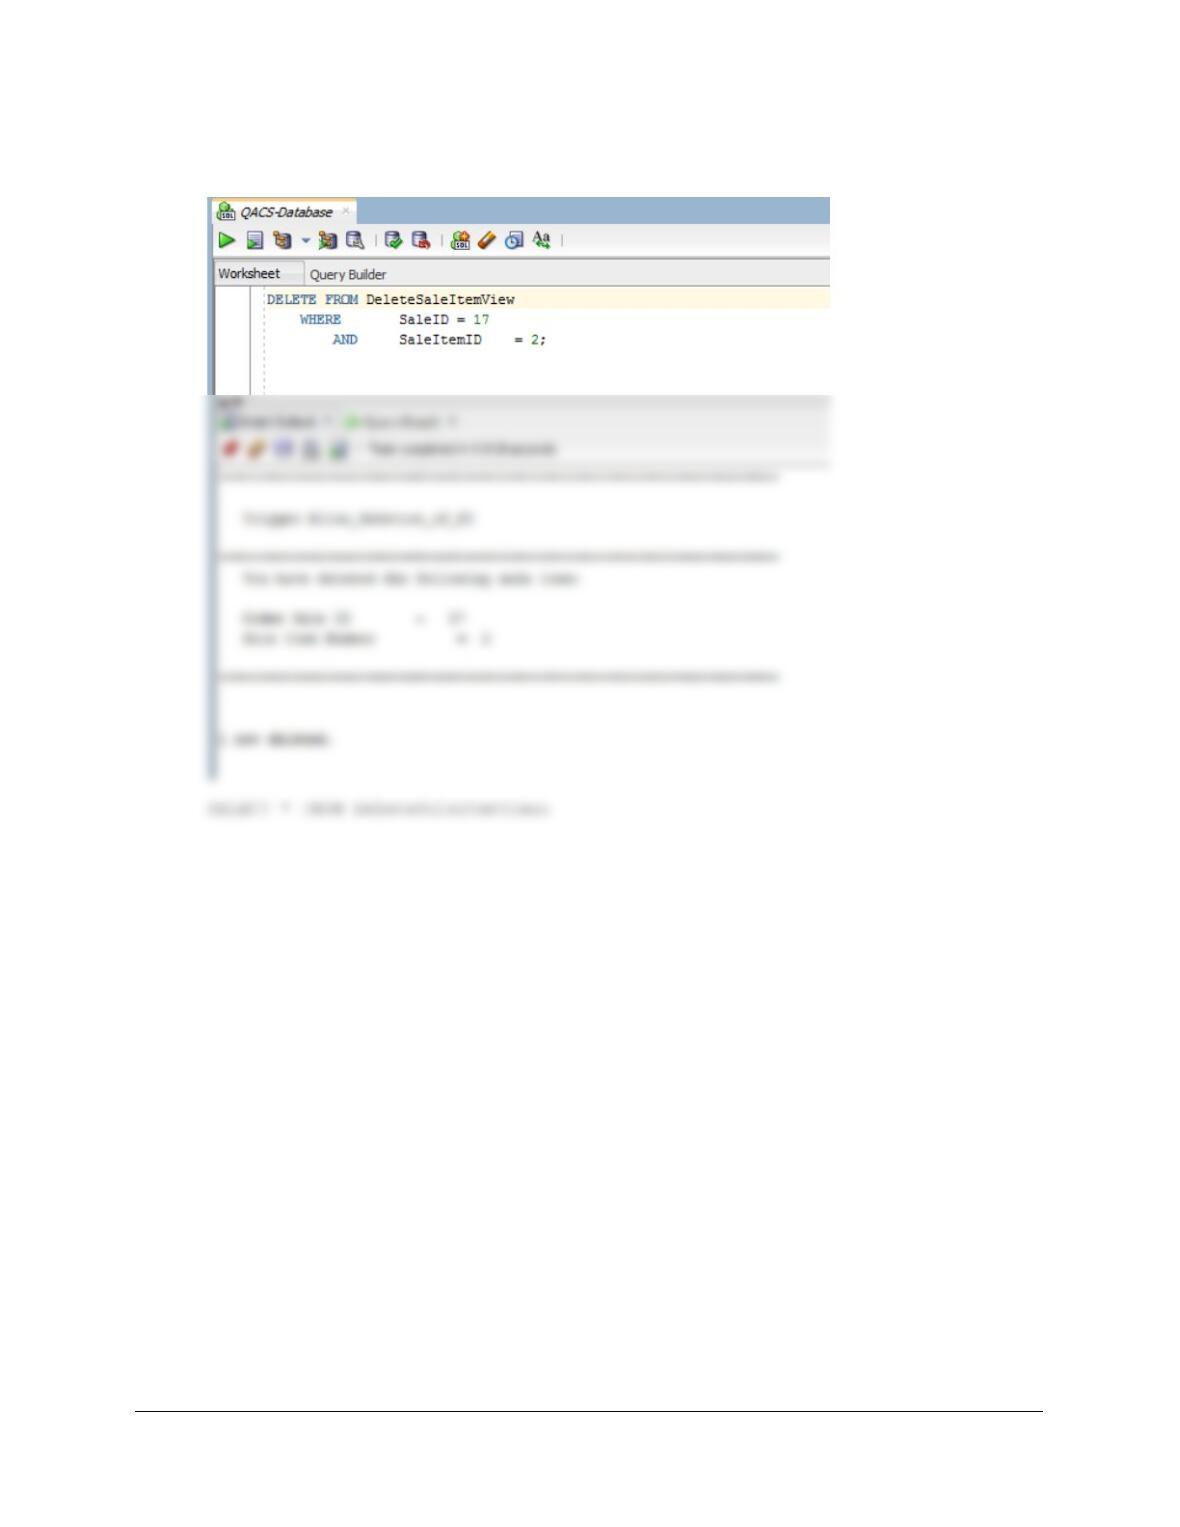
To test this, run the following commands:
SET SERVEROUTPUT ON;
DELETE FROM DeleteSaleItemView
Chapter 10B – Managing Databases with Oracle Database
Page 10B-140
WHERE SaleID = 17
AND SaleItemID = 2;