
44
44
Exercise 9
Grade Staking
OBJECTIVE
The objective of this exercise is to mark grade stakes for a
project using a dumpy level and a laser level.
TEXTBOOK REFERENCE
INTRODUCTION
Grading determines site drainage, sets the height of walls
and paving, and establishes vertical relationships between
site improvements. Staking grades properly is therefore
critical to a project’s success. As with construction staking,
a choice must be made with regard to who should per–
form grade staking. When the project is large or involves
structures, paving, and/or significant drainage areas, a
land surveyor should be contacted to perform the staking.
stake can then be marked to indicate its elevation, and if
desired, the stringline can be left in place as a guide for
construction. Batterboards, which are discussed in Exer–
cise 10, provide a more permanent marking method for
project layout and grades.
Establishing site grades using a dumpy level or a
site elements. Before performing grade staking the key
elements of a project must be located. Refer to Exer–
cise8 for methods of project layout. Grade staking using
a dumpy or laser level includes the following steps:
establishing the benchmark, setting up and leveling the
instrument, measuring elevations and calculating exist–
ing grades, then calculating cut and fill amounts and
marking grade stakes. Detailed instructions for each of
these steps follow.
Note: The following instructions establish grades for
97171_09_ch09_p044-047.indd 44 14/06/10 8:44 PM
© 2011 Cengage Learning. All Rights Reserved. May not be scanned, copied or duplicated, or posted to a publicly accessible website, in whole or in part.
Setting Up and Leveling
the Instrument
• Place the level at a location that has good
visibility of the benchmark and all locations
that will require construction staking. This site
should be in as level an area as possible where
construction traffic and activity will not disturb the
instrument.
mounting plate.
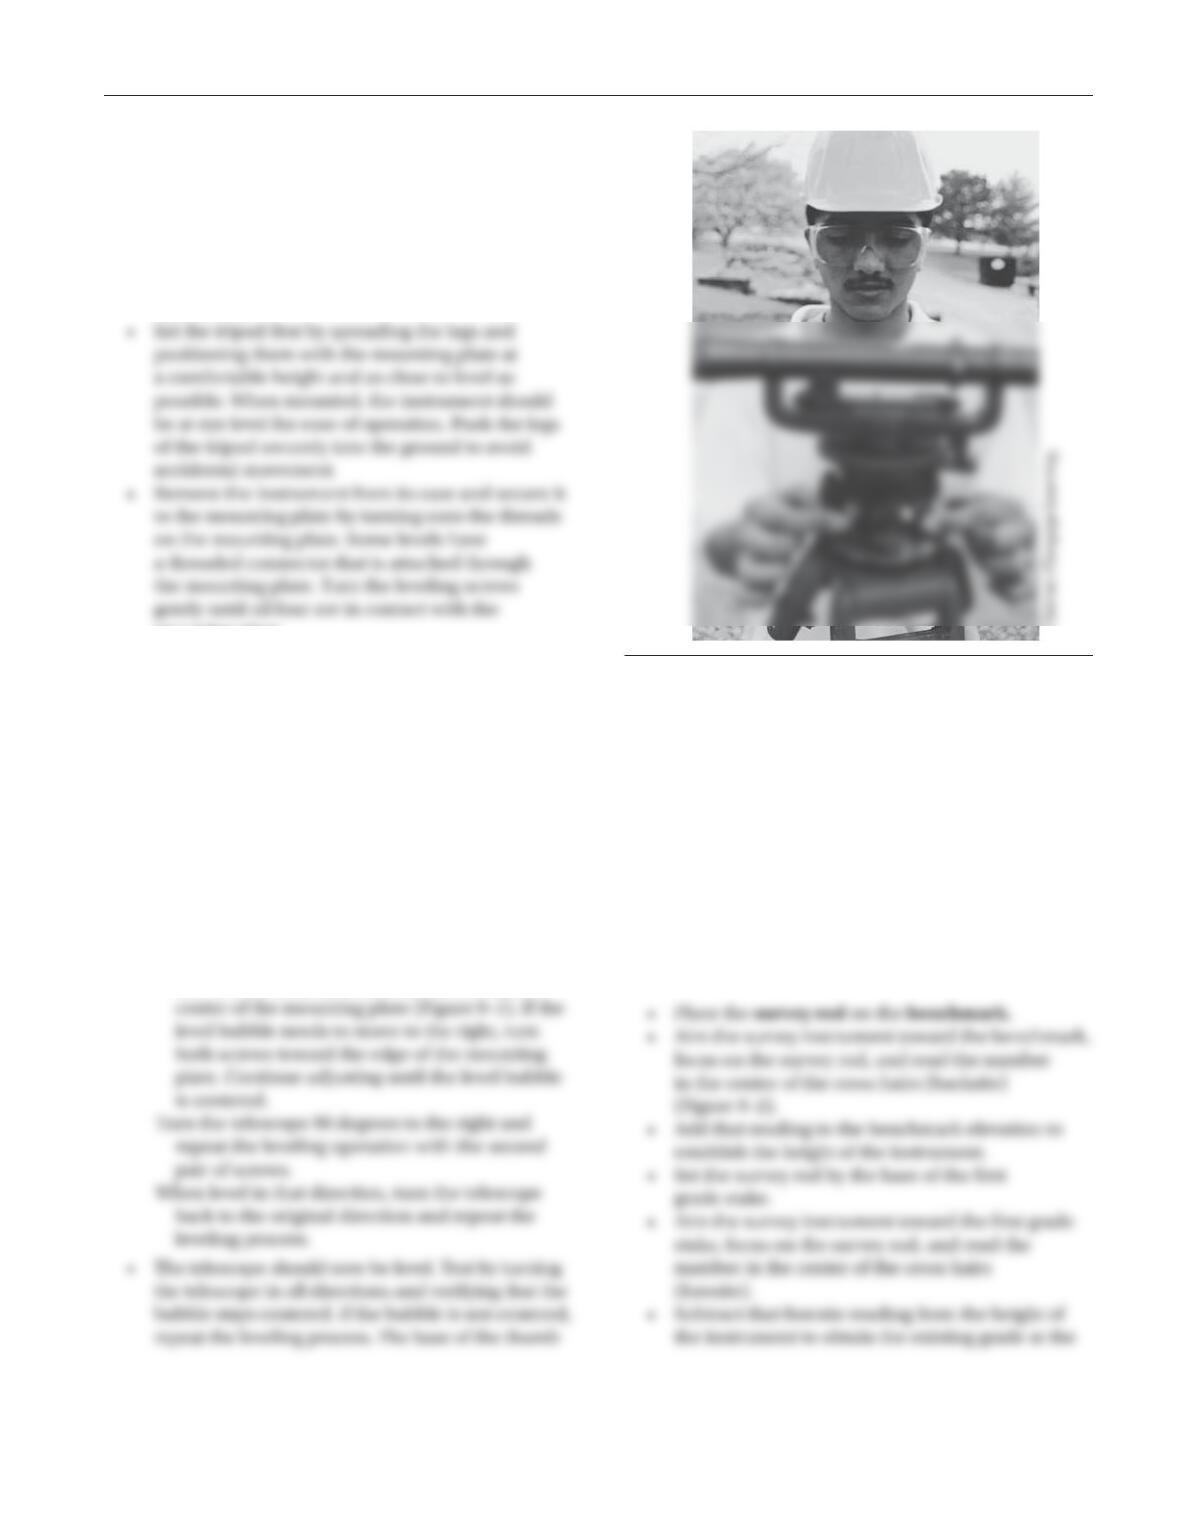
• Level the telescope using the four thumb screws
that support the instrument on the mounting
plate. A small bubble level below the telescope
indicates if the instrument is properly leveled.
Note that a self-leveling laser requires only that the
instrument be set up as level as possible, as the
motors within the instrument will adjust the level
automatically. For dumpy levels and manually
adjusted laser levels, level the instrument using
the following steps:
Turn the telescope so it is aligned with one pair of
thumb screws.
Turn the thumb screws in opposite directions to
center the bubble. If the level bubble needs to
move to the left, turn both screws toward the
screws should always remain in contact with the
mounting plate. If any screw is not in contact with
the plate, lower the screw to the plate and repeat
the entire leveling process.
Measuring Elevations and Calculating
Existing Grades
Note: For more efficient layout, calculate cut/fill for each
grade stake immediately after existing grade has been
determined.
Exercise 9 Grade Staking 45
Figure 9–1 Adjusting level using thumb screws.
© Delmar/Cengage Learning.
97171_09_ch09_p044-047.indd 45 14/06/10 8:45 PM
base of the stake. Mark the grade on the stake or
wherever a sighting is required. The operator
46 Exercise 9 Grade Staking
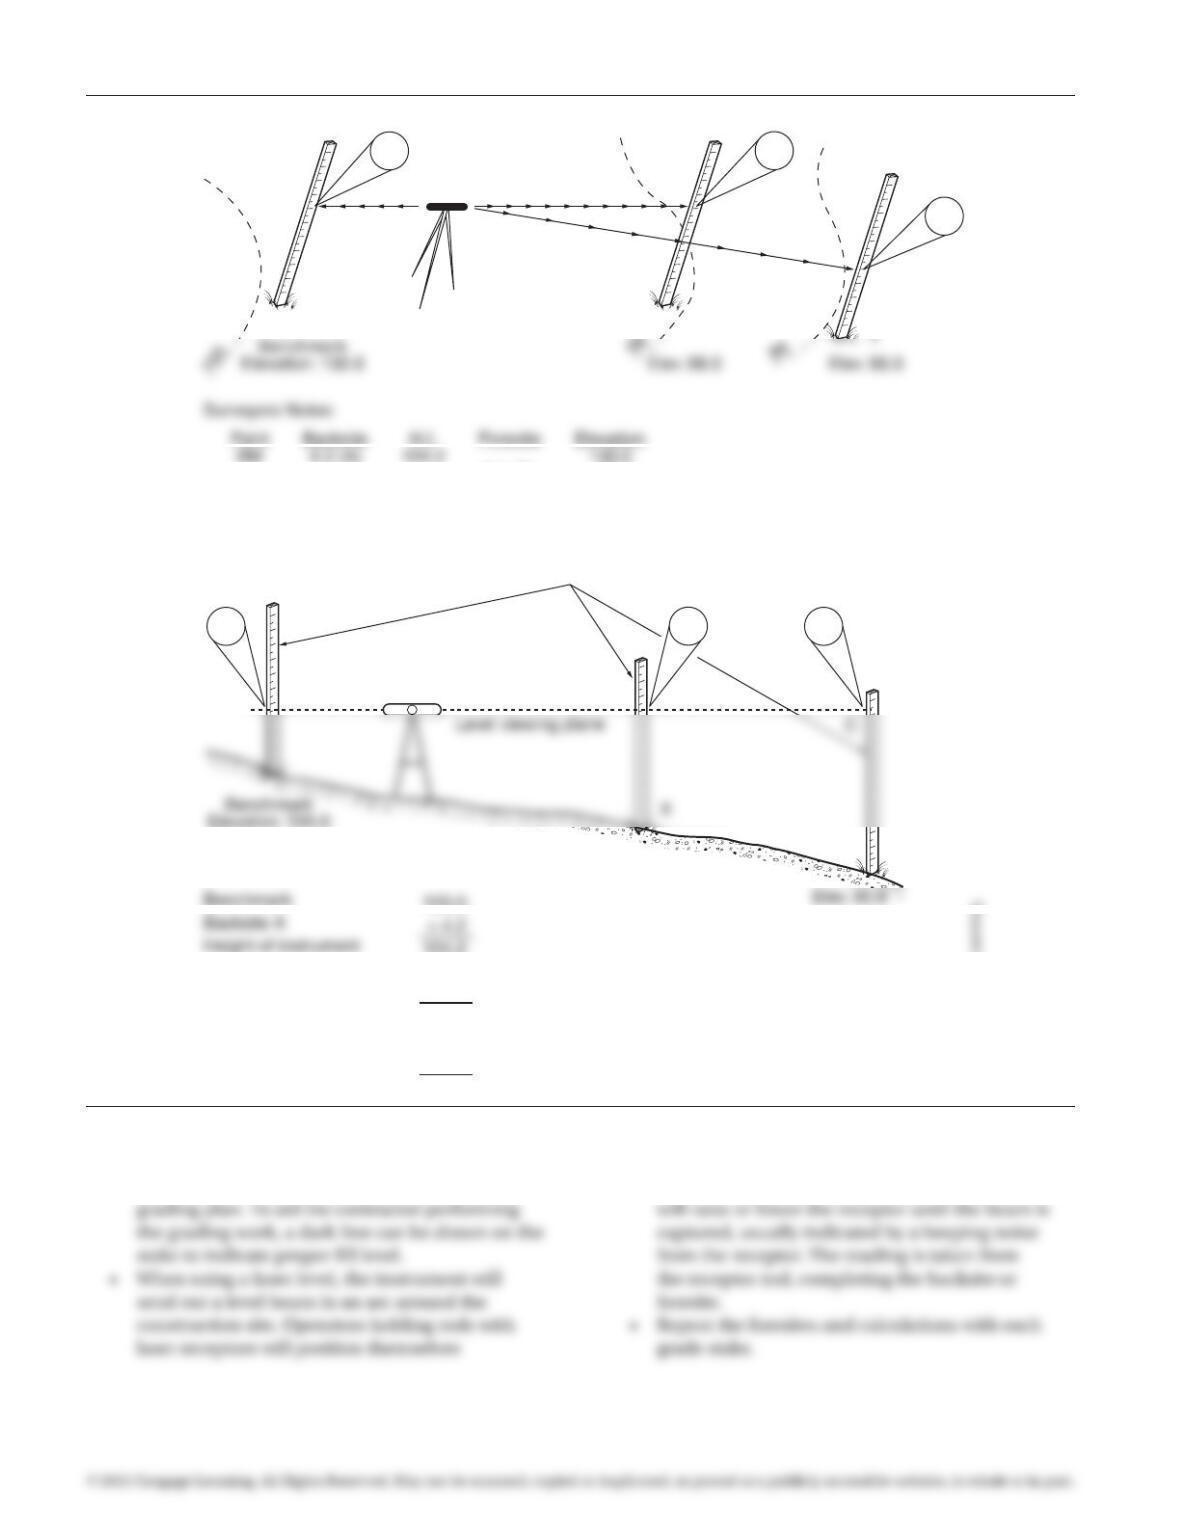
4.2 6.1
8.4
AB
C
X
6.1 (B)
8.4 (C)
98.1
95.8
Readings on
surveyor’s rod
H.I.
104.2
Elev. 98.1
100.0
104.2
AB
4.2 8.4
6.1
Foresite B
Elevation of point X
– 6.1
98.1
Foresite C
Elevation of point Y
– 8.4
95.8
(H.I. – Foresite B) (104.2 – 6.1 = 98.1)
(H.I. – Foresite C) (104.2 – 8.4 = 95.8)
Y
Figure 9–2 Performing elevation calculations.
© Delmar/Cengage Learning.
97171_09_ch09_p044-047.indd 46 14/06/10 8:45 PM
Calculating Cut and Fill Amounts
and Marking Grade Stakes
• Select a grade stake at which to begin. Read the
proposed grade for that point on the
construction grading plan. If the proposed
grade shown on the plan for that point is
grade. Write the difference on the stake with the
word “cut.”
• Repeat these calculations for each grade stake.
PREREQUISITE EXERCISES
Students should have successfully completed Exercise 1,
Construction Math, and Exercise 8, Construction Staking
before beginning this exercise.
MATERIALS REQUIRED
• Four 2 × 2 stakes, 2 feet long, with pointed ends
• Two pound sledgehammers
• Two tape measures
• Broad tip marking pen
• Transit/dumpy level
EXERCISE DESCRIPTION
To complete this exercise mark the proper amount of
cut or fill at each corner stake for the design shown in
Figure 9–3. This will require locating the corners of the
project (see Exercise 8), selecting a temporary benchmark,
setup of a dumpy level, setup of a laser level, measuring
the existing grade at each corner of the project, calculating
the amount of cut or fill for project spot elevations, and
marking the corner stakes for cut or fill.
Exercise 9 Grade Staking 47
10′-0″
100.3 100.5
Figure 9–3 Grade staking plan.
97171_09_ch09_p044-047.indd 47 14/06/10 8:45 PM