
156
Exercise 38
Pool Liner Installation
OBJECTIVE
The objective of this exercise is the proper installation of
a flexible pool liner for a decorative pond.
TEXTBOOK REFERENCE
Information related to this activity can be found in the
Landscape Construction textbook in Chapter 34, Water
Features and Bridges.
INTRODUCTION
Pool liners have eased the difficulty of pool installation.
covered by coping, which hides the liner.
Pool liners do have limitations. In particular, drains
cannot be installed at the bottom of the pool. Difficulties
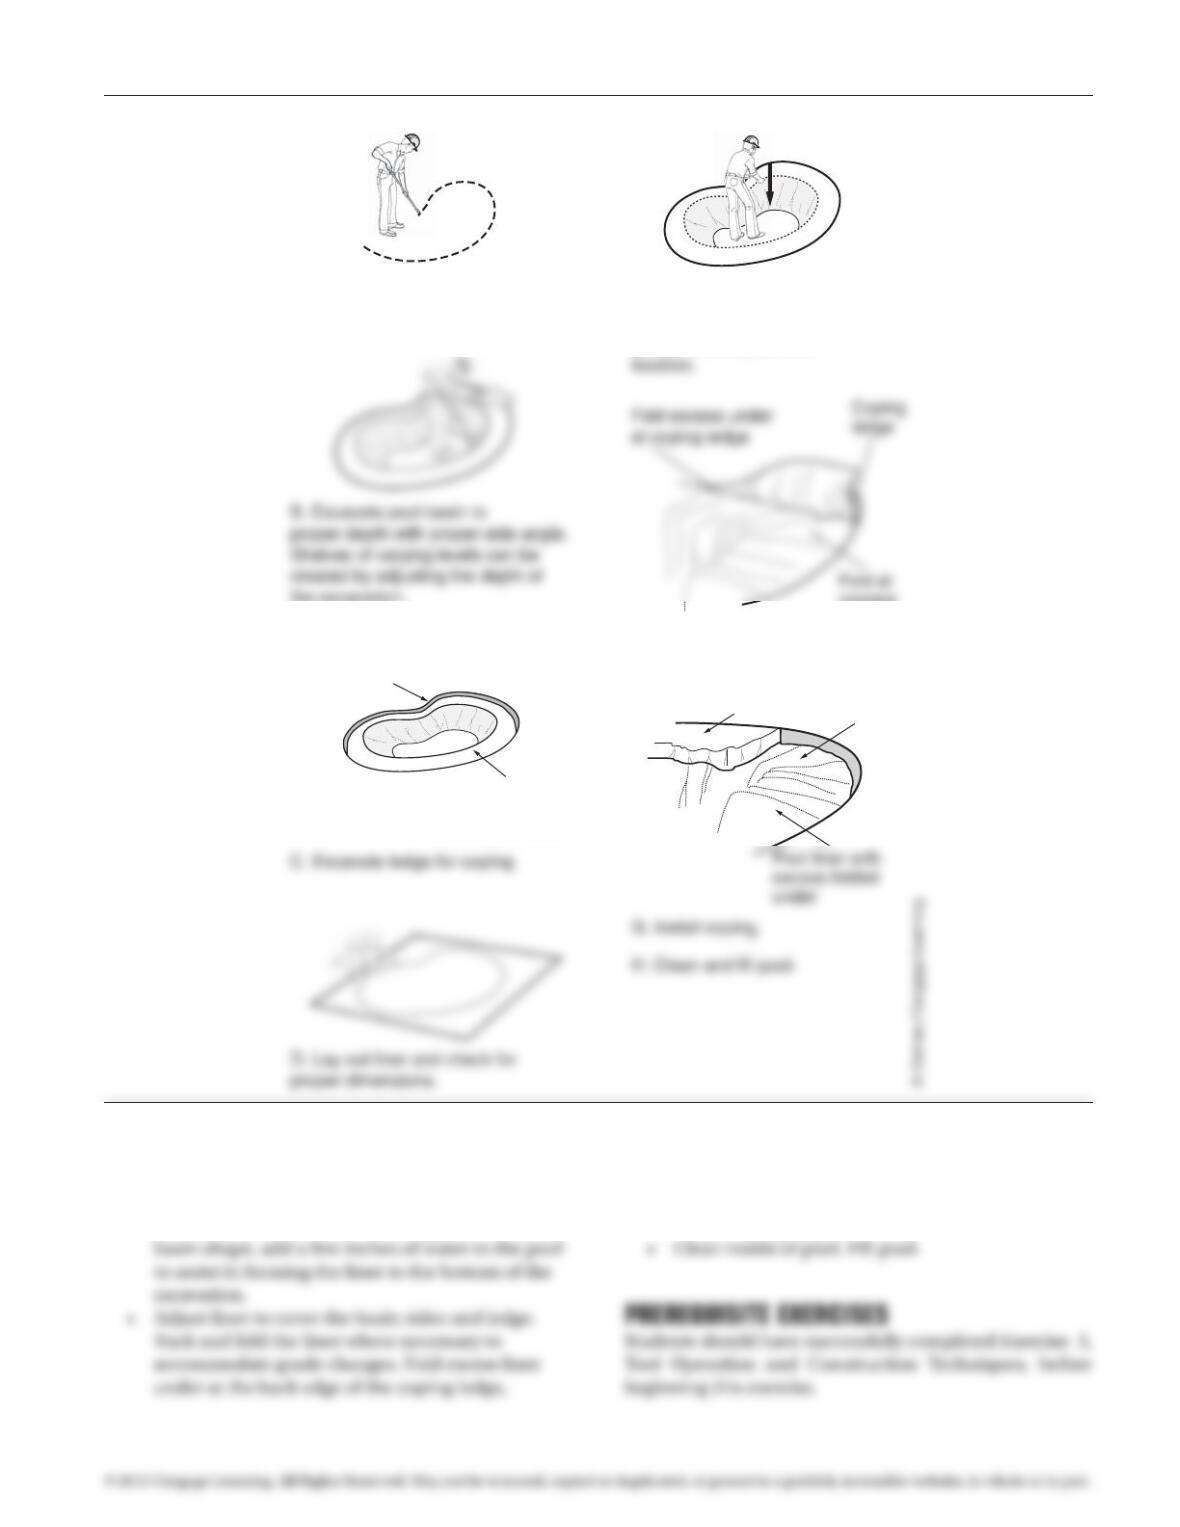
To install a lined pool follow these instructions:
• Mark the pool basin location (Figure 38–1A).
• Excavate the pool basin to proper depth. Designs
Verify that the ledge is level along the entire
perimeter. Use a 2 × 4 with a level resting on
top to verify level across the pool. Adjust grade if
necessary (Figure 38–1C).
• Irregularities in the bottom or sides of basin walls
can be corrected by filling holes with sand.
• Install a spunbond geotextile protective barrier
(liner pad) over the entire basin, including the
sides and coping ledge. Trim the barrier at the
back of the coping ledge.
• Lay out liner and trim to rough dimensions
length at the rim and D equals pool depth
Liner width in feet = W + 2D + 3, where W equals pool
width at the rim and D equals pool depth
97171_38_ch38_p156-158.indd 156 14/06/10 9:11 PM
Exercise 38 Pool Liner Installation 157
• Center liner over basin opening (Figure 38–1E).
Push liner into basin. If using your feet to push
liner, remove shoes. After molding the liner to the
trimming liner if necessary to create a nice fold
(Figure 38–1F).
• Install coping (Figure 38–1G).
A. Mark pool basin location. E. Center liner over pool
basin and push into basin.
Smooth and adjust liner
the excavation.
F. Fold excess liner under
at back edge of coping ledge.
corners
Coping Coping ledge
Ledge to match
coping dimensions
Ledge must be
level along the
entire perimeter
Figure 38–1 Installation steps for a flexible pool liner.
97171_38_ch38_p156-158.indd 157 14/06/10 9:11 PM
158 Exercise 38 Pool Liner Installation
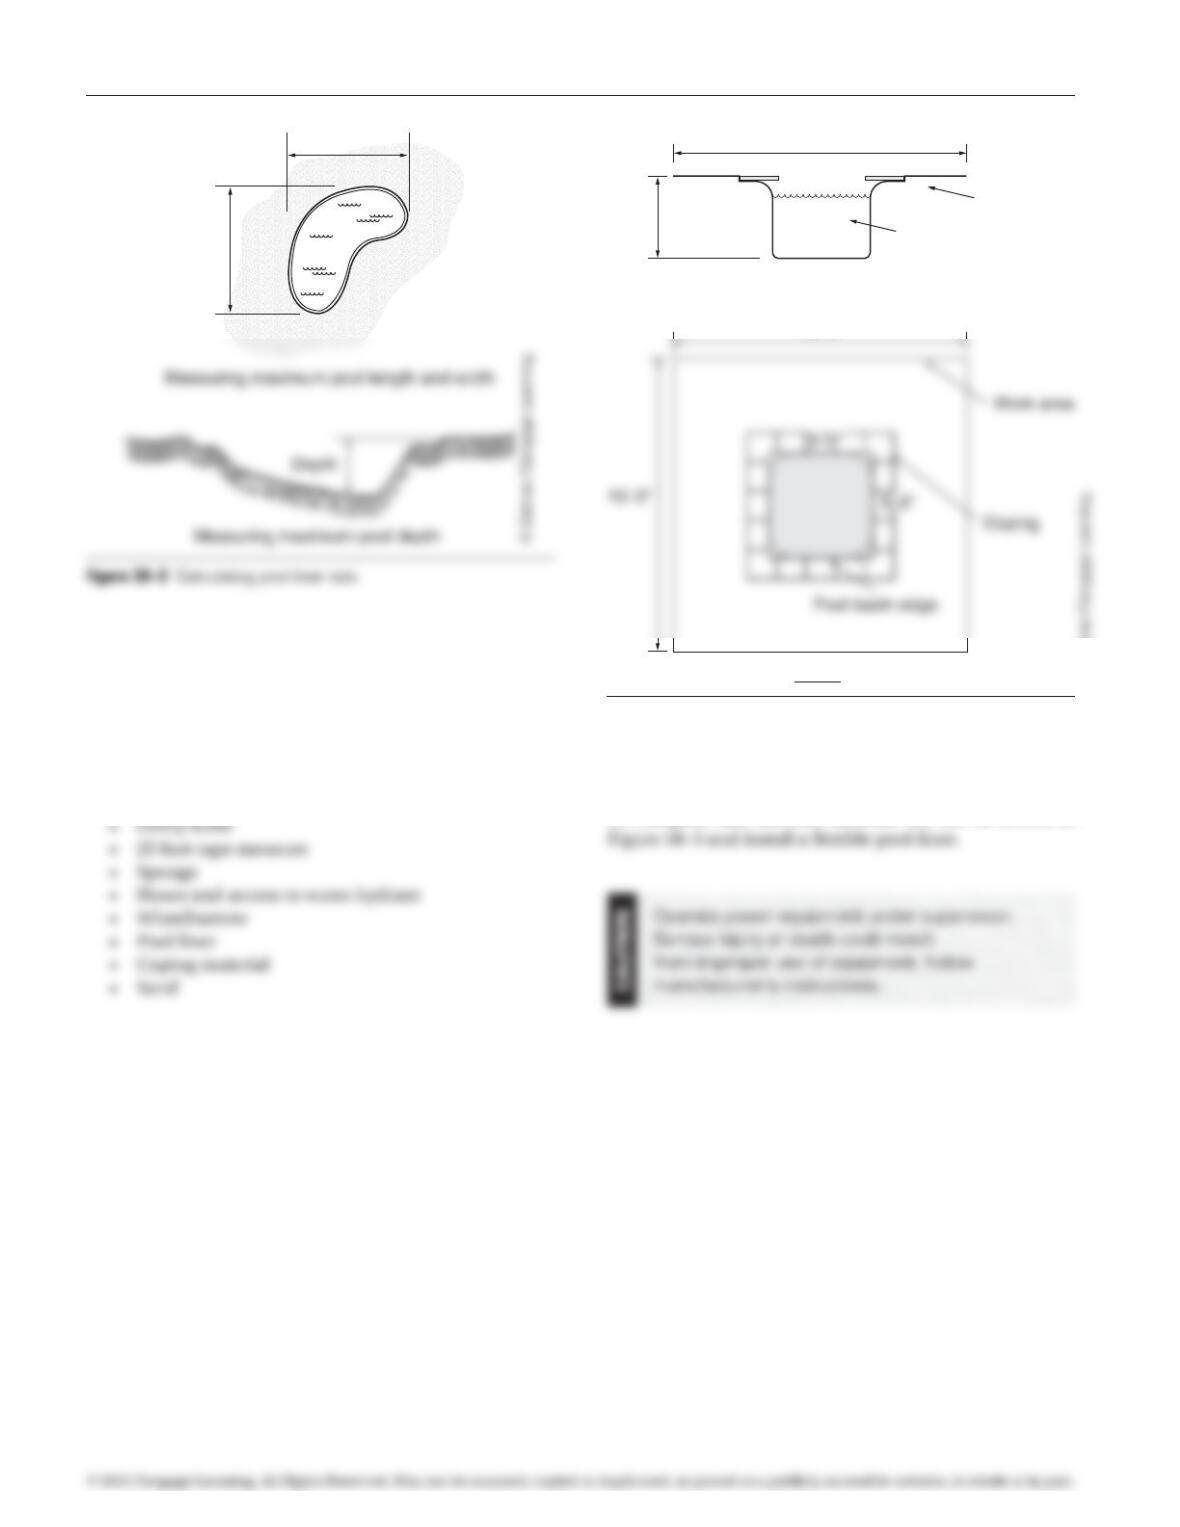
EXERCISE DESCRIPTION
To complete this exercise excavate the site as shown in
MATERIALS REQUIRED
• Marking spray paint
• Round-nosed shovel
• Square-nosed shovel
• 2 × 4
• Hand saw
• Carpenter’s level
Depth
Width
Pool
15′-0″
15′-0″
4′-0″
Cross section
Pool
Coping
PLAN
Figure 38–3 Plan and cross section for pool liner installation.
© Delmar/Cengage Learning.
97171_38_ch38_p156-158.indd 158 14/06/10 9:11 PM