Exercise 36
Wood-Surfaced
Stringer Fence and Gate
Construction
OBJECTIVE
The objective of this exercise is to properly construct a
section of wood-surfaced stringer fencing with a gate.
TEXTBOOK REFERENCE
Information related to this activity can be found in the
Landscape Construction textbook in Chapter 29, Wood
Decks and Platforms; Chapter 32, Fencing, and Chapter 33,
Freestanding Walls.
INTRODUCTION
Wood-Surfaced Stringer Fencing
Wood-surfaced fences are used primarily for privacy and
screening. Similar in appearance to prefabricated panel
fencing, wood-surfaced fences differ from prefabricated
expensive than panel or rail fences and require more
carpentry skills to install. Wood-surfaced stringer fences
require the installation of horizontal structural members
to support the surfacing.
Post Installation
The spacing of posts for panel fences depends on the
panel design and how the panel is to be attached. Face
97171_36_ch36_p145-151.indd 145 14/06/10 9:09 PM
146 Exercise 36 Wood-Surfaced Stringer Fence and Gate Construction
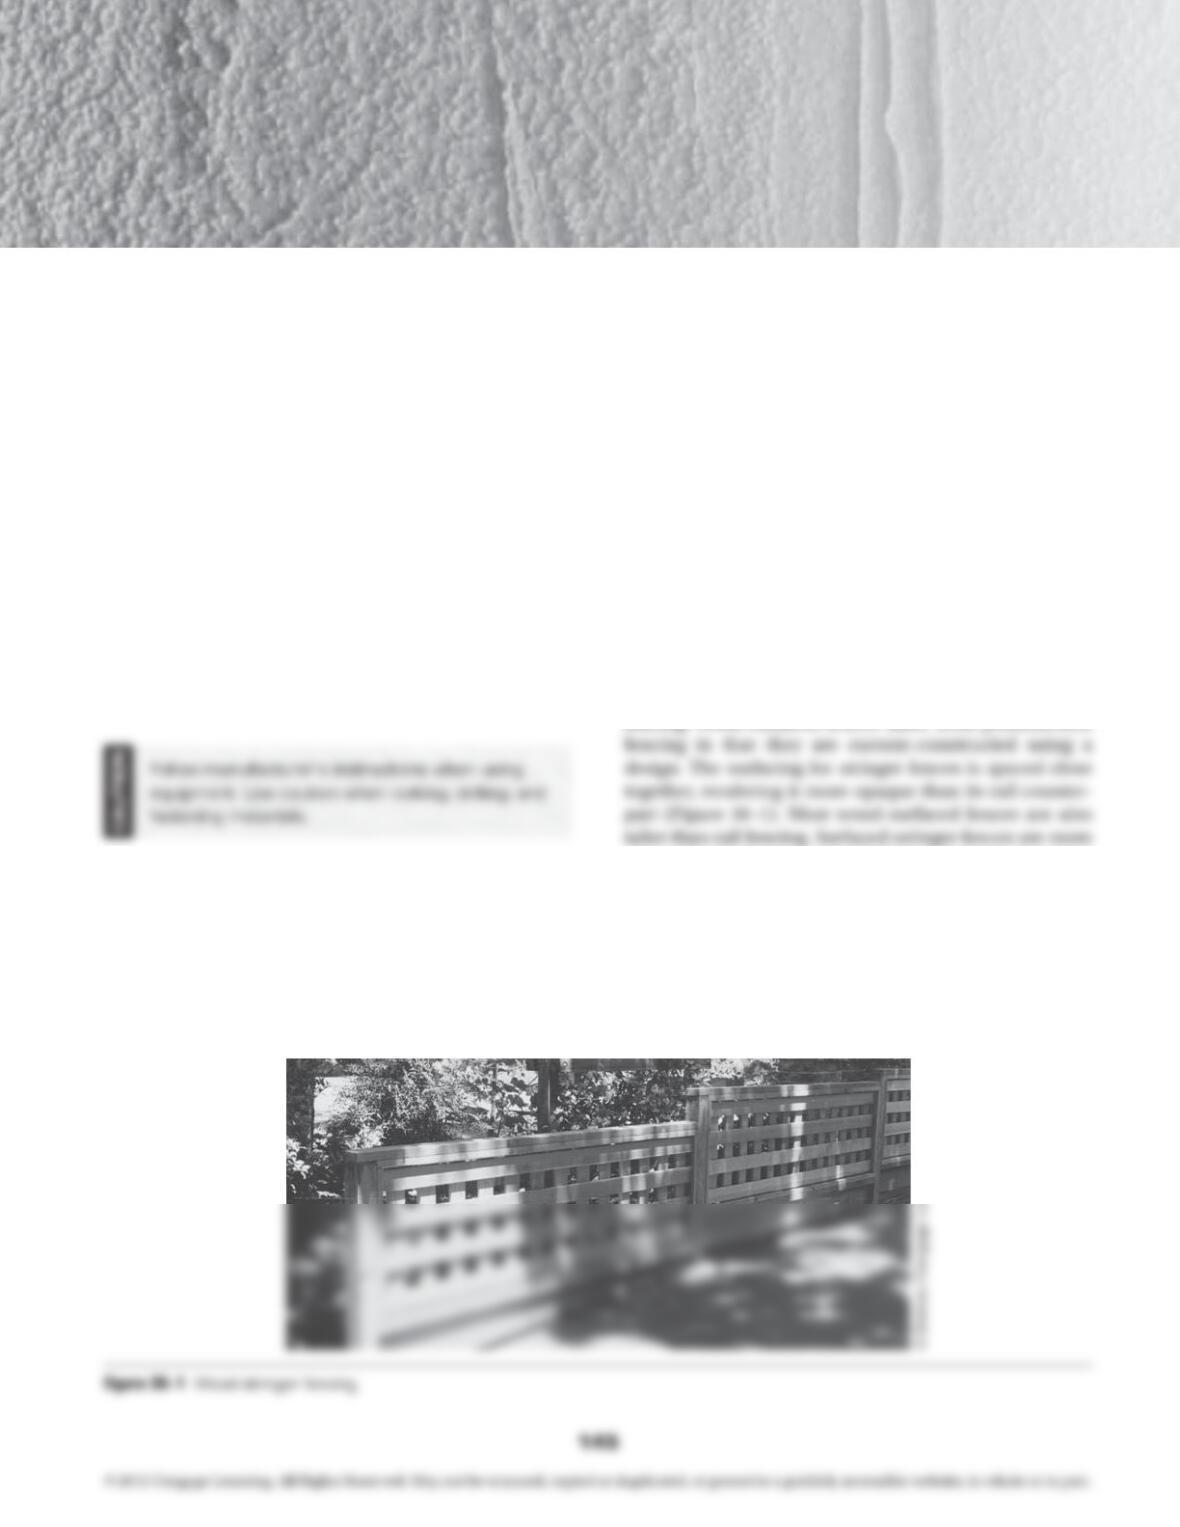
• Using a marker, draw a line near the base of the
post that indicates the proper burial depth. Place
crushed aggregate in the bottom of the hole and
for line posts (Figure 36–3). If posts are too tall,
they can be trimmed with a circular saw.
An alternate method for anchoring posts is to attach
attachment requires different post spacing than hanging;
ascertain how panels are to be attached before locating
posts. Then, use the following steps to install posts:
but is less obvious when placed at either end.
• In the center of each post location, dig or auger a
hole twice the diameter of the post and 6 inches
deeper than the typical frost depth for your region,
End
marker
End
marker
Stretched
line
Intermediate
flags
1. Locate and stretch line between end flags
2. Flag intermediate post locations
3. Set and brace end posts plumb
4. Excavate for intermediate posts
End post
End post
5.
Postholes
Stretch line near
top of posts
97171_36_ch36_p145-151.indd 146 14/06/10 9:09 PM

Exercise 36 Wood-Surfaced Stringer Fence and Gate Construction 147
Stringers level,
surfacing extends to ground
additional lateral support to hold the fence upright.
Refer to Figures 36–4 and 36–5 for placing posts on a
hillside.
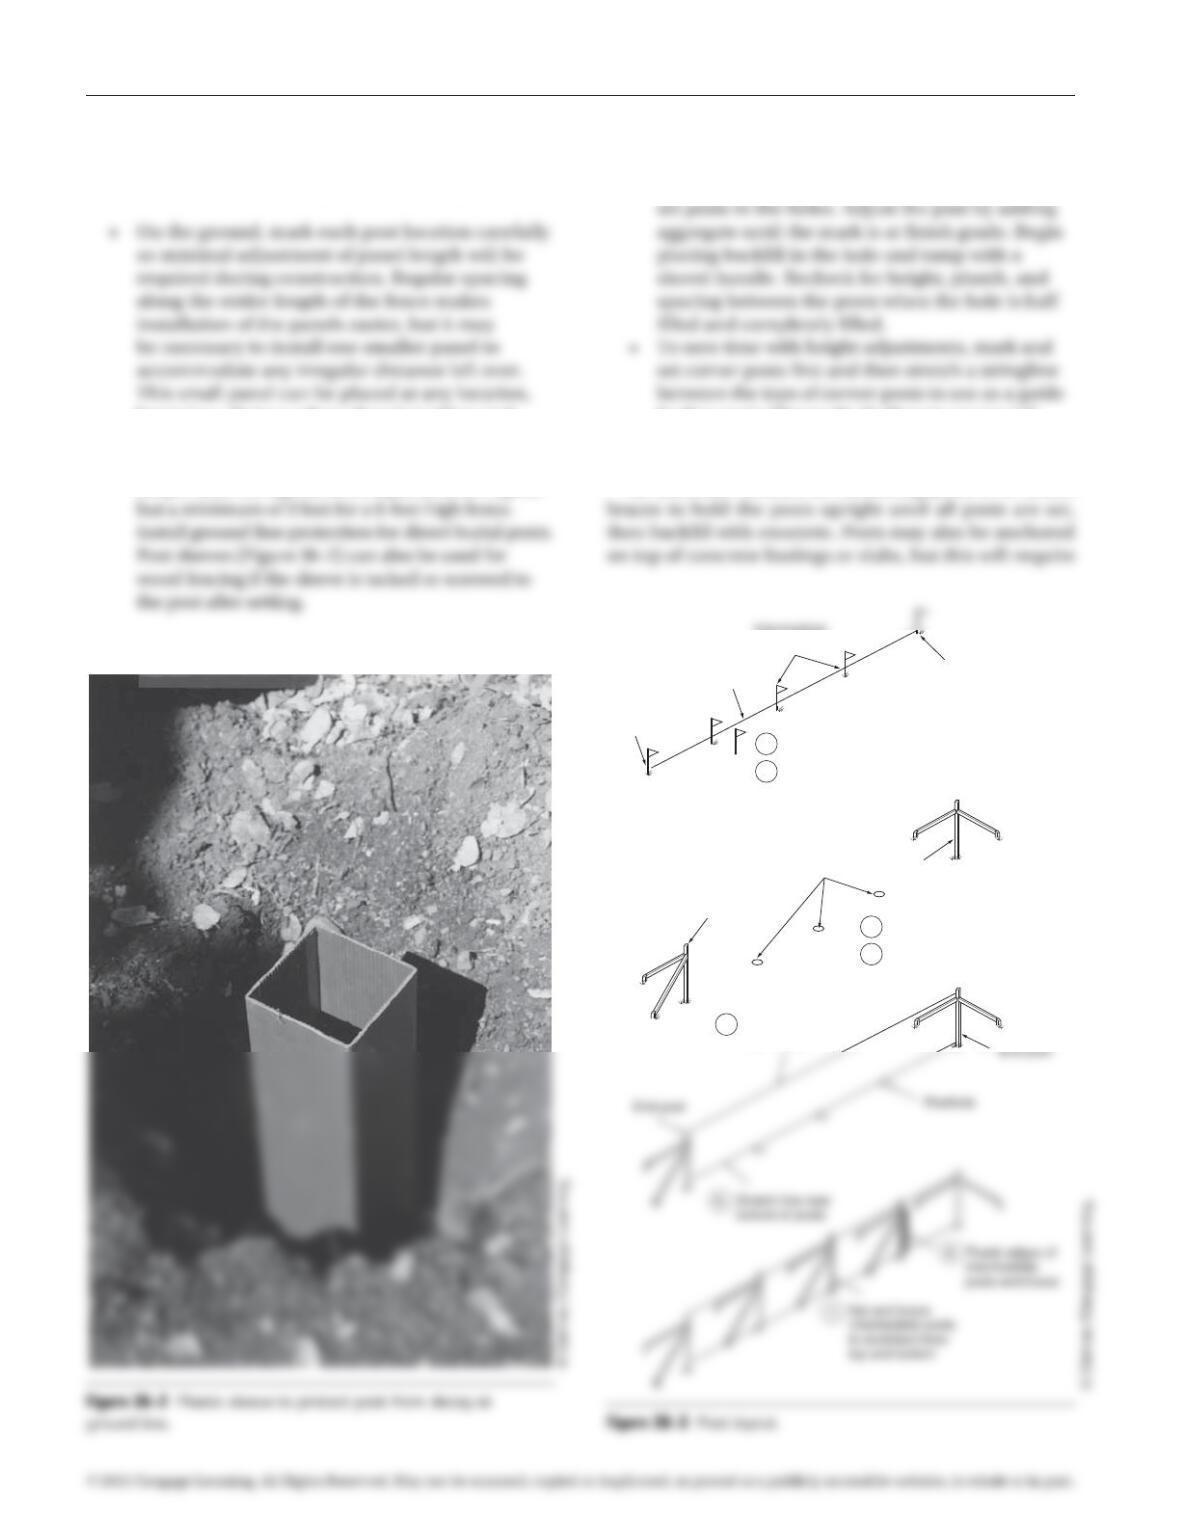
Attaching Stringers for Vertical
Surfacing
posts. When stringers are hung between posts, 4 × 4s
should be used. If a kickplate is installed, 2 × 4s may be
used for the stringers (Figure36–6).
To install stringers on the face of the posts, use the fol-
lowing steps:
• Mark level lines between the posts using a
chalkline. The top stringer should be placed at or
• Cut a stringer the measured length and attach it
to the posts using two deck screws per post. Joints
should be centered over posts using butt joints.
• Install kickplates by cutting a piece of 1 × 8 or 2 × 8
(or wider) lumber the length of the fence panel. Mark
the location for the top of the kickplate and toenail
the piece into the posts. Angle brackets can be used
to install the kickplate if the nailing locations are
difficult to reach.
• Cut the 2 × 4 stringer the width of the fence panel,
Upper
post
Typical height
of post
C
97171_36_ch36_p145-151.indd 147 14/06/10 9:09 PM
148 Exercise 36 Wood-Surfaced Stringer Fence and Gate Construction
Attaching Vertical Surfacing
• Place a stringline along the fence run at the height
of the top of the fencing material.
• Measure and cut surface material for the fence.
• If placing surfacing on the face of the stringers,
attach the surfacing at the top using a deck
screw and check for plumb. Finish attaching the
surfacing at the top and at the bottom using two
deck screws per stringer (Figure 36–9).
Vertical surfacing on the face of the stringers can be
extended up to 1 foot above or below the stringers, but
Figure 36–6 Kickplate for a wooden fence.
© Delmar/Cengage Learning.
97171_36_ch36_p145-151.indd 148 14/06/10 9:09 PM

Exercise 36 Wood-Surfaced Stringer Fence and Gate Construction 149
Vertical louvered fencing is constructed with only a top
and bottom stringer. The location and angle of each
louver are marked on both the top and bottom stringer
and then a spacer block of 2 × decay-resistant wood is
attached with deck screws along each mark. Trim any
portion of this block that extends beyond the stringers.
Attach the louvers to the block at the top and bottom with
two 2-inch deck screws at each location.
Lattice surfacing should be trimmed to match the
opening of the panel and attached to the stringers and
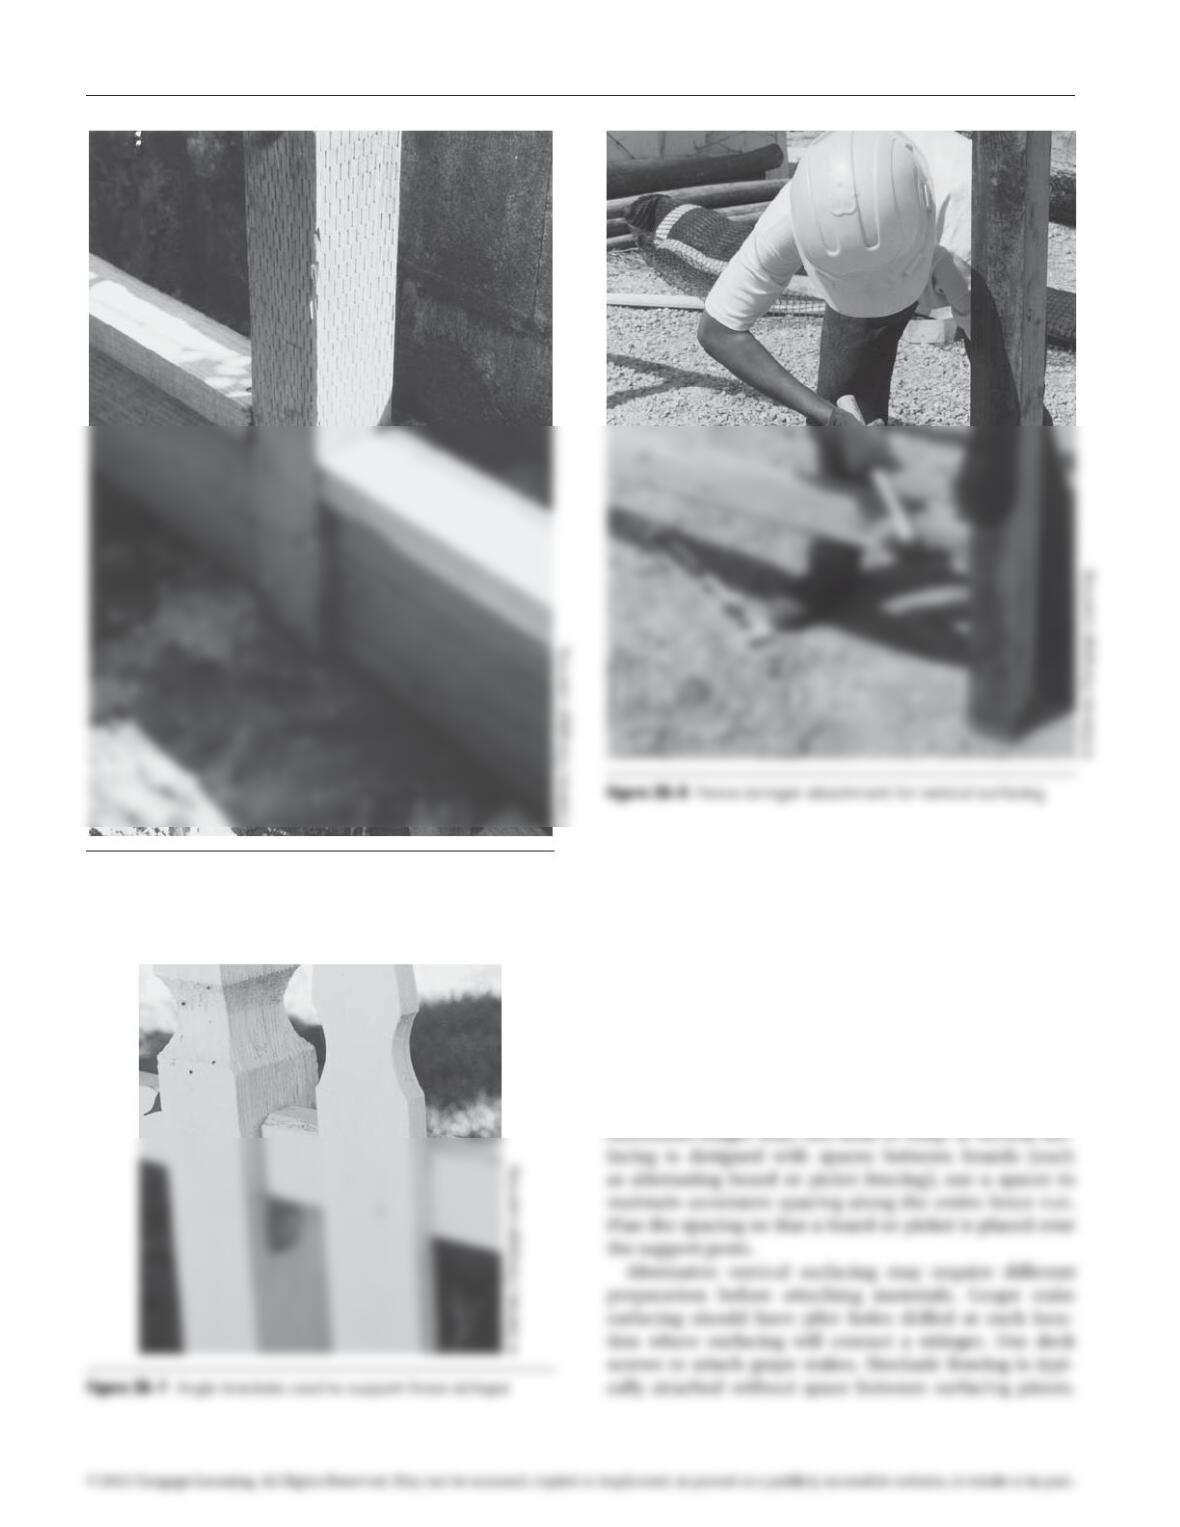
• Attach the hinges and latch hardware to the gate
panel and prop it in position in the gate opening.
• Connect the hinges to one post and check the gate
for proper swing.
• Attach the latch hardware to the other post and
adjust for proper closing.
To hybridize between premanufactured and custom
built, metal frameworks to which custom surfacing
materials can be attached are available for creating gates
(Figure 36–11). A wood panel that matches the fence
surfacing is built and then screwed to the gate hardware,
97171_36_ch36_p145-151.indd 149 14/06/10 9:09 PM
150 Exercise 36 Wood-Surfaced Stringer Fence and Gate Construction
• Attach the hinges and latch hardware to the gate
panel and prop it in position in the gate opening
(Figure 36–12).
• Connect the hinges to one post and check the gate
for proper swing.
• Attach the latch hardware to the other post and
adjust for proper closing.
PREREQUISITE EXERCISES
Students should have successfully completed Exercise 1,
Construction Math, and Exercise 5, Tool Operation and
MATERIALS REQUIRED
• Five 4 × 4s, 9 feet in length each
• Three 4 × 4s, 8 feet in length each
• Three 2 × 8s, 8 feet in length each
• Approximately 60 LF of 2 × 4
• Approximately 350 LF of 1 × 6 trim and surfacing
lumber
• Approximately 30 LF of 1 × 8 trim lumber
• 2 lbs of poly coated deck screws
• 2 lbs of galvanized 6d box nails
• 2 turnbuckle gate braces
97171_36_ch36_p145-151.indd 150 14/06/10 9:09 PM
Exercise 36 Wood-Surfaced Stringer Fence and Gate Construction 151
EXERCISE DESCRIPTION
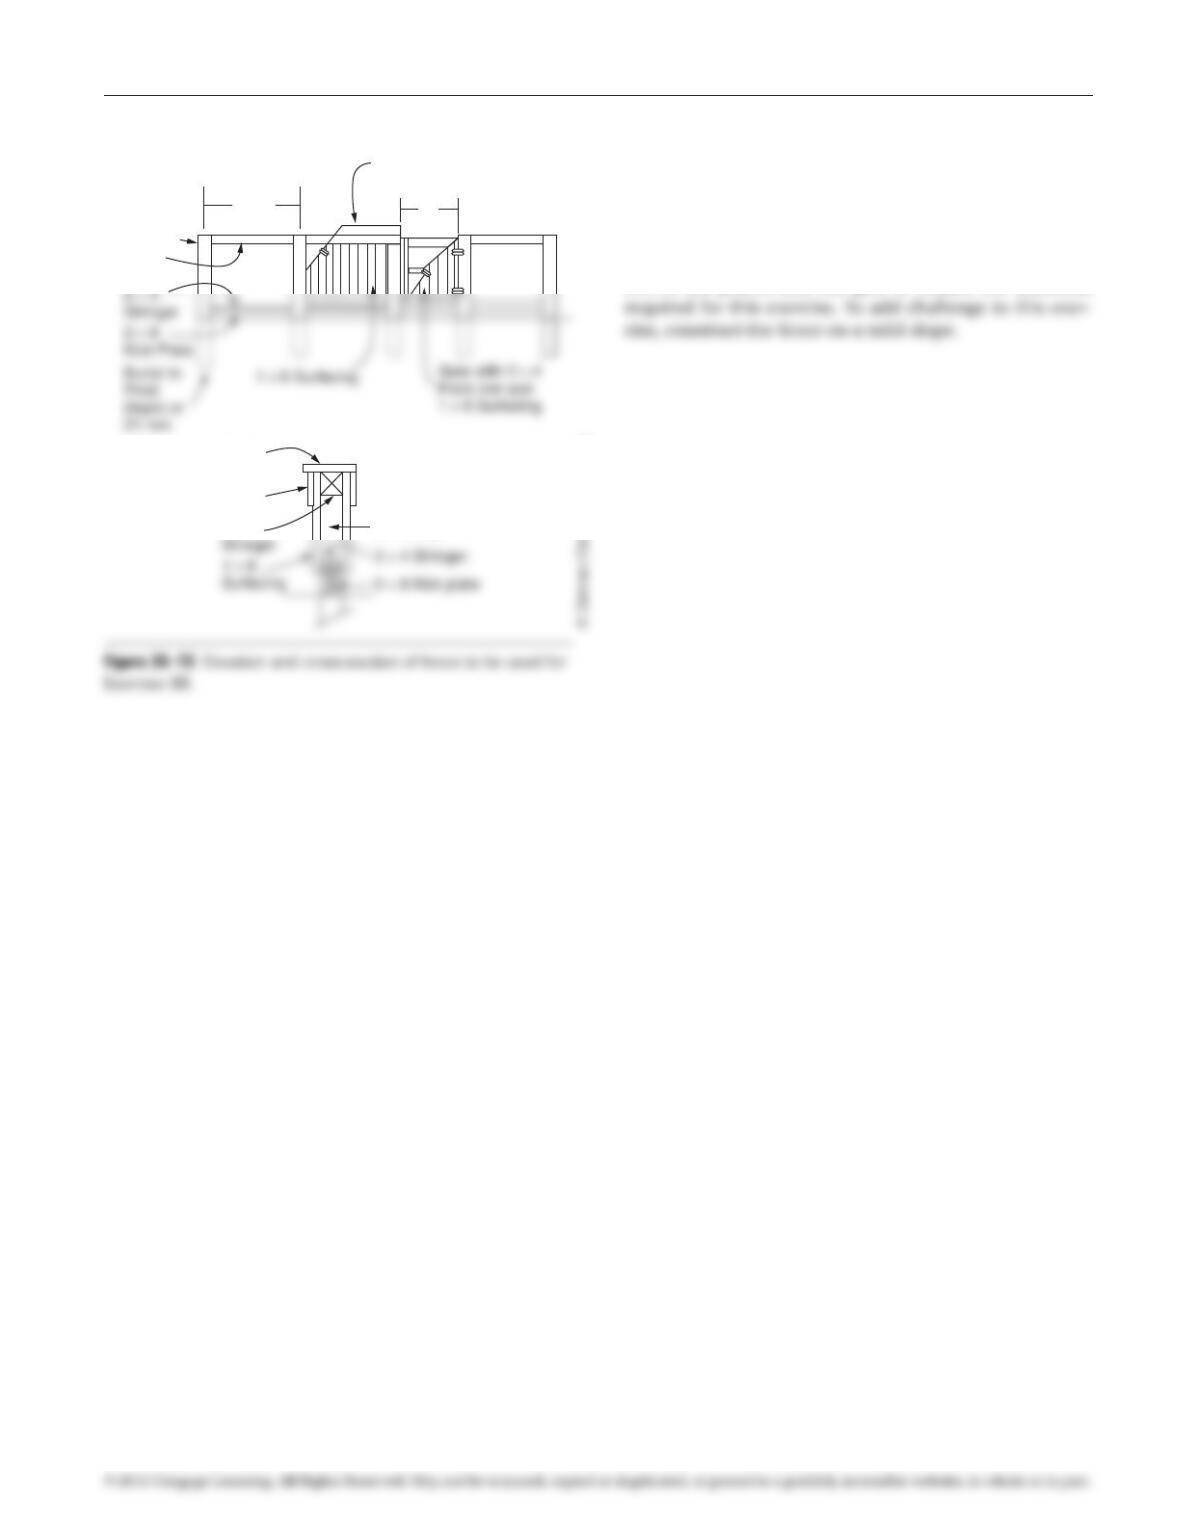
Using the elevation and cross-section depicted in
Figure 36–13, construct three panels of wood-surfaced
stringer fencing and the associated gate. Use any of the
surfacing patterns shown in Figure 36–1. Install posts,
framing, and kick plates for all sections, but surface only
two of the panels and the gate to reduce the materials
1 × 8 Trim on top
1 × 6 Trim on front
3’
8’ typ
4 × 4 Post
4 × 4
Stringer
1 × 8
Tr i m
1 × 6
Tr i m
4 × 4
4 × 4 Post
97171_36_ch36_p145-151.indd 151 14/06/10 9:09 PM