© 2011 Cengage Learning. All Rights Reserved. May not be scanned, copied or duplicated, or posted to a publicly accessible website, in whole or in part.
138
Exercise 34
Surfacing Wood Structures
OBJECTIVE
The objective of this exercise is to properly surface wood
structures.
TEXTBOOK REFERENCE
Information related to this activity can be found in the
Landscape Construction textbook in Chapter 29, Wood
Decks and Platforms.
INTRODUCTION
Deck surfacing comes in a variety of materials. Before
making a selection, review the structural and aesthetic
requirements of a project. Deck surfacing must be app-
lied at an angle to the joists for maximum support. Right
angles provide maximum support, but angles of up to
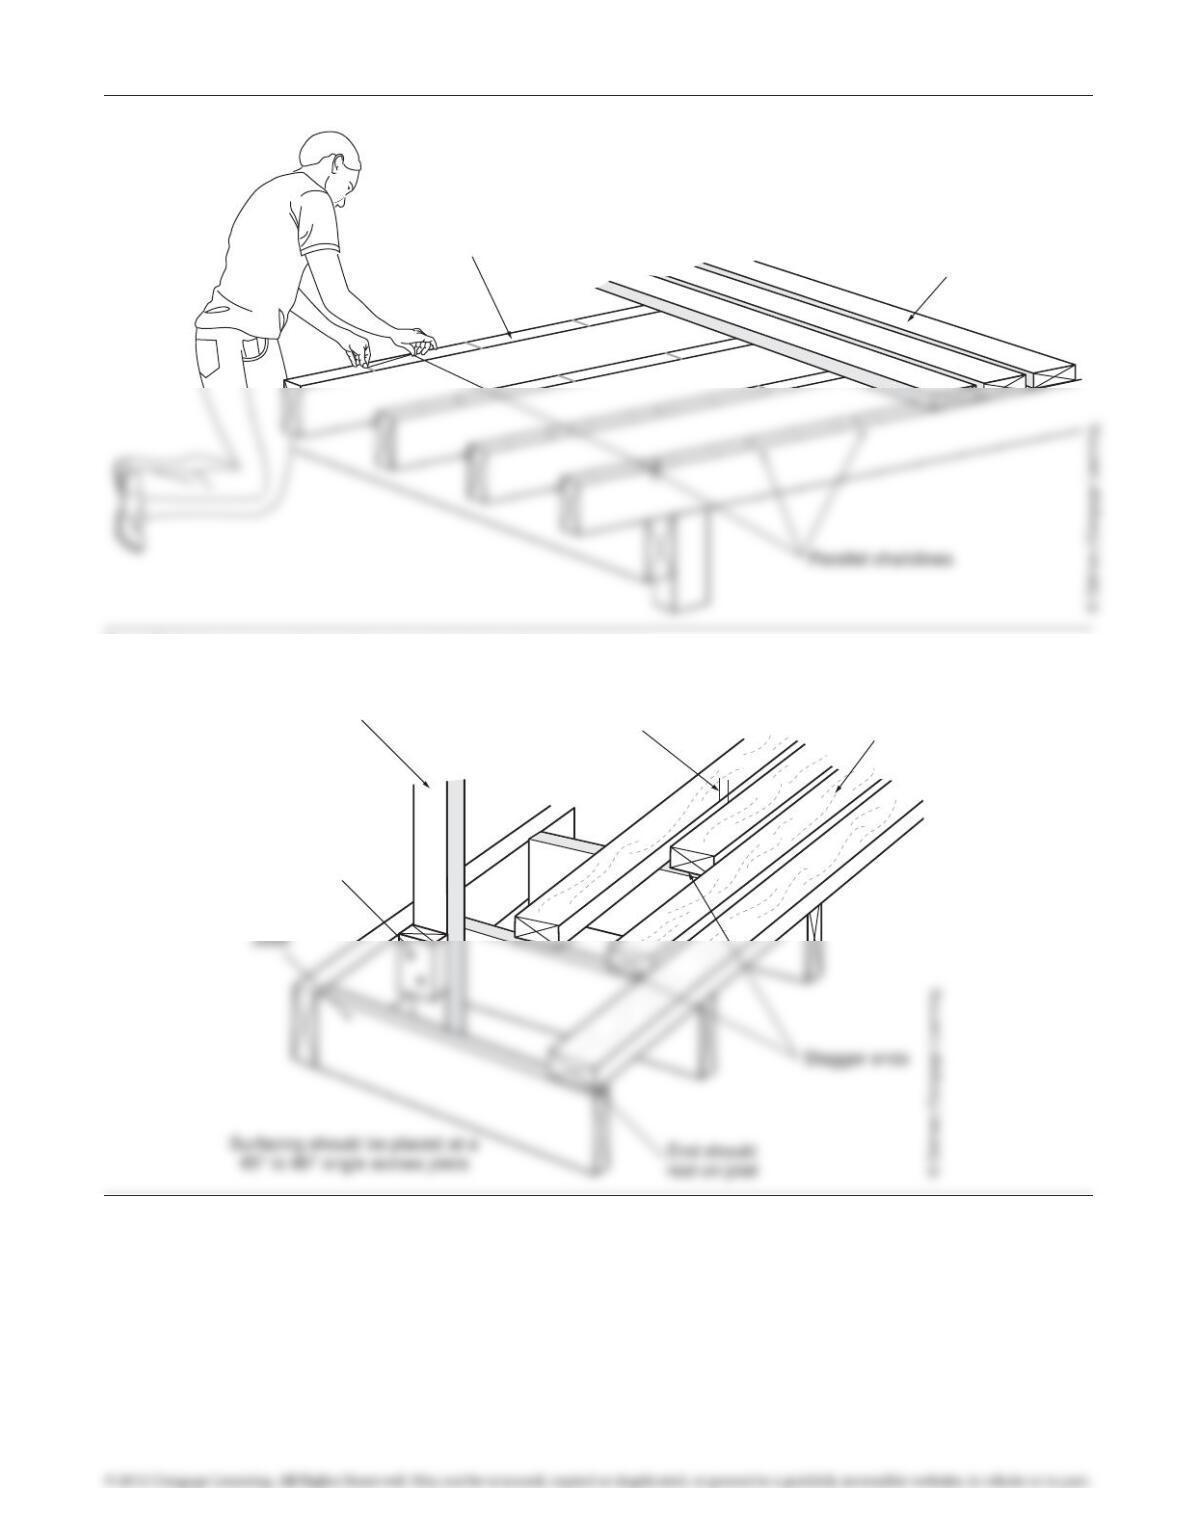
Surface Installation
• Select a starting point for installation of the
surfacing material.
• Snap parallel chalklines on top of the joists to help
surfacing are staggered. Trim material if necessary
to ensure surfacing always ends on a joist.
Consistently space deck material using a shim or
nail placed between the boards. Typical spacing
for 2 × 4s is 3/16 inch, but 2 × 4s that are still
wet from preservative treatment and 5/4s cedar
should be spaced 1/8 inch to allow for shrinkage
(Figure 34–2).
• Fasten material to joists using two nails or deck
screws at each joist location, each nail placed
1 inch in from the edge of the surfacing and
centered over the joist.
• At edges where the surfacing material overhangs
the frame of the deck, snap a chalkline along the
97171_34_ch34_p138-140.indd 138 14/06/10 9:07 PM
Exercise 34 Surfacing Wood Structures 139
MATERIALS REQUIRED
• Cordless drill and bits
• Socket wrench and sockets
• Circular saw
• 50 foot extension cord and access to a 120V GFCI
circuit
• Claw hammer
• Carpenter’s level
• Carpenter’s pencil
• 25 foot tape measure
• Lumber
• Fasteners
Installed
decking
Joists
Figure 34–1 Snapping parallel chalklines to guide deck surfacing installation.
Post
Cleat to support
surfacing at post.
Top of cleat to be
flush with top of joists.
Deck
surfacing
Maintain spacing
between surface
boards
Figure 34–2 Deck surfacing.
97171_34_ch34_p138-140.indd 139 14/06/10 9:07 PM
140 Exercise 34 Surfacing Wood Structures
EXERCISE DESCRIPTION
To complete this exercise, calculate and procure the
Deck surfacing and structural support
97171_34_ch34_p138-140.indd 140 14/06/10 9:07 PM