Exercise 27 Stairs 111
CAUTION
111
Exercise 27
Stairs
OBJECTIVE
The objective of this exercise is to properly install butt
Follow manufacturer instructions when using
equipment. Use caution when cutting and
installing wall materials. Obtain assistance when
lifting wall materials.
TEXTBOOK REFERENCE
Information related to this activity can be found in the
INTRODUCTION
Movement from one level to another in the landscape is
typically accomplished through the use of stairs. Stairs
can be freestanding (placed on an embankment without
enclosing walls for support) or constructed as part of a
Interlocking Stair Installation
Interlocking stairs should be constructed as the wall is
shorter than the width of a single piece of wall mate-
rial. For wider stair treads additional material will be
required. If special solid blocks are available for stairs, or
if alternative tread materials are used, increase the num-
ber of wall blocks below the tread to match the dimen-
sion required.
Use the following steps to install interlocking stairs:
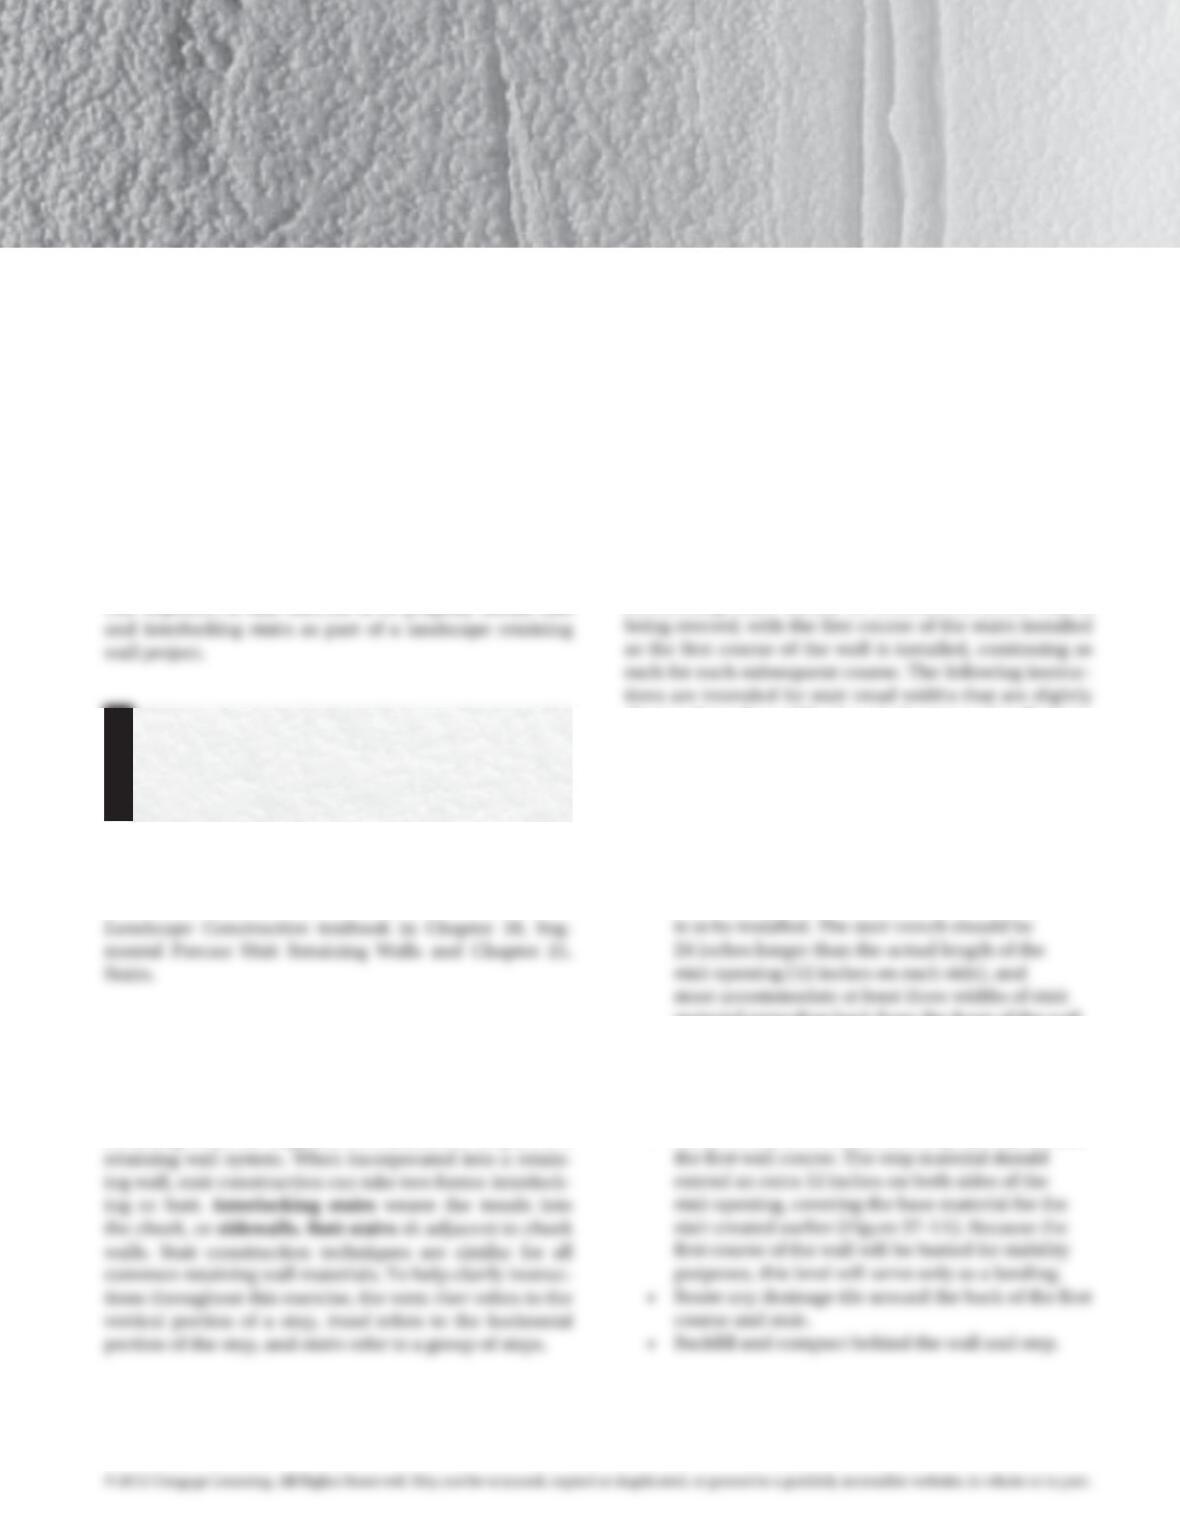
• Widen the granular base trench where the stair
material extending back from the front of the wall
alignment (Figure 27–1A).
• Fill this widened trench with base material and
compact.
• Place the first course of the wall.
• Place the material for the first step directly behind
97171_27_ch27_p111-114.indd 111 14/06/10 9:01 PM
112 Exercise 27 Stairs
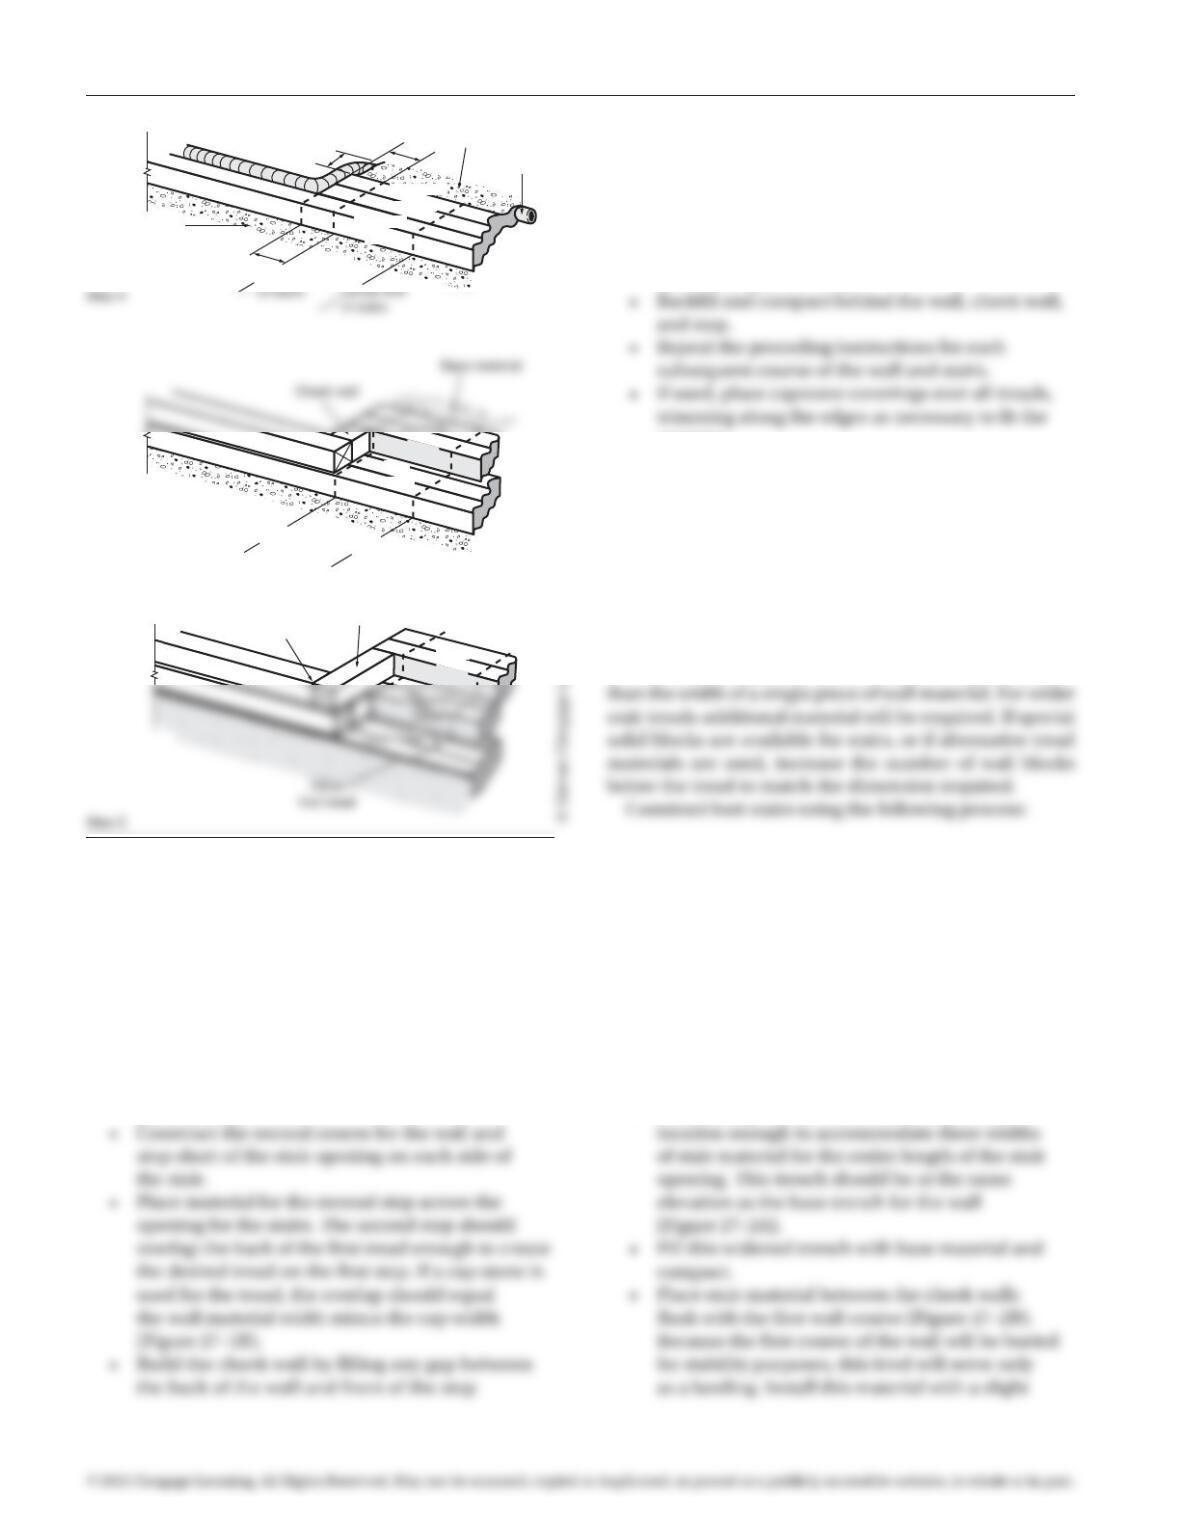
• Excavate a base trench behind the first step for
the second step. This trench should be 18 inches
wide (or the width of two pieces of wall material),
6 inches deep, and match the length of the first
stair trench. Fill the trench with base material
and compact. If a tile is present, fill over the tile
without disturbing its level. Smooth the base
material so that it is flush with the top of the
previous step.
with wall material. The cheek wall should be
perpendicular to the wall face. Trim block as
required to fit. If building the wall with wood
or stone, remember that the cheek wall must
interlock with the wall face and that alternate
courses of the cheek wall will run to the face of
the wall (Figure 27–1C).
opening.
Butt Stair Installation
While butt stairs are simpler to construct, they are not as
stable as interlocking stairs. Because butt stairs are not
interlocked into the cheek wall, they may move up or
down at a different rate than the walls next to them, caus-
ing unevenness or irregularity. The following instructions
are intended for stair tread widths that are slightly shorter
• Retaining walls and cheek walls can be
constructed prior to or concurrently with butt stair
installation. The cheek walls are perpendicular
to the retaining wall and must extend beyond
the back of the stairs. Leave an opening for stairs
when constructing the wall and verify that the wall
material on each side of the opening is level across
the opening. Adjusting the width of the opening
to match material dimensions is also desirable.
Use of a batter on cheek walls will require cutting
material to fit.
• Widen the granular base trench at the stair
12″
12″ 12″
Left edge
Base material
Base material
Rerouted
tile
Wall first
course
Extra wall
material
Left edge
of stairs
Step B
Center line
of stairs
First
tread
tread
Third
tread
Cheek wall
Interlocked
corners
Figure 27–1 Interlocking stair construction for tie/timber walls.
97171_27_ch27_p111-114.indd 112 14/06/10 9:02 PM
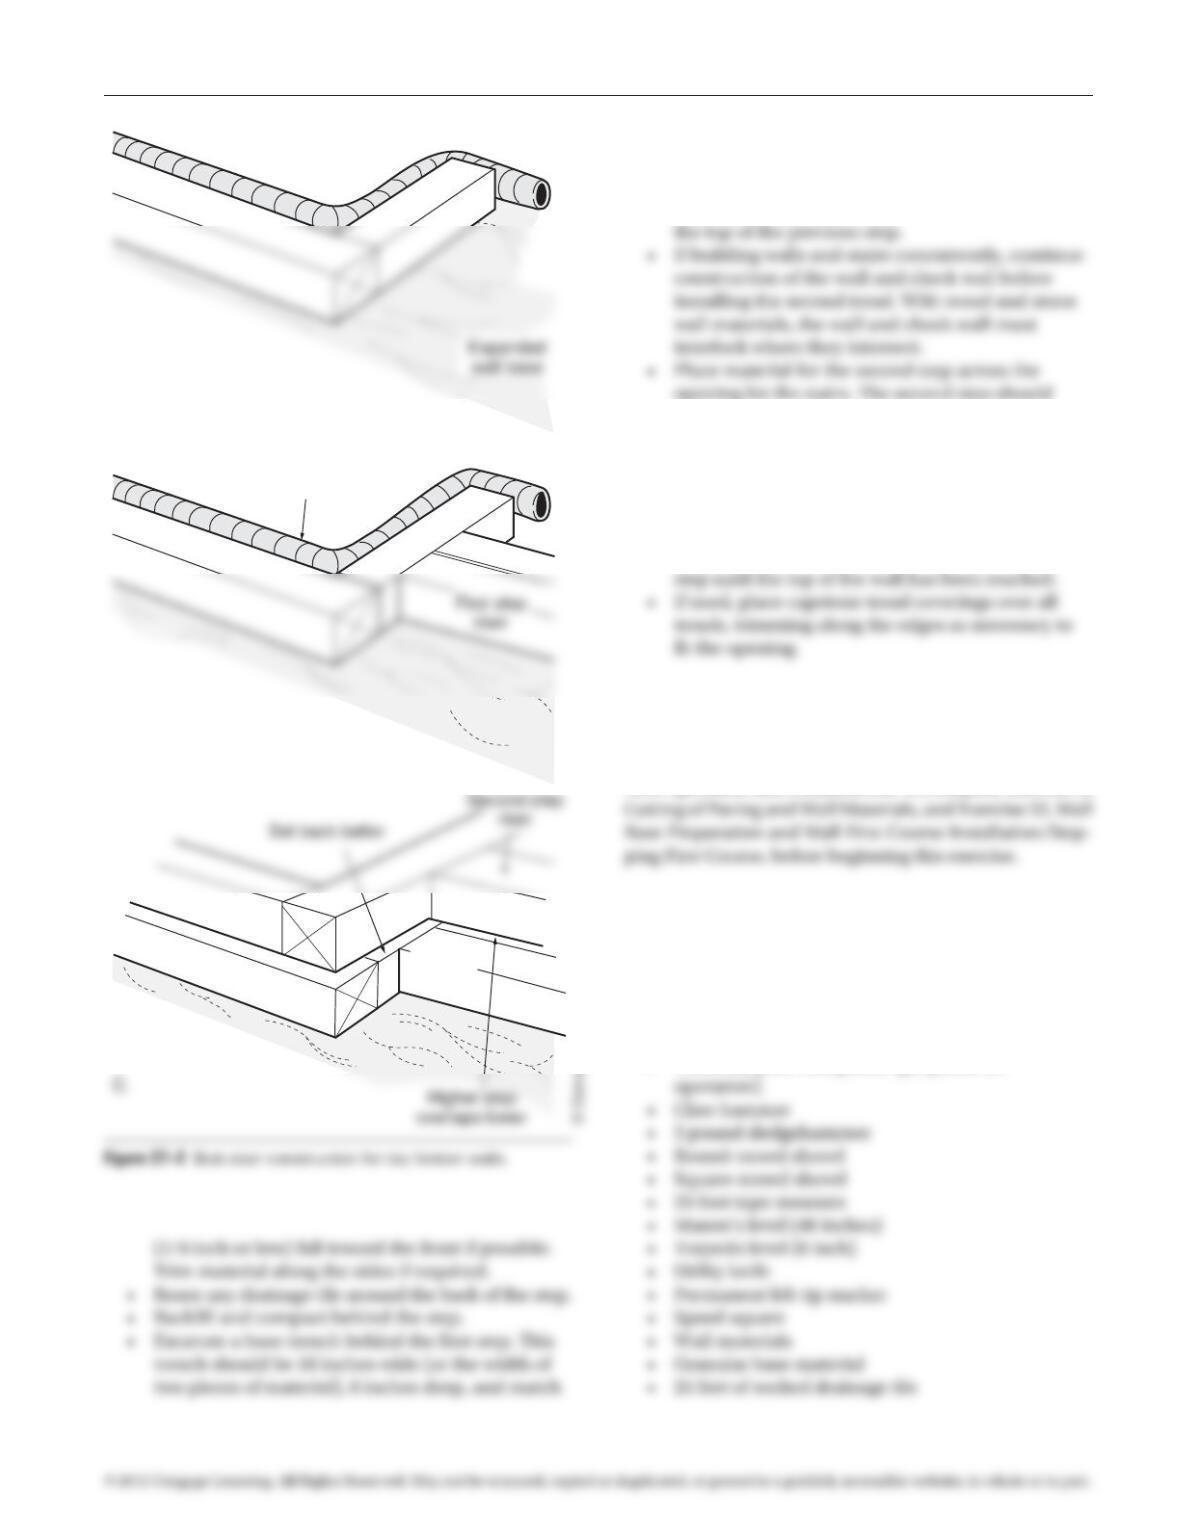
Exercise 27 Stairs 113
the length of the first stair trench. Fill the trench
with base material and compact. If a tile is present,
fill over the tile without disturbing its level.
Smooth the base material so that it is flush with
opening for the stairs. The second step should
overlap the back of the first tread enough to
create the desired tread width on the first step. If a
capstone is used for the tread, the overlap should
equal the wall material width minus the cap width
(Figure 27–2C).
• Backfill and compact behind the step.
• Repeat the preceding steps for each subsequent
PREREQUISITE EXERCISES
Students should have successfully completed Exercise 5,
Tool Operation and Construction Techniques, Exercise 6,
MATERIALS REQUIRED
• Proper clothing and safety gear
• Cutoff saw or wet masonry saw (prepared for
operation)
• Chain saw (prepared for operation)
• Vibratory plate compactor (prepared for
First step
riser
A.
B.
Rerouted
tile
97171_27_ch27_p111-114.indd 113 14/06/10 9:02 PM
114 Exercise 27 Stairs
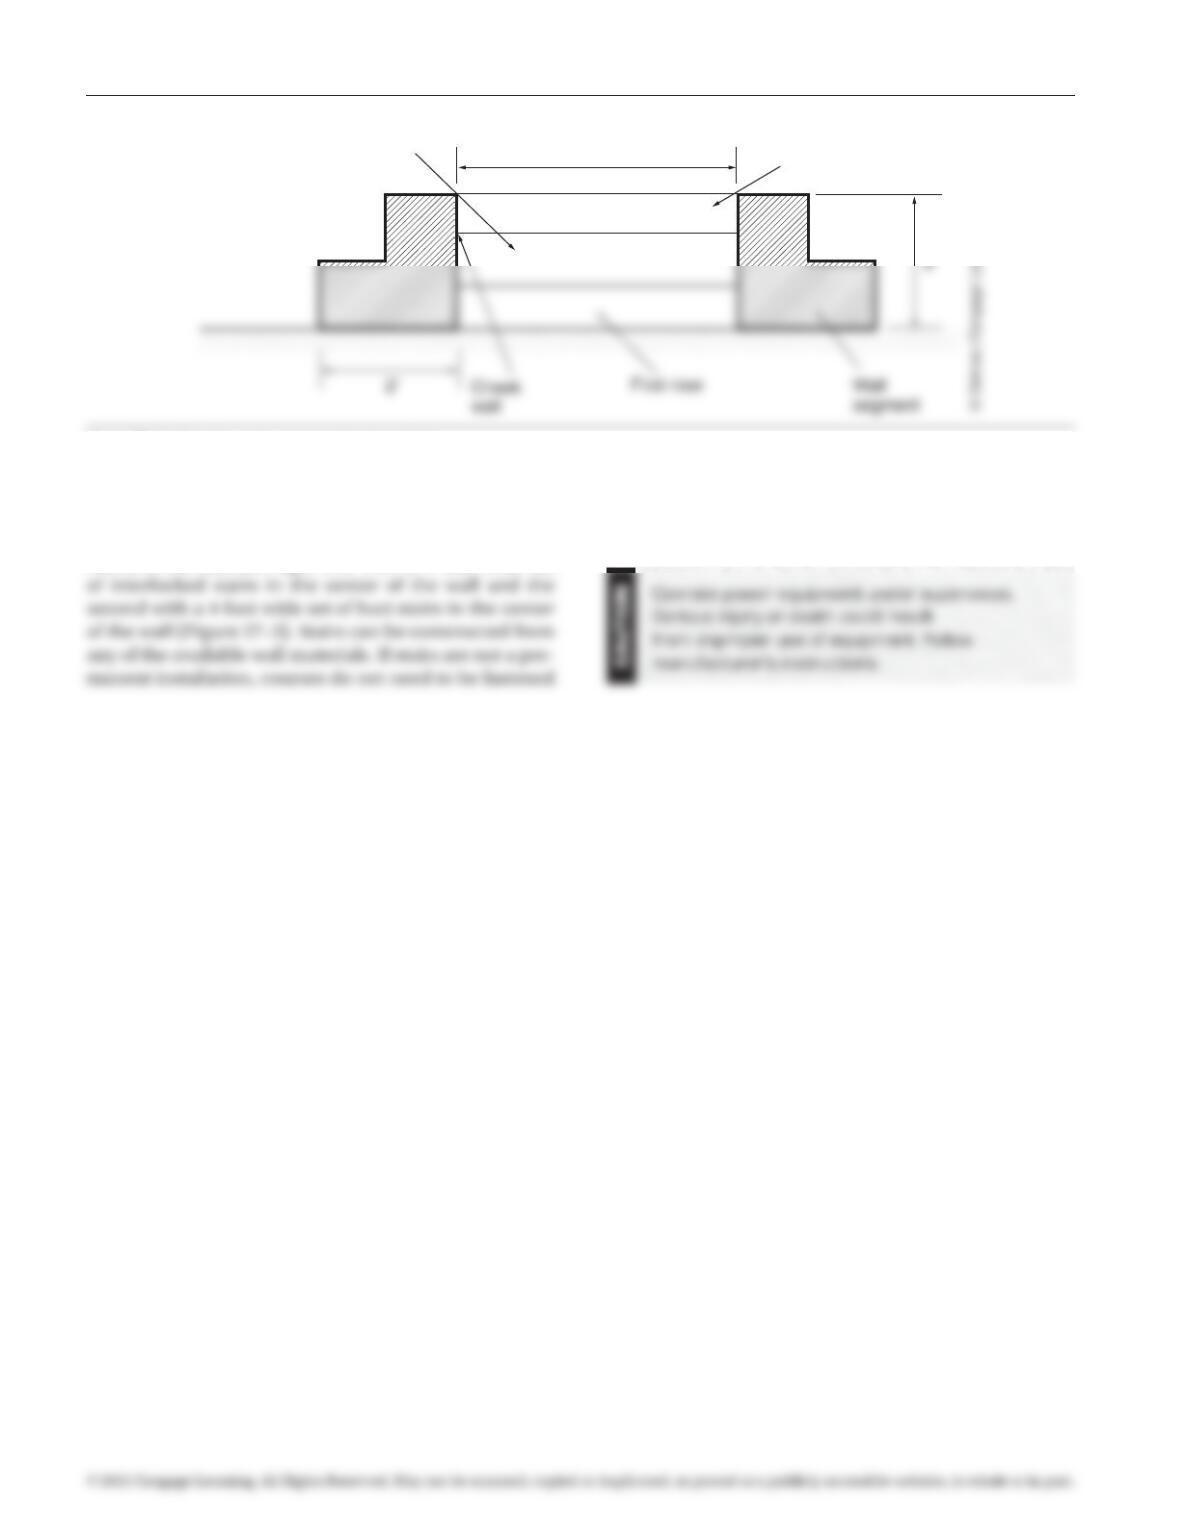
EXERCISE DESCRIPTION
To complete this exercise construct two short wall seg-
ments three courses high, one with a 4 foot wide set
Second riser Third riser
4′
Figure 27–3 Plan for stair construction installation.
together. The stairs should run from a flat area up a
gradual slope.
97171_27_ch27_p111-114.indd 114 14/06/10 9:02 PM