105
105
Retaining Wall Drainage
OBJECTIVE
The objective of this exercise is to properly install tile
drainage behind retaining walls.
INTRODUCTION
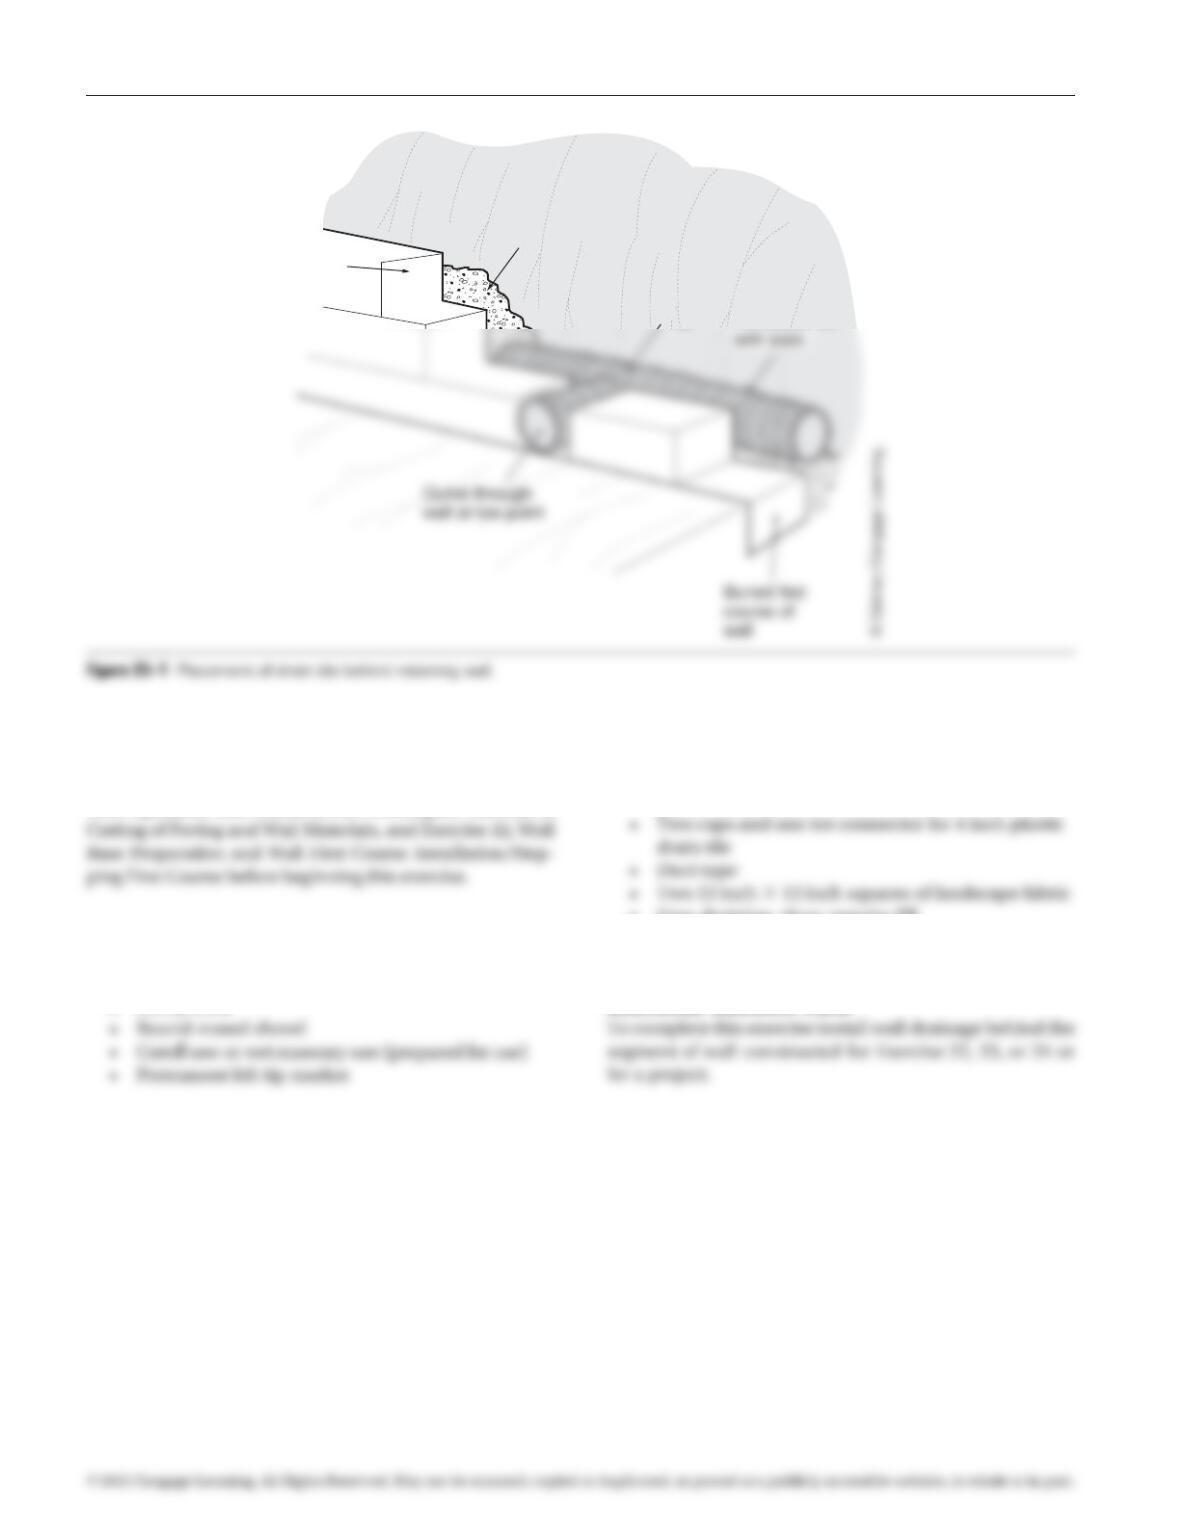
Retaining wall failure is often caused by the buildup of
water pressure behind the wall. Efforts to anchor the wall
provide a partial solution, but it is also necessary to reduce
The most effective method of reducing water pressure
is the placement of a proper drainage system behind the
wall. This drainage system is composed of a tile that runs
behind the first course of the wall, above which a zone of
free-draining angular fill is installed. As water approaches
• Following the installation of the first course of a
retaining wall, place a socked, 4 inch diameter
perforated plastic drain tile behind the entire length
of the wall. Placement of the tile should be directly
the tile around the end of the wall and trim at the
face of the wall. Cap the opposite end.
• If the low point(s) is(are) in between the ends of
the wall, cut a 5 inch wide gap in the first course at
that low point (Figure 25–1). Cut the tile behind this
gap and insert a tee connector that projects into the
• Cut a 12 inch × 12 inch section of landscape fabric
and duct-tape it over the open end of the tile that
projects through the wall. Cap the tile at both ends
of the wall.
• Backfill over the tile with 3/4 inch to 1/2 inch
Exercise 25
97171_25_ch25_p105-106.indd 105 14/06/10 9:00 PM
106 Exercise 25 Retaining Wall Drainage
PREREQUISITE EXERCISES
Students should have successfully completed Exercise 5,
Tool Operation and Construction Techniques, Exercise 6,
MATERIALS REQUIRED
• Proper clothing and safety gear
• Utility knife
• Square-nosed shovel
• 25 feet of 4 inch diameter socked perforated
plastic drain tile
• Free-draining, clean angular fill
EXERCISE DESCRIPTION
Wall
Free draining angular
fill over tile
Performed tile
Te e
Free-draining angular
fill over tile
Perforated tile
Te e
97171_25_ch25_p105-106.indd 106 14/06/10 9:00 PM