CHAPTER 5 SKETCHING
APPLICATIONS PROBLEMS
INSTRUCTIONS
Use proper sketching materials and techniques to solve the fol-
lowing sketching problems on 8-1/2 3 11 in. bond paper or
newsprint, unless otherwise specified by your instructor. Use
lightly sketched construction lines for all layout work. Darken
the finished lines but do not erase the layout lines, unless other–
wise specified by your instructor.
Part 1: Problems 5.1 Through 5.6
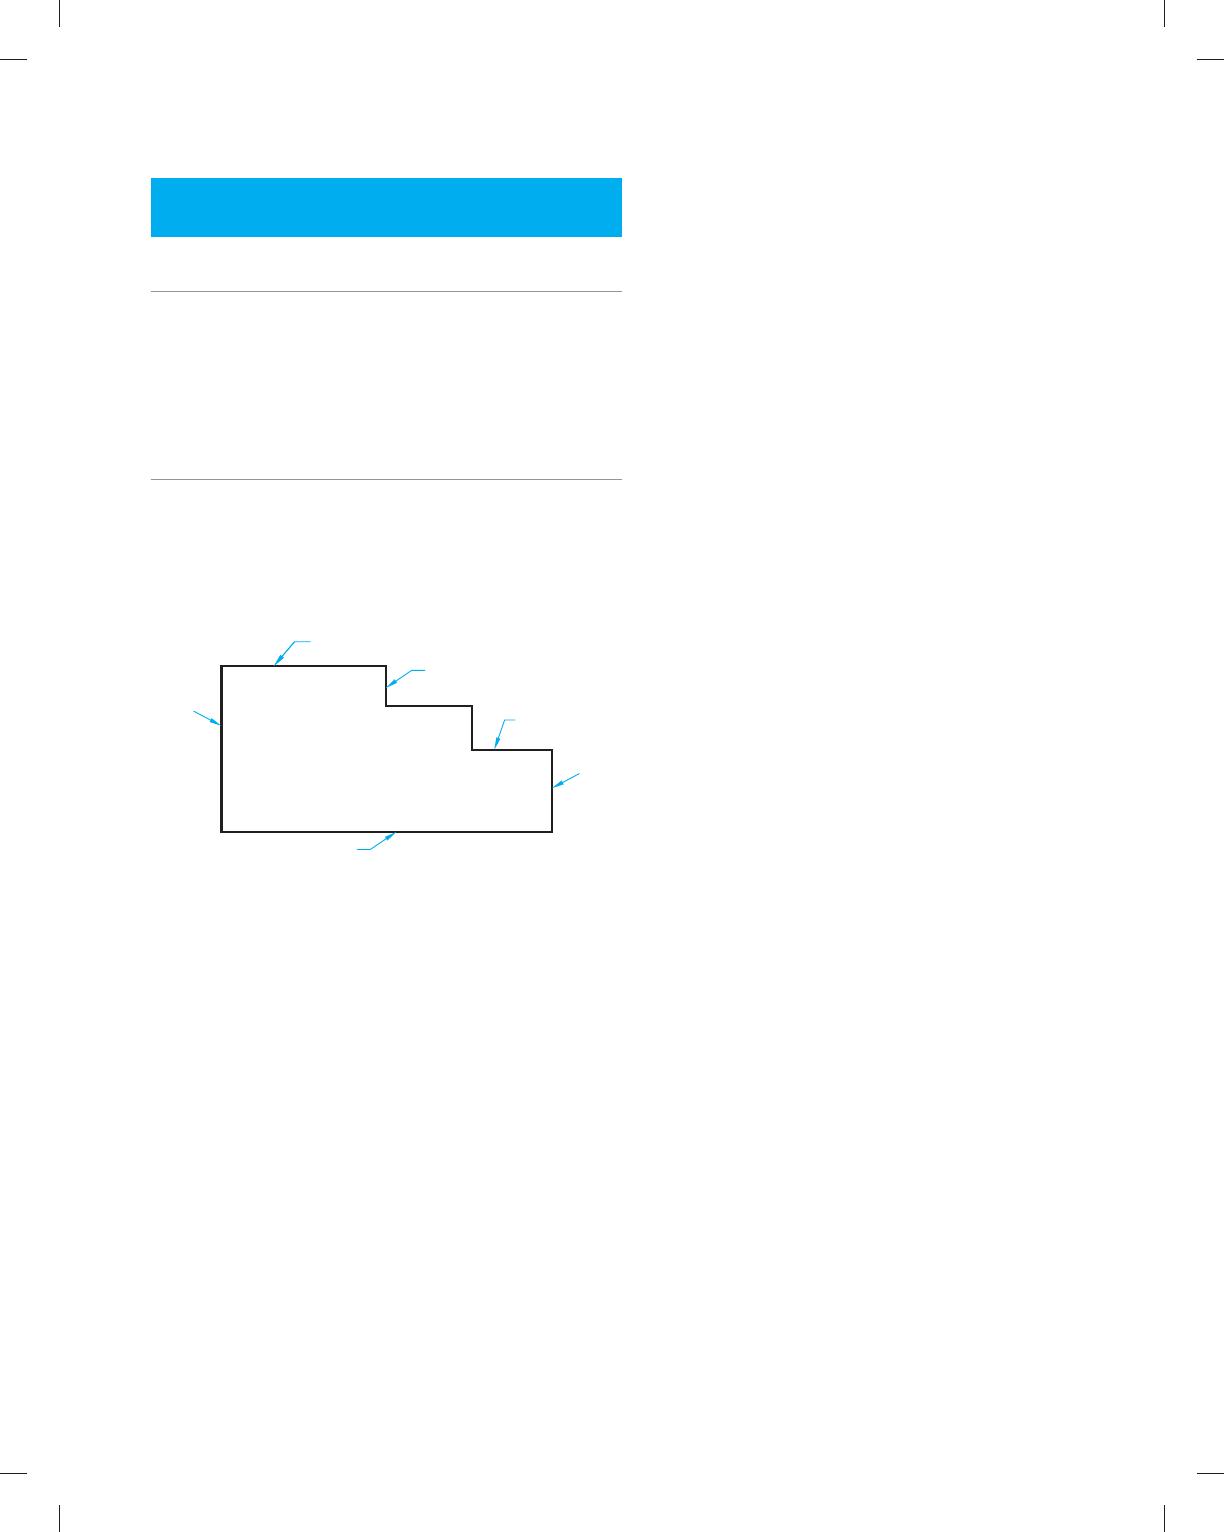
PROBLEM 5.1 List on a separate sheet of paper the length,
direction, and position of each line shown in the drawing. Re-
member, do not measure the lines with a scale. Example: Line 2
is the same length as line 1 and touches the top of line 1 at a 908
angle.
4
3
2
1
6
5
PROBLEM 5.2 Use the box, centerline, hand-compass, and
trammel methods to sketch a circle with an approximately 4 in.
diameter.
59728_ch05_EOC_ptg01.indd 1 03/02/16 10:22 am
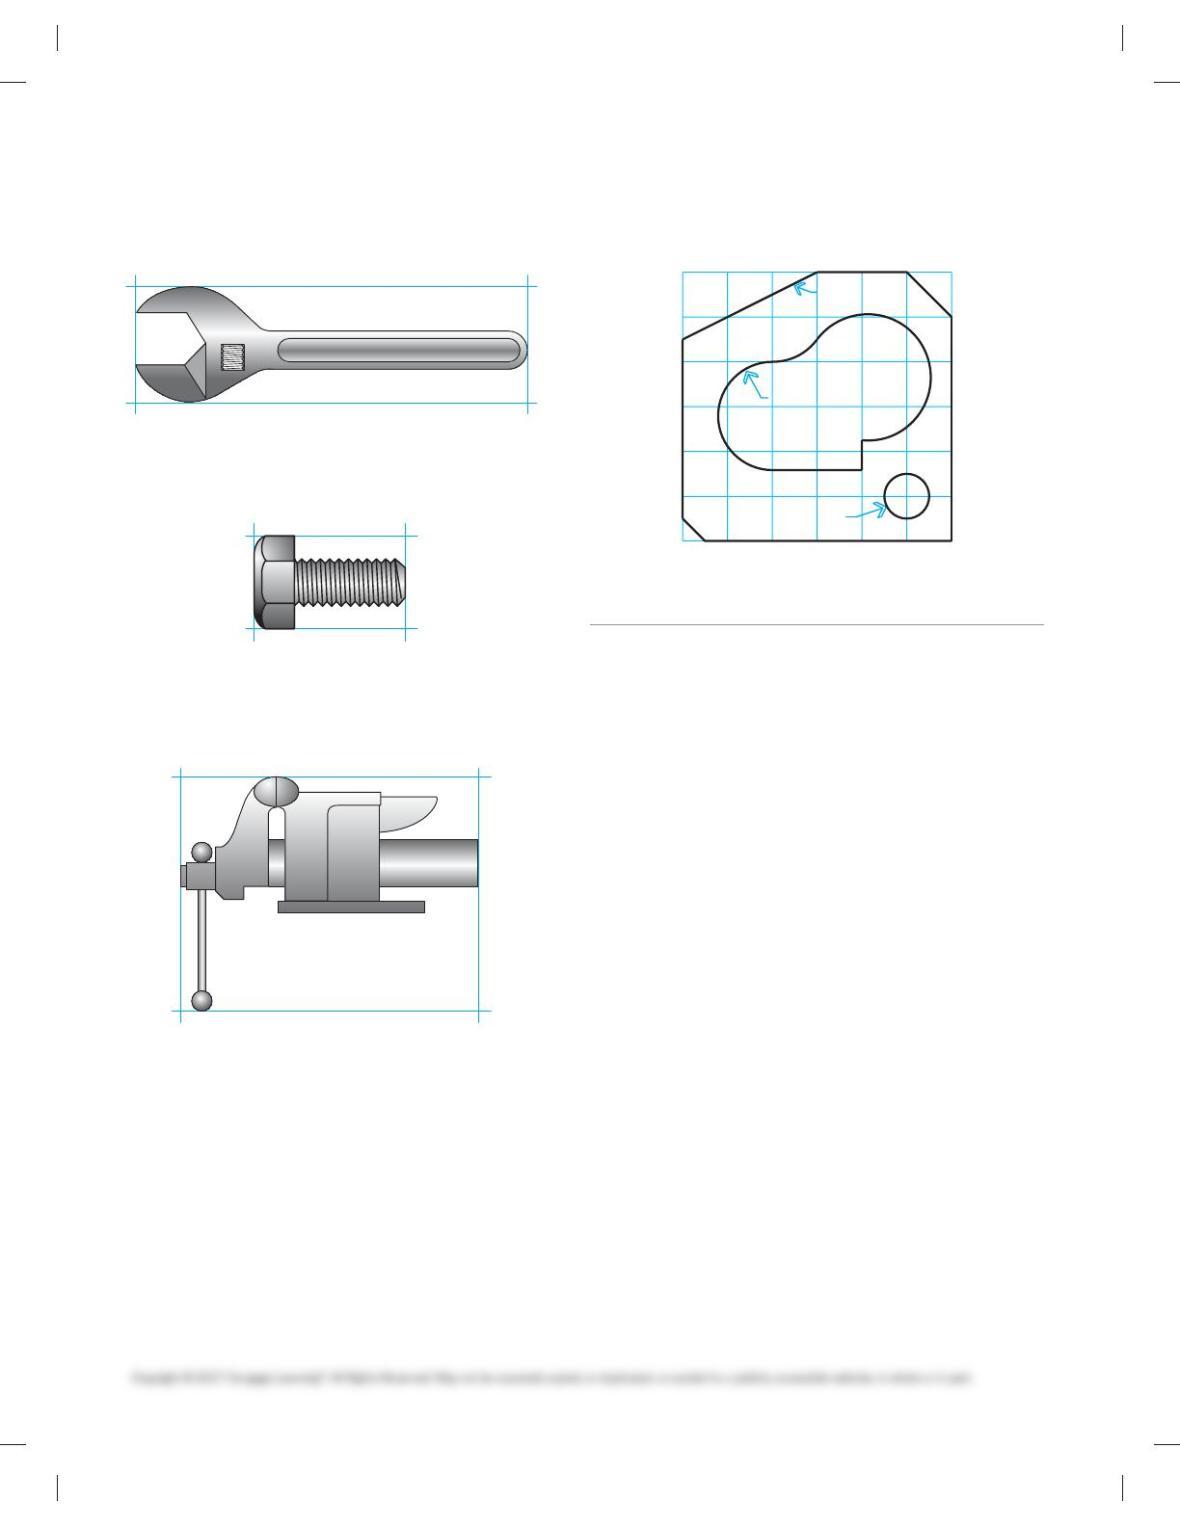
PROBLEM 5.3 Make a sketch of the wrench in the following
figure. Use a frame of reference to make your sketch twice as
big as the given sketch.
WRENCH
PROBLEM 5.4 Make a sketch of the machine screw in the
figure. Use a frame of reference to make your sketch twice as
big as the given sketch.
MACHINE SCREW
PROBLEM 5.5 Make a sketch of the vise in the following fig-
ure. Use a frame of reference to make your sketch twice as big
as the given sketch.
VISE
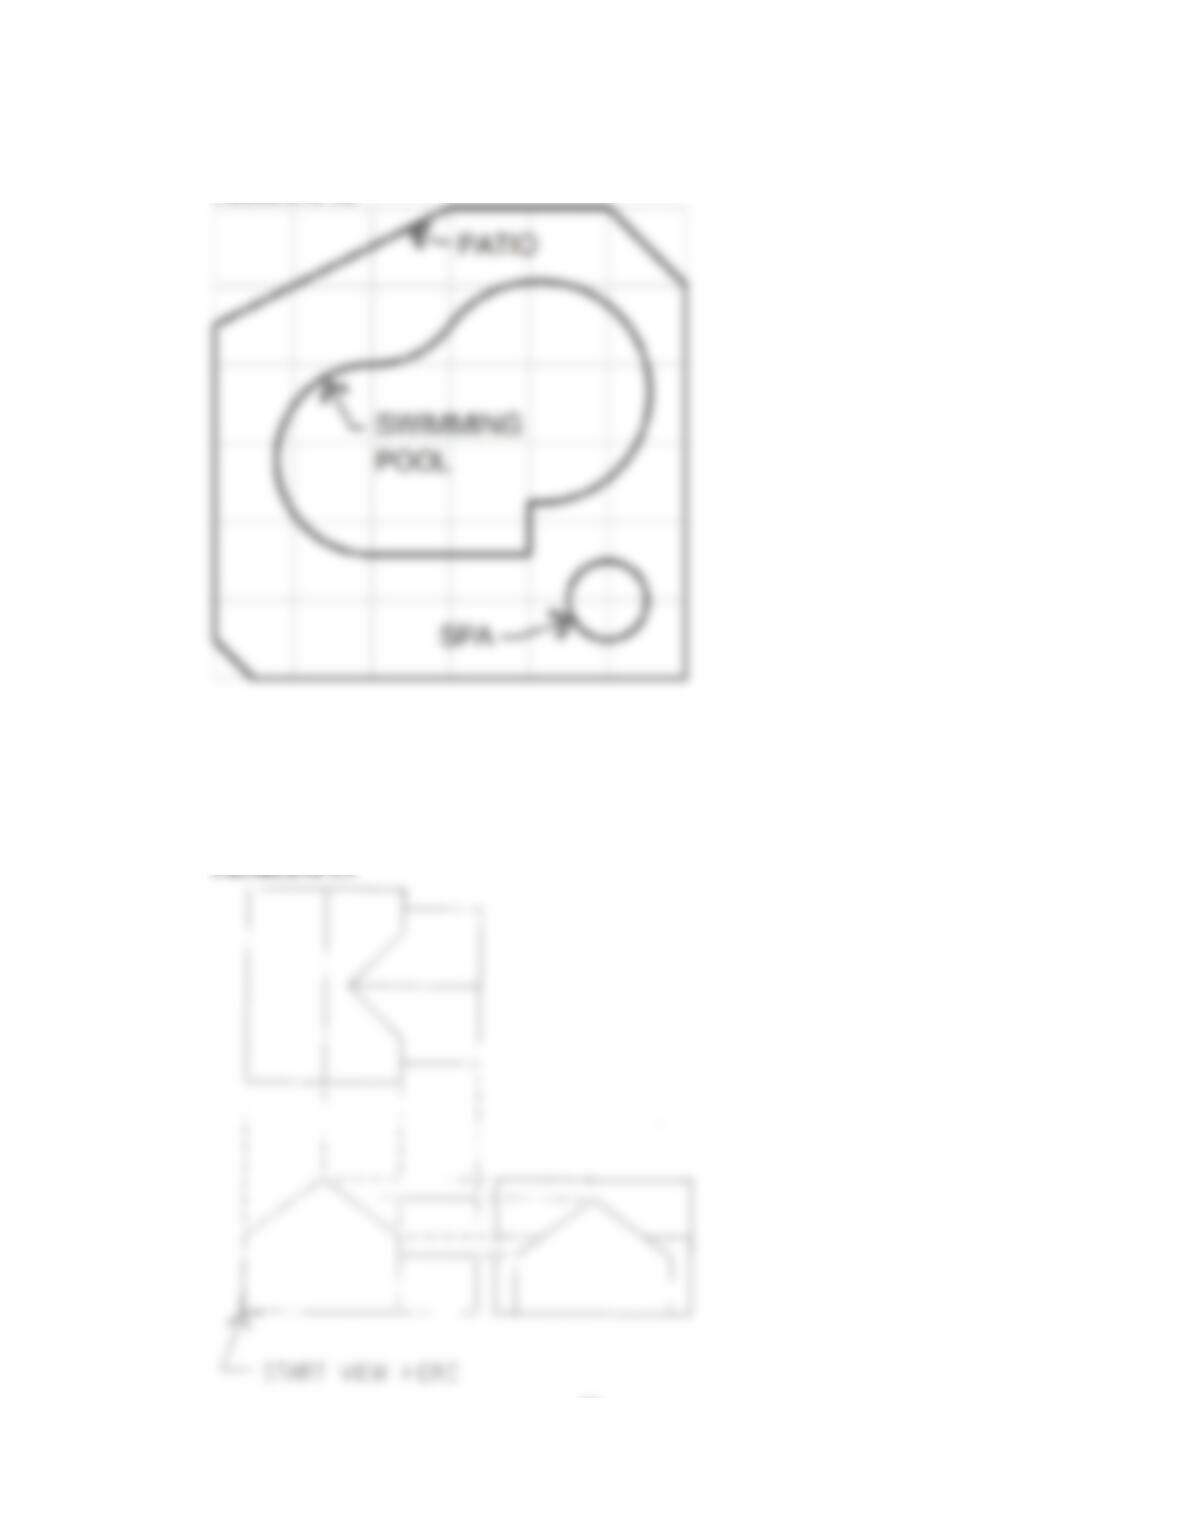
PROBLEM 5.6 Make a sketch of the patio, swimming pool,
and spa in the following figure. Use a frame of reference to
make your sketch twice as big as the given sketch.
PATIO
SWIMMING
POOL
SPA
Part 2: Problems 5.7 Through 5.12
PROBLEM 5.7 Find a stapler, tape dispenser, or coffee cup
and sketch a two-dimensional frontal view using the block
technique. Do not measure the object. Use the measurement-
line method to approximate proper proportions.
PROBLEM 5.8 Find an object with an irregular shape and
sketch a two-dimensional view using the regular grid method.
Sketch the correct proportions of the object without measuring.
59728_ch05_EOC_ptg01.indd 2 03/02/16 10:22 am
START VIEW HERE
PROBLEM 5.9 Transfer the given top and right-side views of
the house below to another sheet using the sketching methods
that you learned in this chapter. Make your sketch twice the size
of the given example. Use projection methods to establish and
sketch the missing front view.
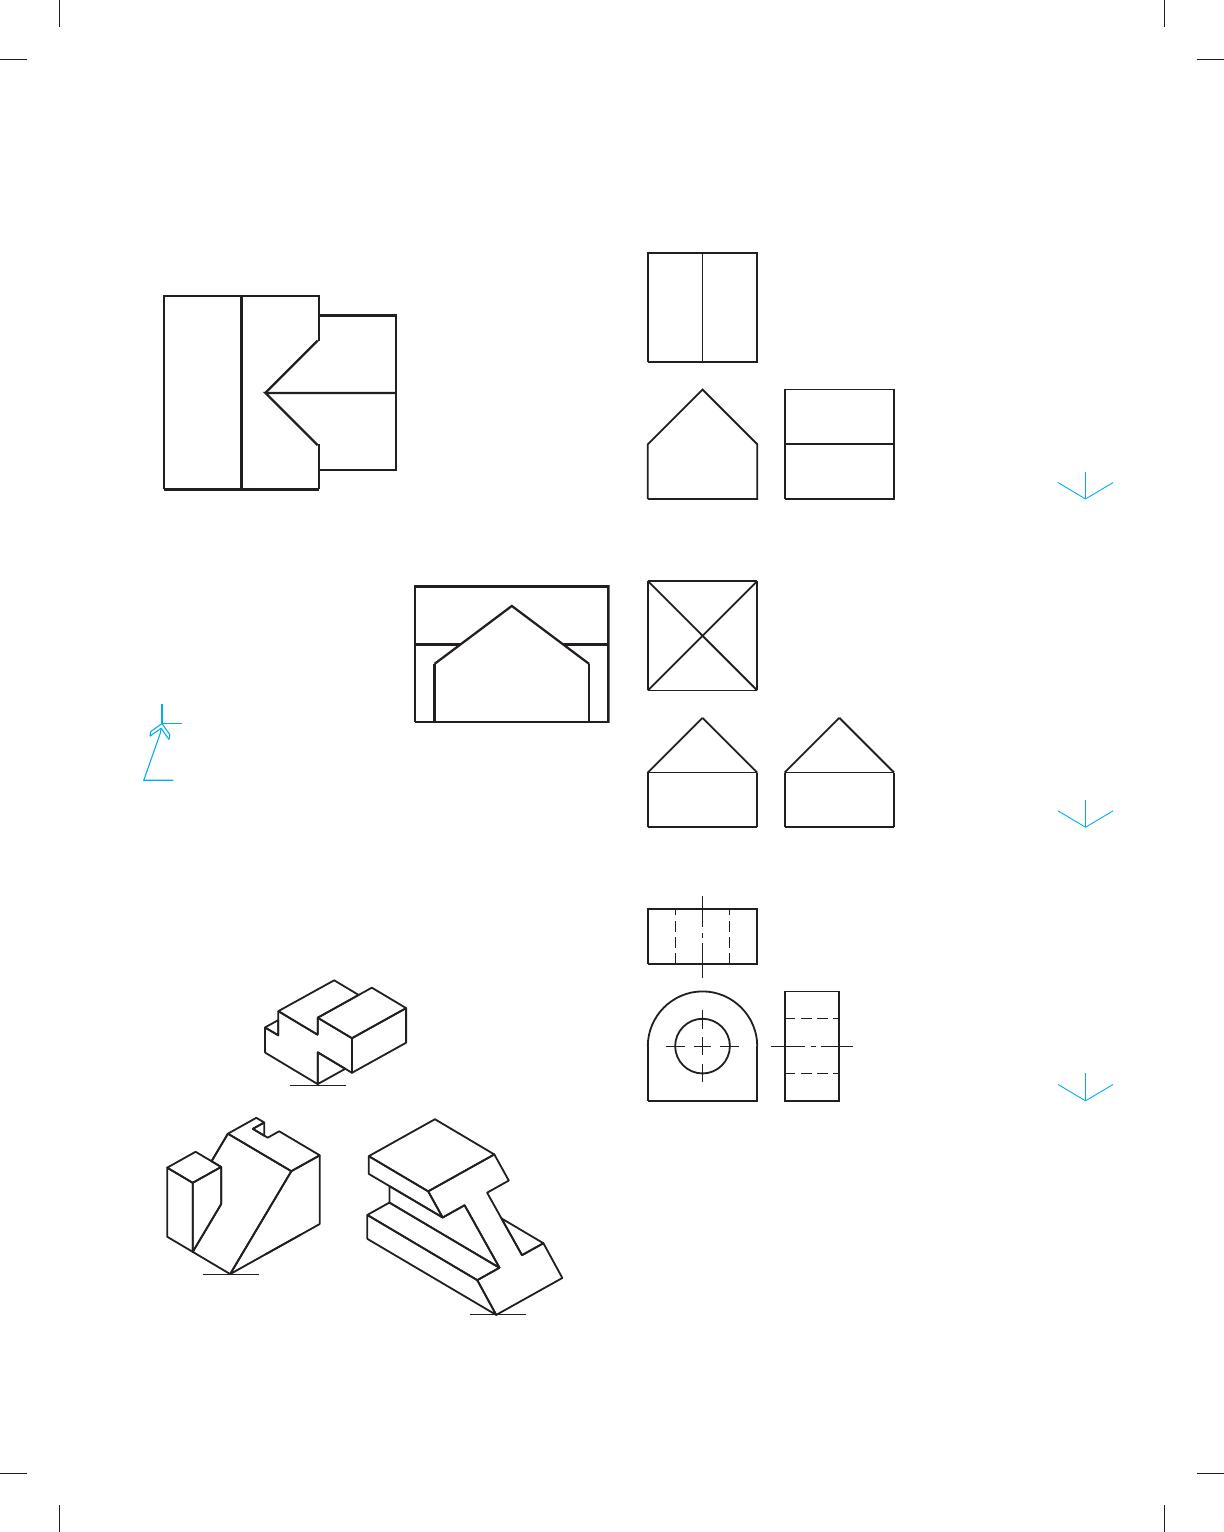
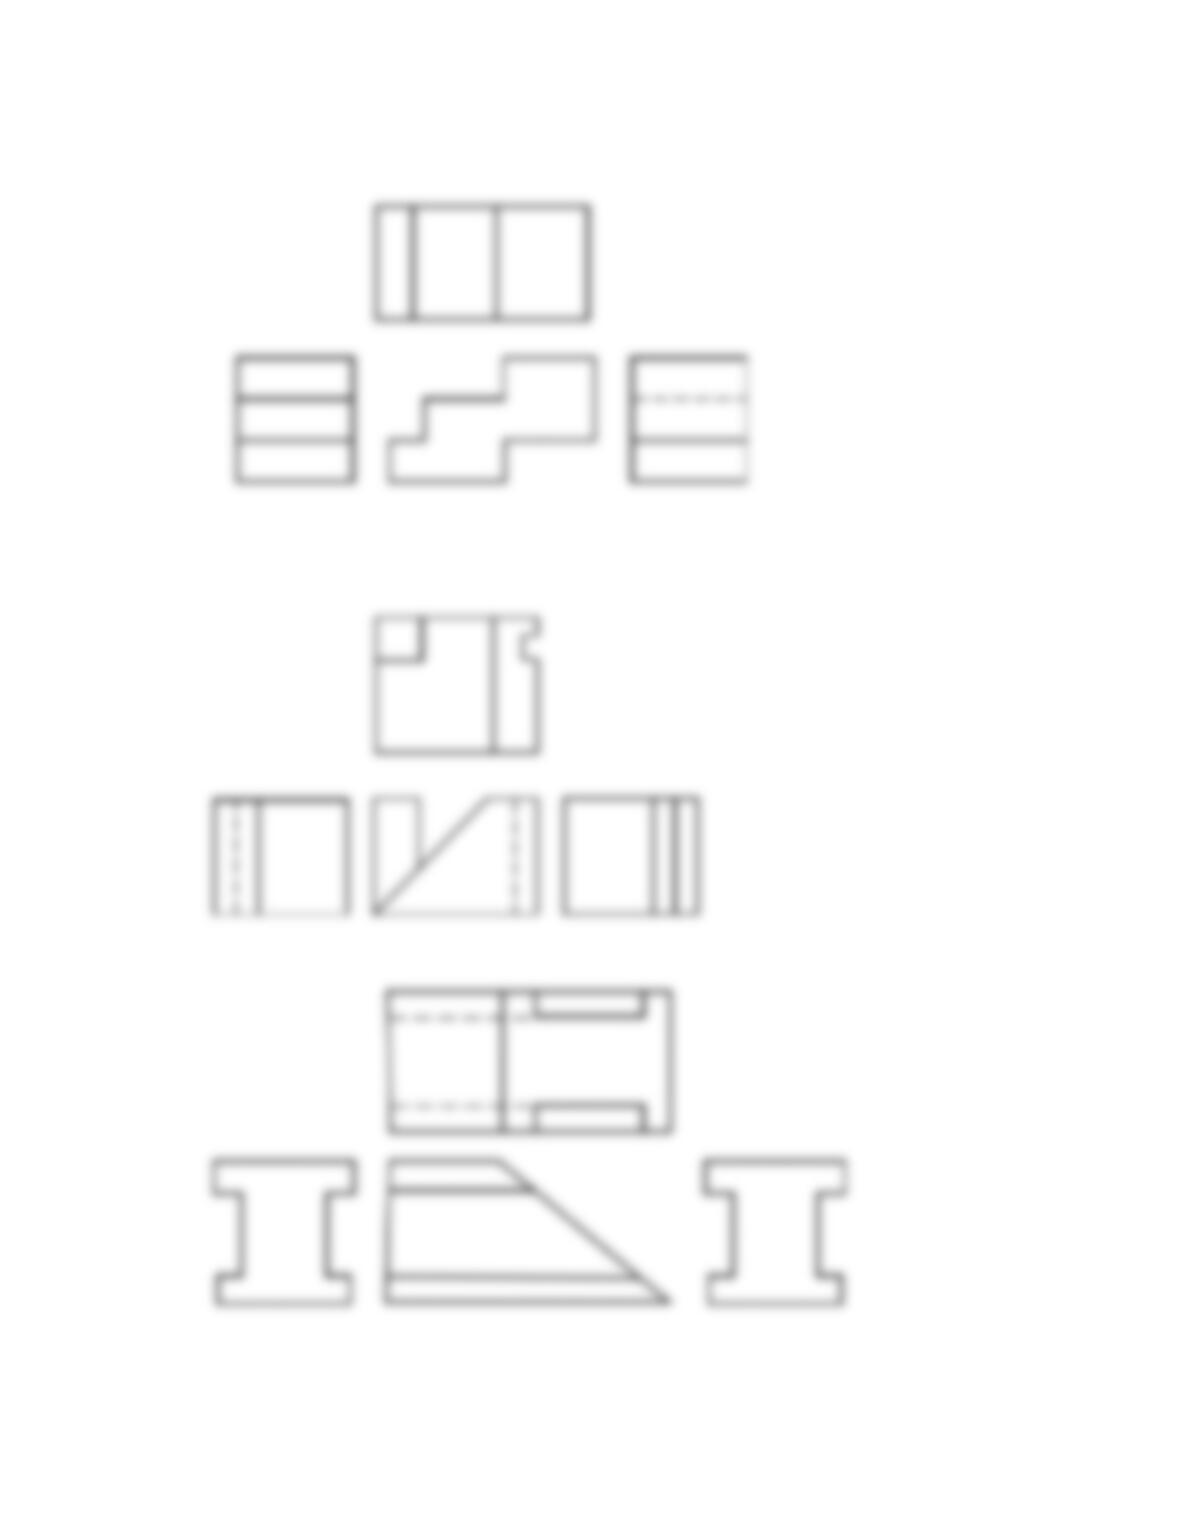
PROBLEM 5.10 Given the three objects in the figure below,
sketch, without measuring, the front, top, and side views of
each. Use the multiview-alignment technique discussed in
this chapter. Make the multiview sketch of each object fill
an 8-1/2 3 11 in. sheet of paper.
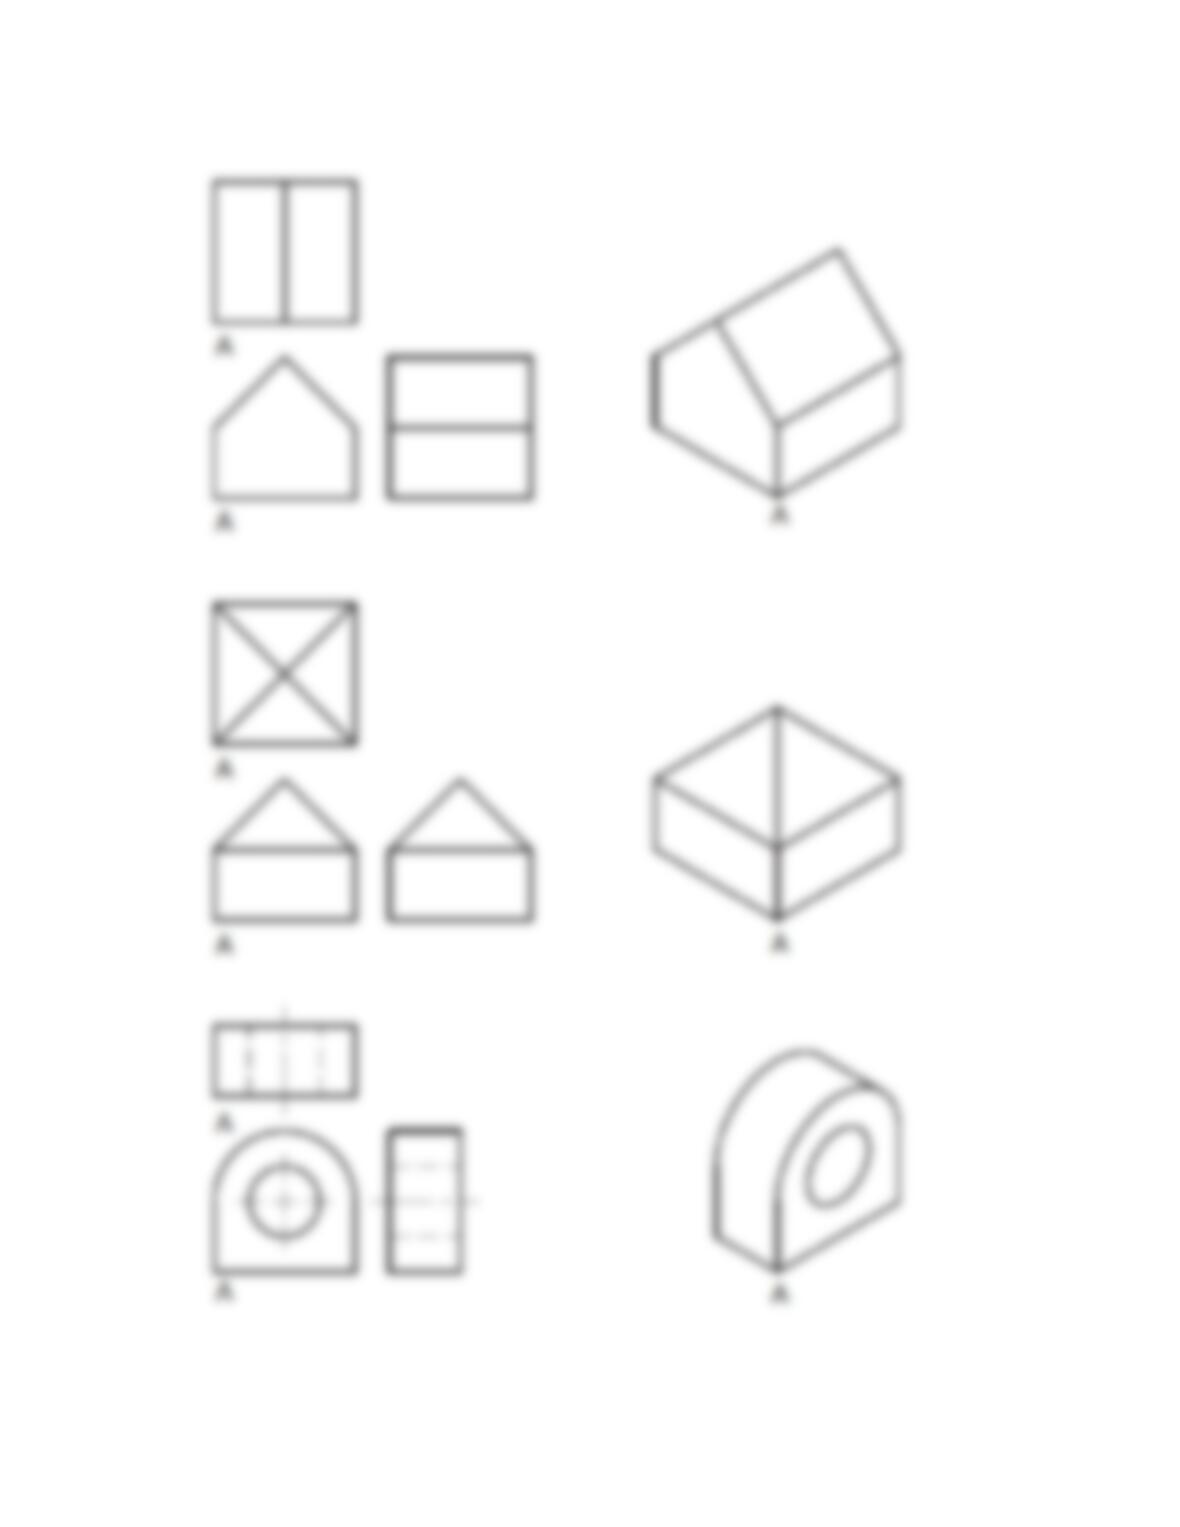
PROBLEM 5.11 Given the three objects below, sketch an
isometric view of each at the adjacent location marked A.
Transfer your sketch to fill an 8-1/2 3 11 in. sheet of paper.
PROBLEM 5.12 Using the same object selected for Problem 5.7,
sketch an isometric representation. Do not measure the ob-
ject but use the measurement-line technique to approximate
proportions.
A
A
A
A
A
A
A
A
A
59728_ch05_EOC_ptg01.indd 3 03/02/16 10:22 am
19
Chapter 5
Sketching Applications
Solutions to End-of-Chapter Problems
Part 1: Problems 5.1 Through 5.6
PROBLEM 5.1 Solutions will vary. The following is a possible solution example:
PROBLEM 5.2
20
PROBLEM 5.5 Solutions will vary.
PROBLEM 5.6
Part 2: Problems 5.7 Through 5.12
PROBLEM 5.7 Solutions will vary.
PROBLEM 5.8 Solutions will vary.
21
PROBLEM 5.10
22
PROBLEM 5.11
PROBLEM 5.12 Solutions will vary.