Cities of Smithville and Bingham – User Guide for Chromebook
For use with McGraw-Hill Education
Accounting for Governmental & Nonprofit Entities
18th Edition
By Jacqueline L. Reck | Suzanne L. Lowensohn | Daniel G. Neely
Table of Contents
Introduction ………………………………………………………………………………………………………………..2
System Requirements ………………………………………………………………………………………………..2
Licensing ………………………………………………………………………………………………………………...2
Cities of Smithville and Bingham Main Window ………………………………………………………………9
Adding and Posting Journal Entries …………………………………………………………………………… 10
Editing / Deleting / Unposting Journal Entries …………………………………………………………….. 12
Working with the Ledgers Screen ……………………………………………………………………………… 14
Working with the Detail Journal Screen ……………………………………………………………………… 14

Cities of Smithville and Bingham software is designed to be used with the McGraw-Hill Education
textbook Accounting for Governmental & Nonprofit Entities, 18th Edition.
System Requirements
To use the Cities of Smithville and Bingham accounting software application, you must have one
of the following Operating systems:
• MS Windows 7
• MS Windows 8
• MS Windows 8.1
• MS Windows 10
• OSX 10.10 – Yosemite
• OSX 10.9 – Mavericks
• ChromeBook
Licensing
The Cities of Smithville and Bingham software and manual are copyrighted, with all rights
reserved. It may not be copied, except as otherwise provided in your software license or as
expressly permitted in writing by McGraw-Hill Education.
Use of the Cities of Smithville and Bingham governmental accounting software and its
documentation are governed by the terms set forth in your license. Such use is at your sole risk.
The software and its documentation are provided “AS–IS” and without warranty of any kind.
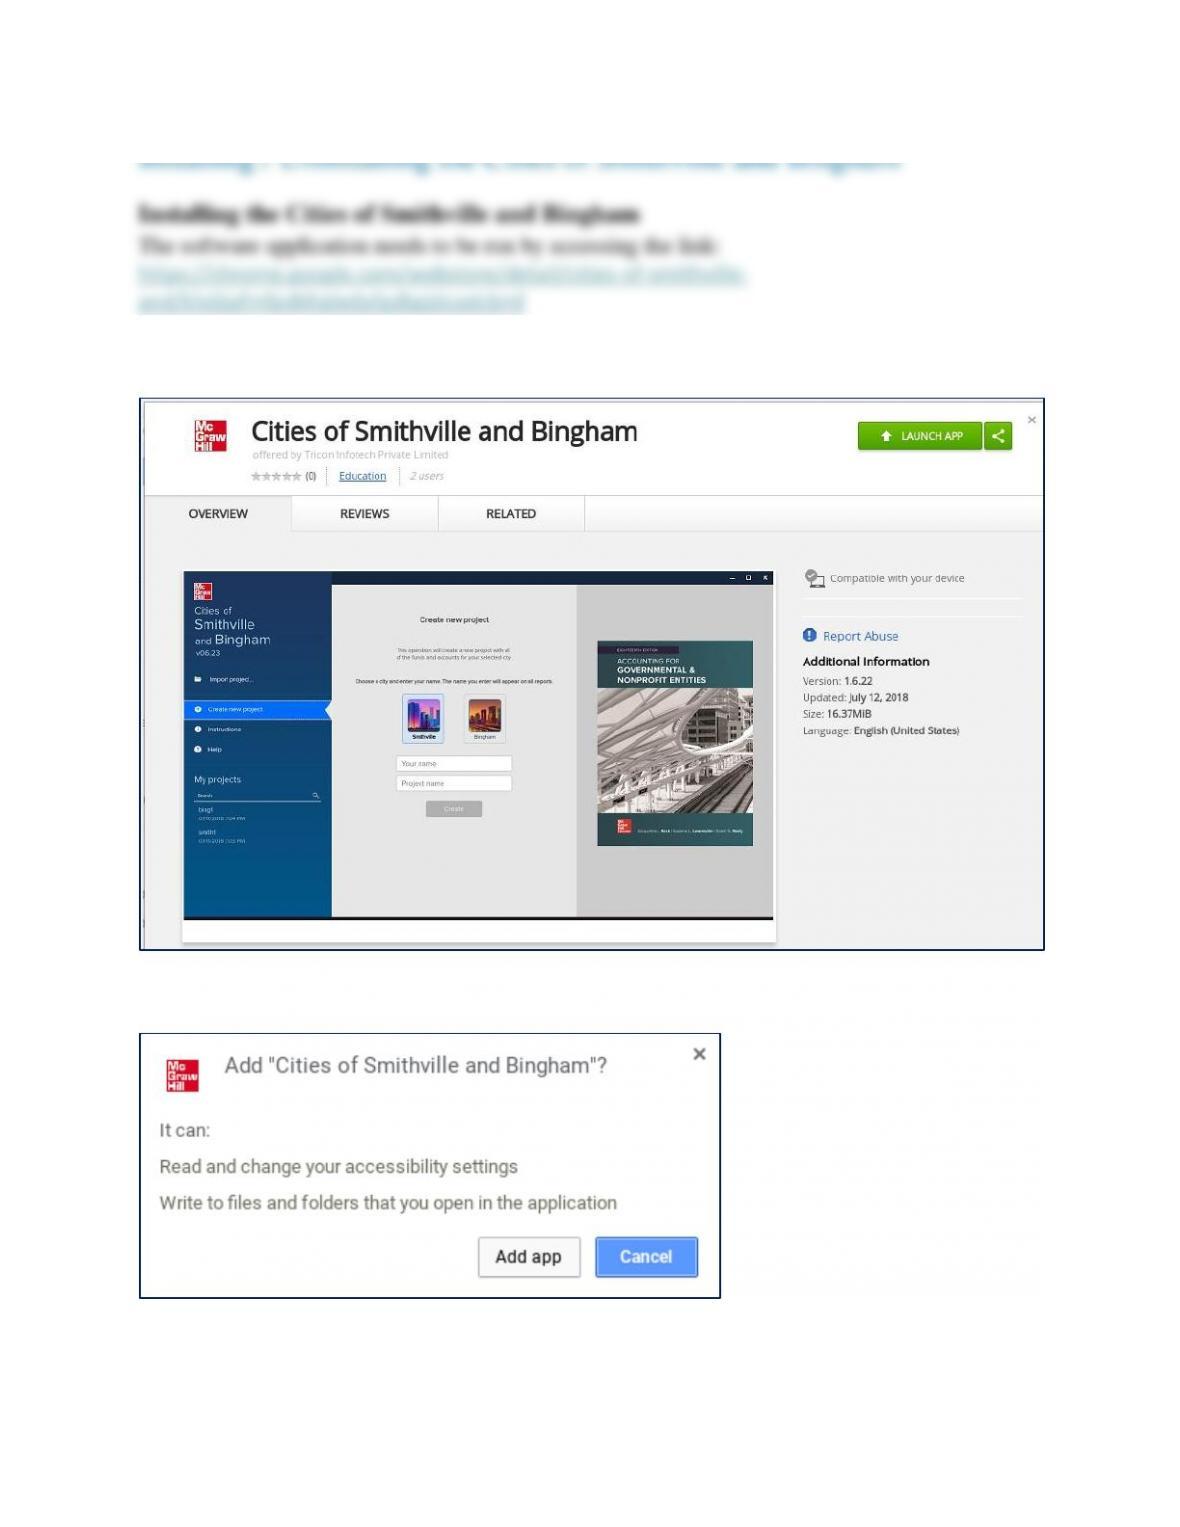
Chrome Extension will open as shown below:
Clicking on Launch App will display a pop up to confirm adding application as an extension, as
shown below:
Click “Add App” button
This will launch the “Cities of Smithville and Bingham” Application.
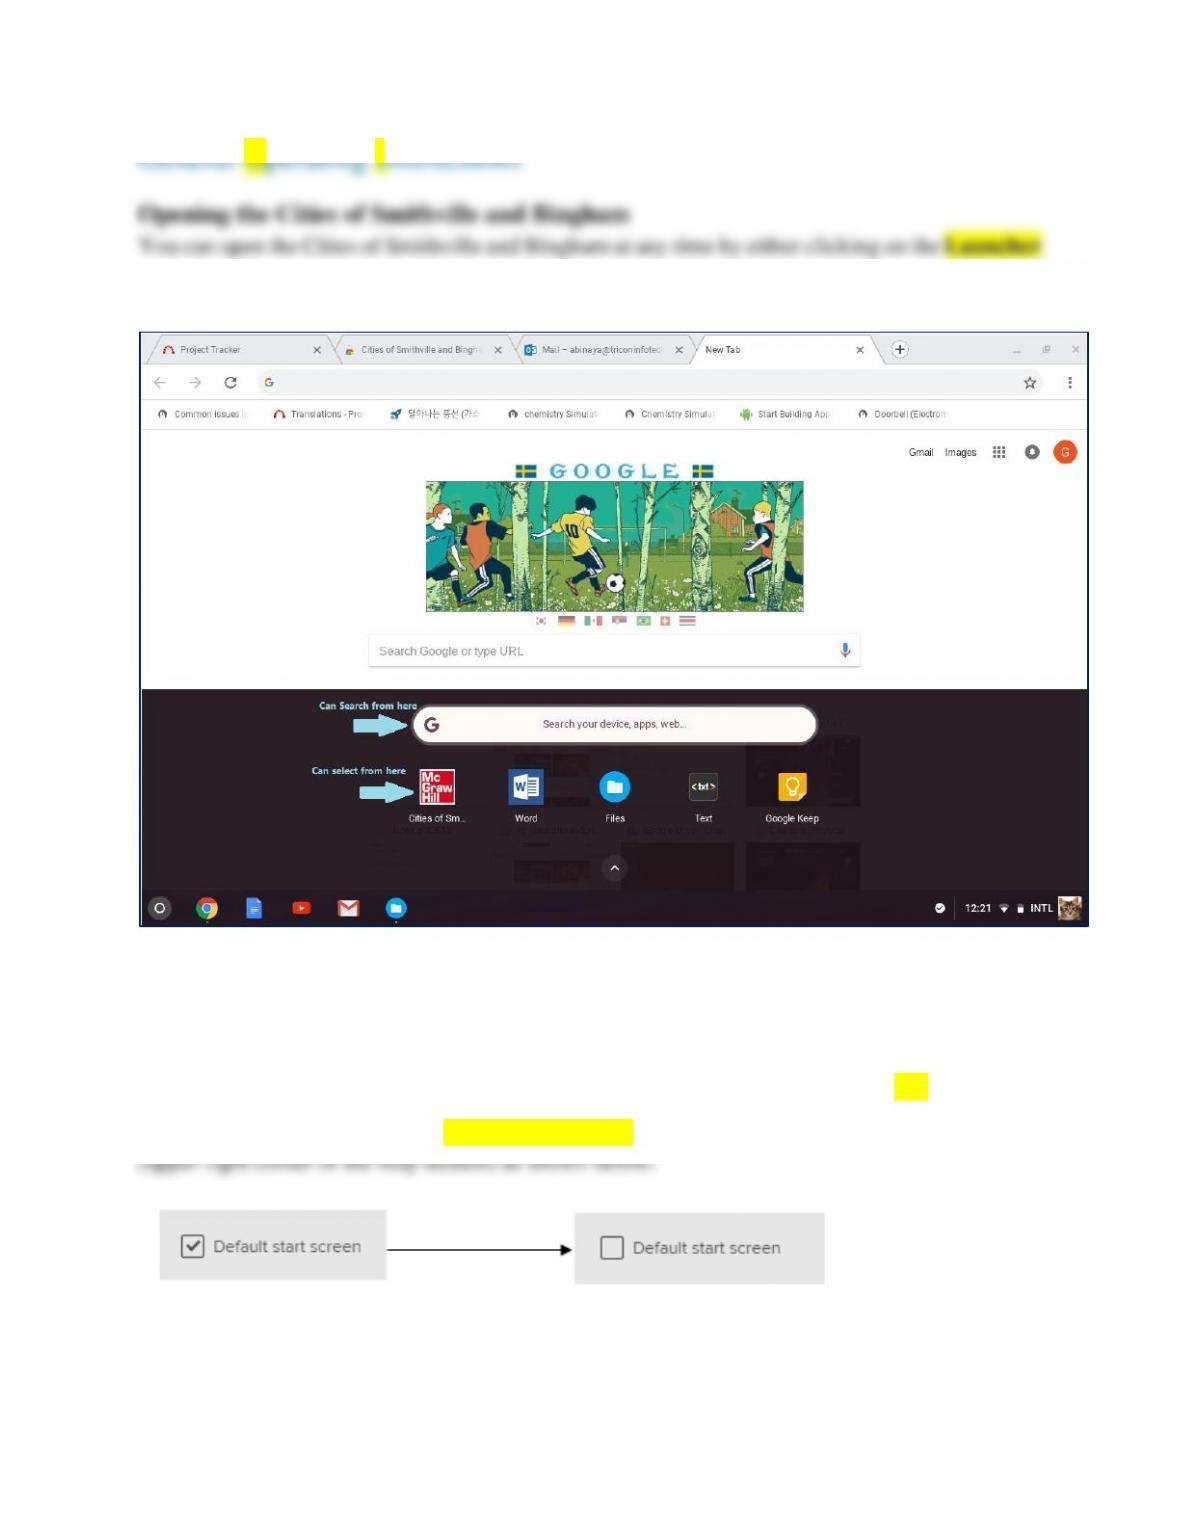
and searching for it or selecting it from recently opened apps (as shown below):
Creating a New Project
You will see Help section (by default), once the application is opened. This Help section will also
be available on the navigation bar of the main window of the Cities of Smithville and Bingham.
To change the default section to Create new project section, you need to uncheck the checkbox
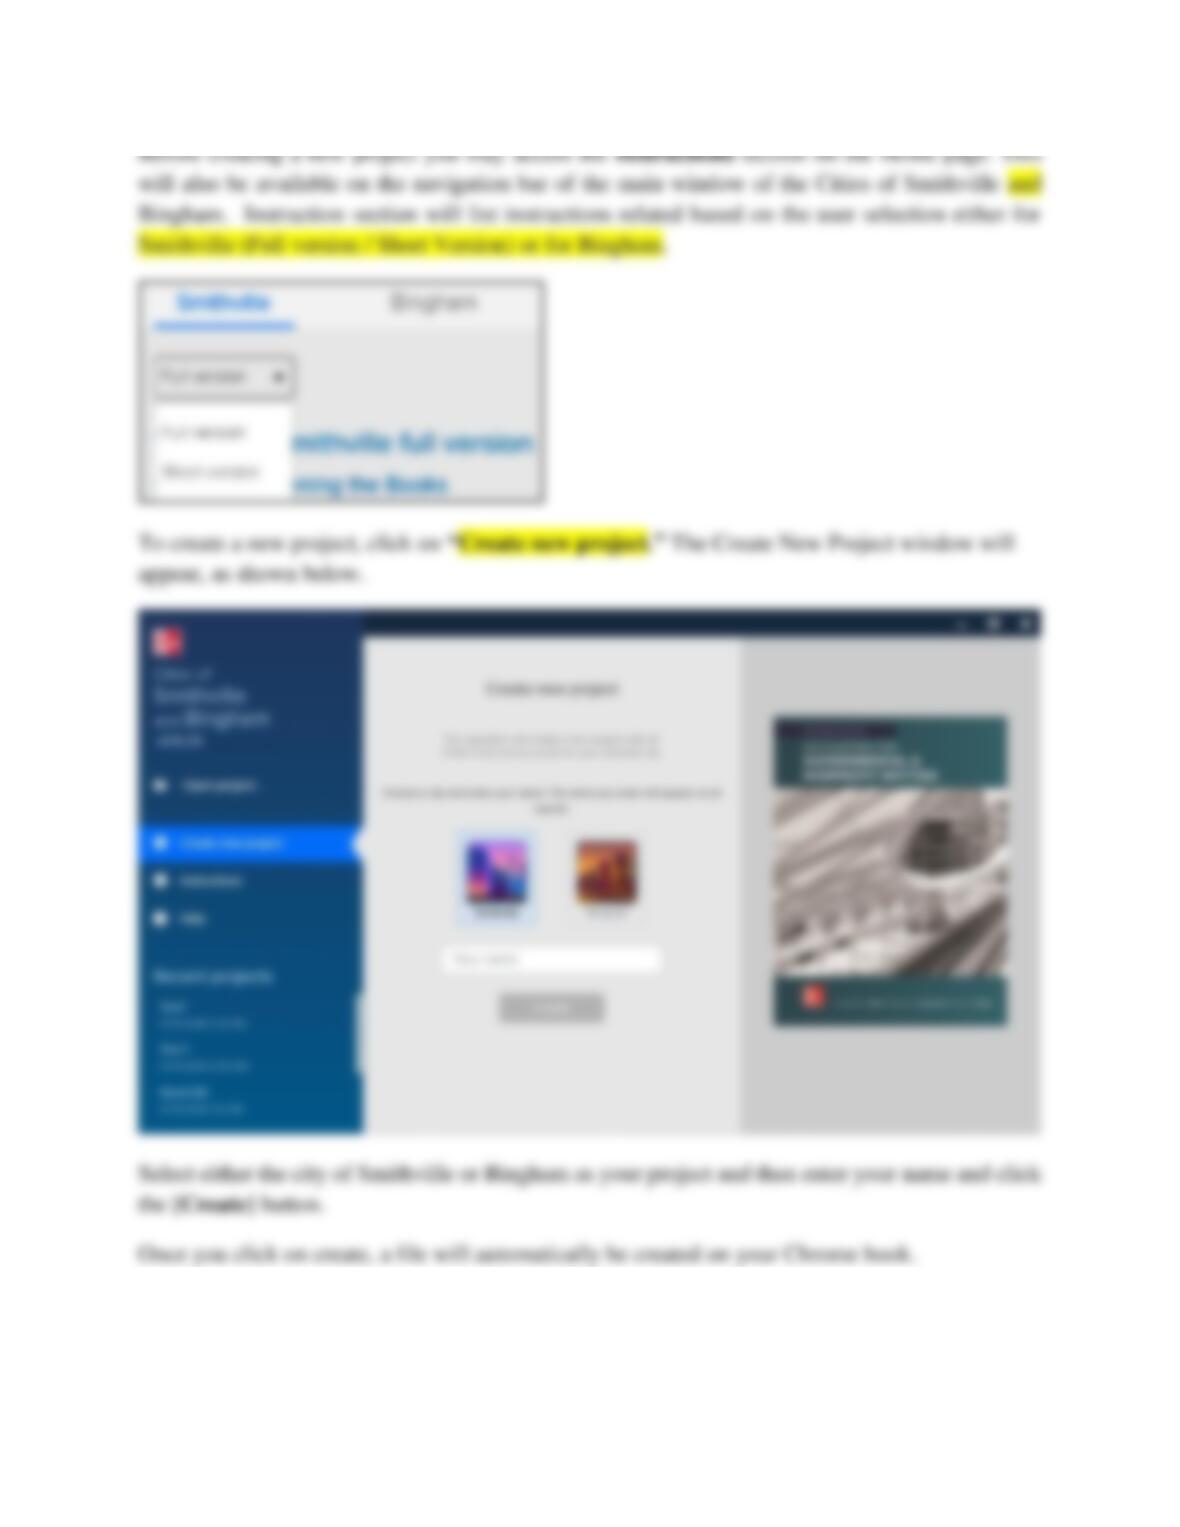
The main project window will pop-up once the project is created and you will be ready to begin
entering journal entry data for your first assignment. This data gets saved automatically.
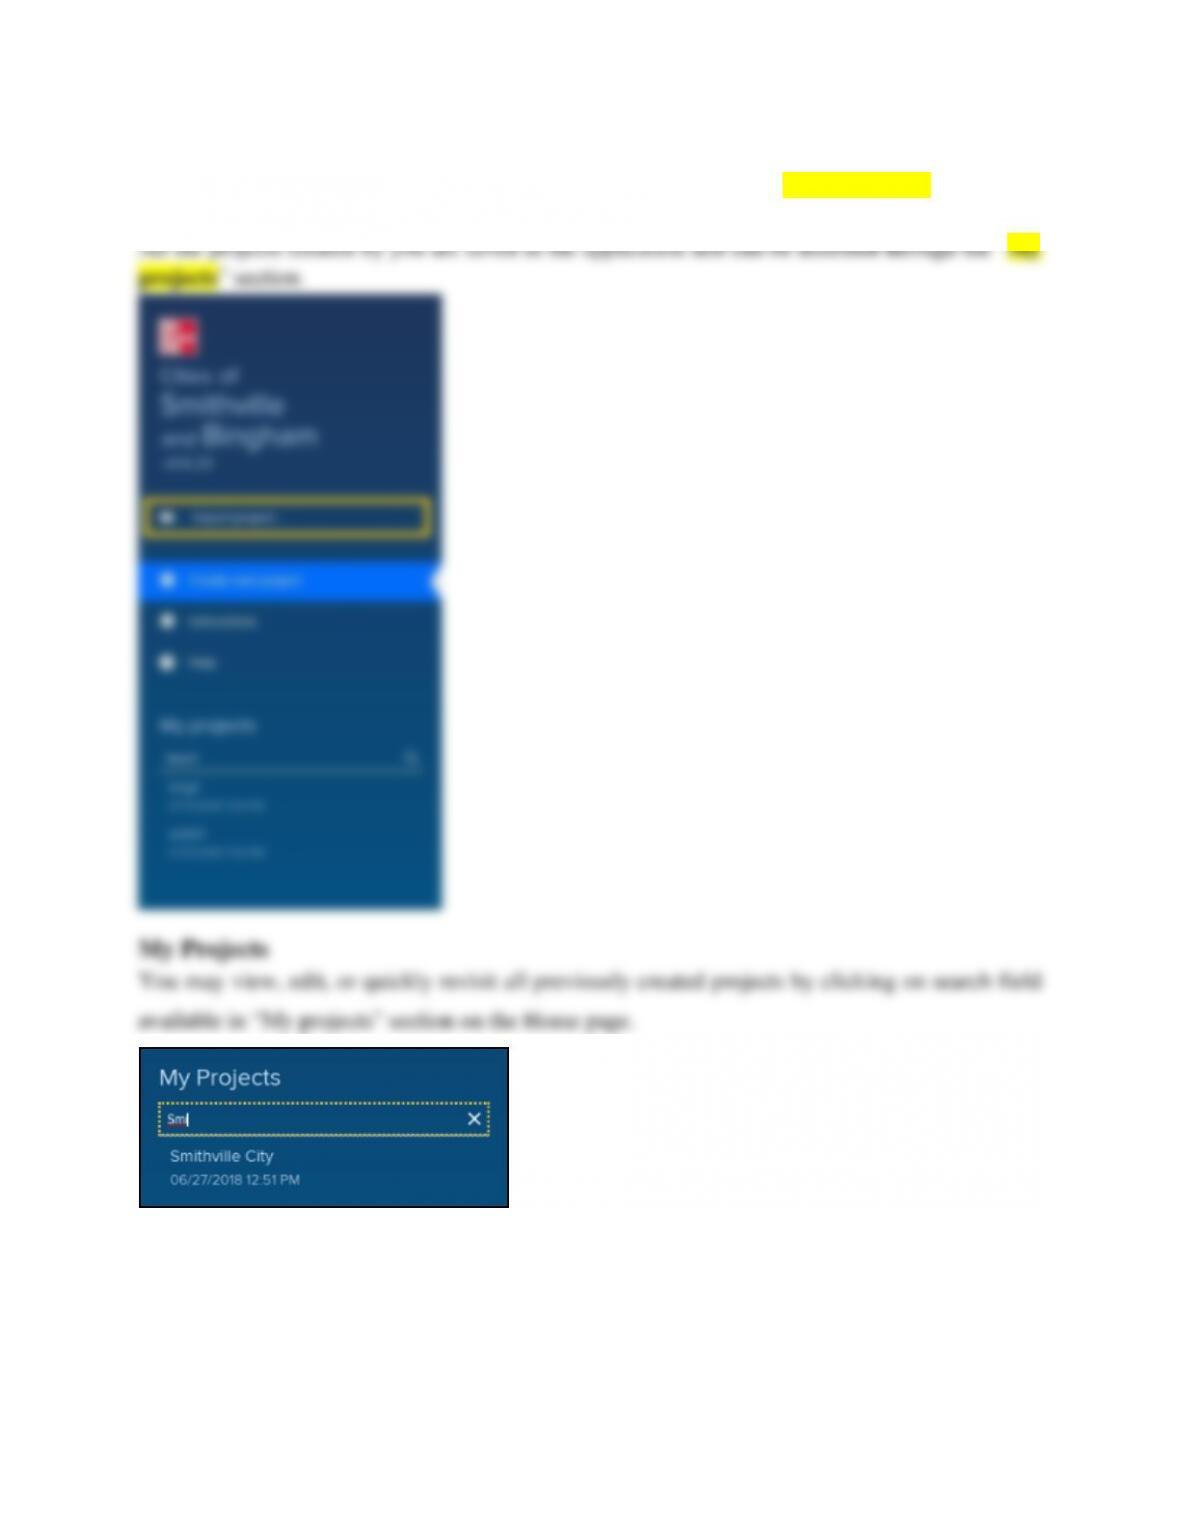
Import an Existing Project
If you want to import the project from your Chrome book, click on “Import project” and select
the file. You will be redirected to application main screen where journal entries can be created.
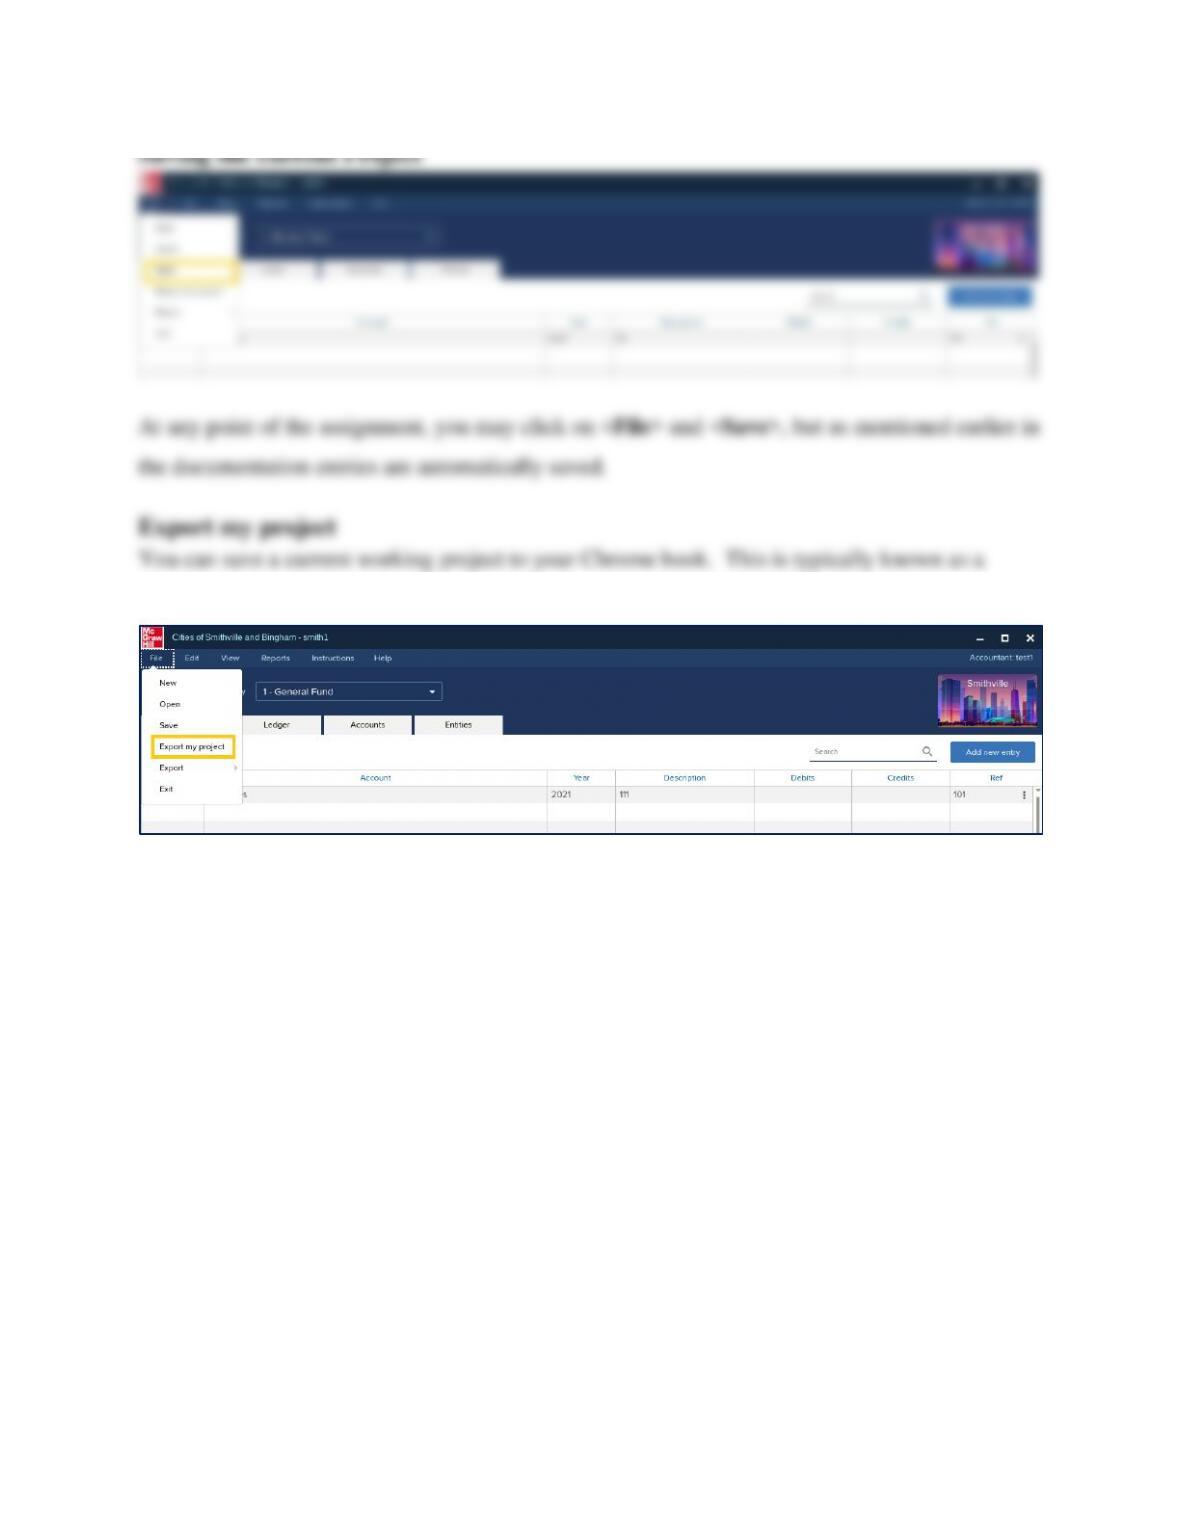
“Save As”.
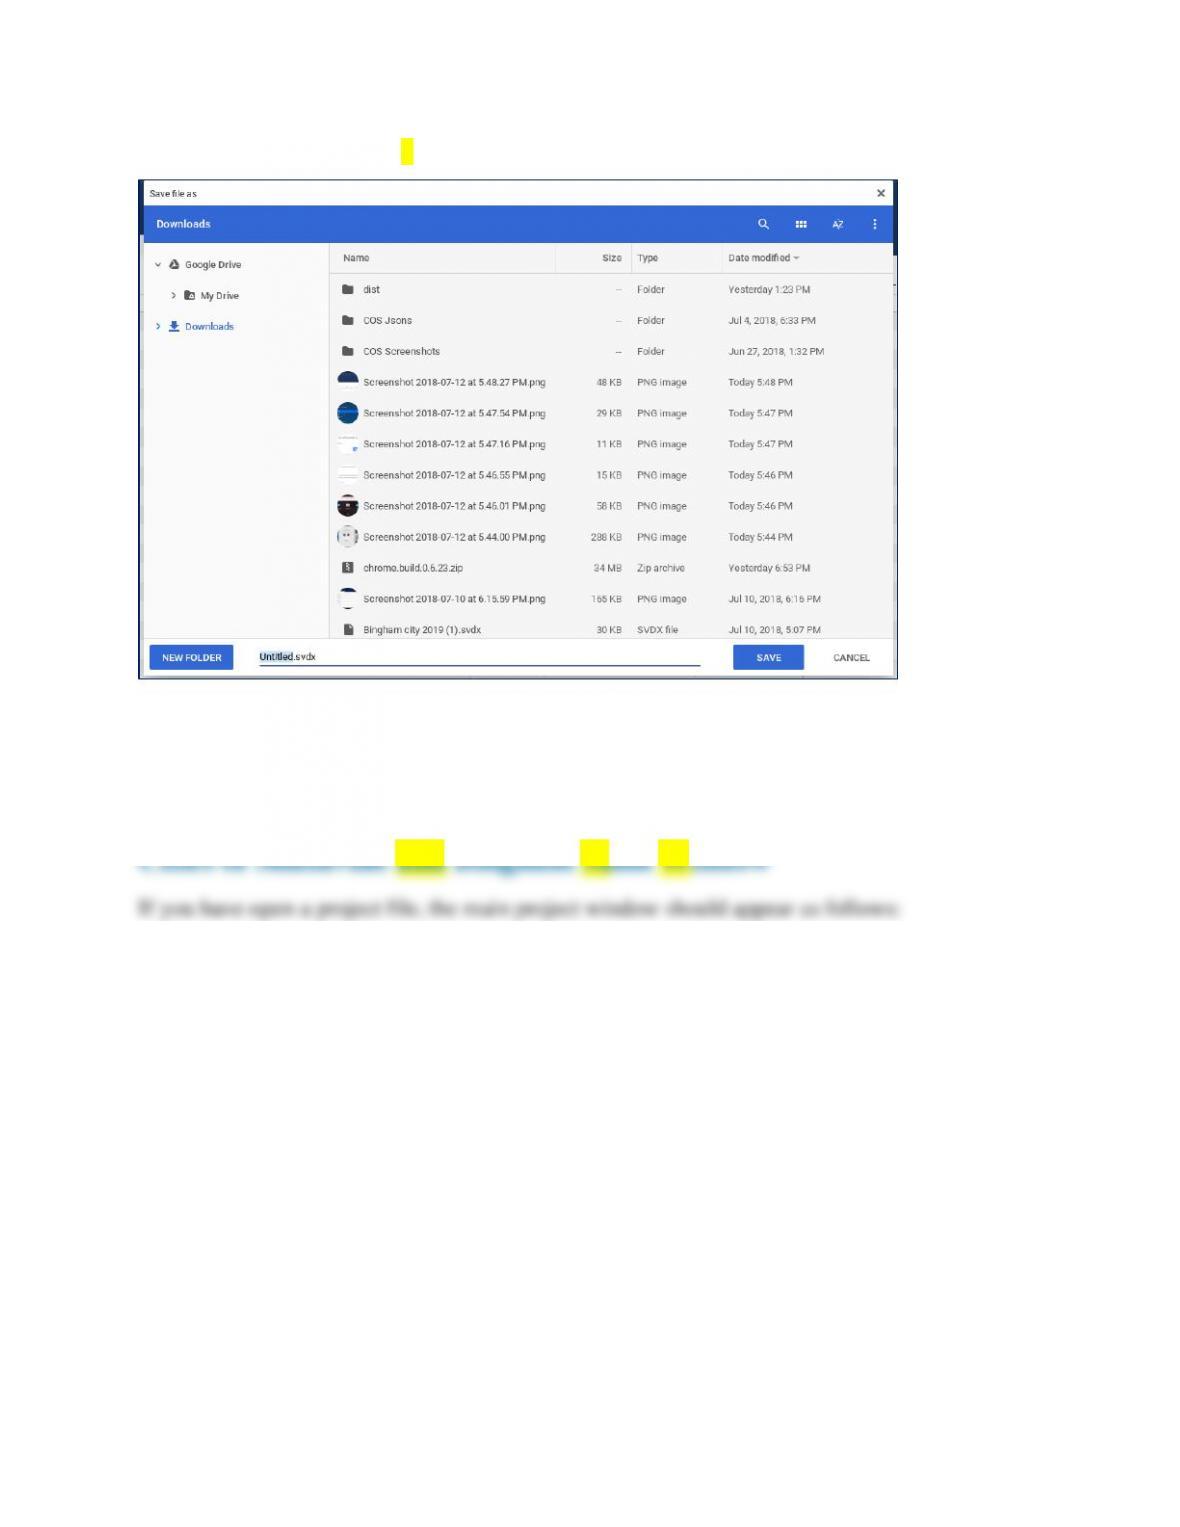
When clicking “Export my project”, the pop-up window will open as shown below:
Choose a name for the file and click on the save button. Once the export is completed, any
updates made will continue to be made to the original file and will not save to the exported
project. If you want to make changes to the export, open that particular export file.
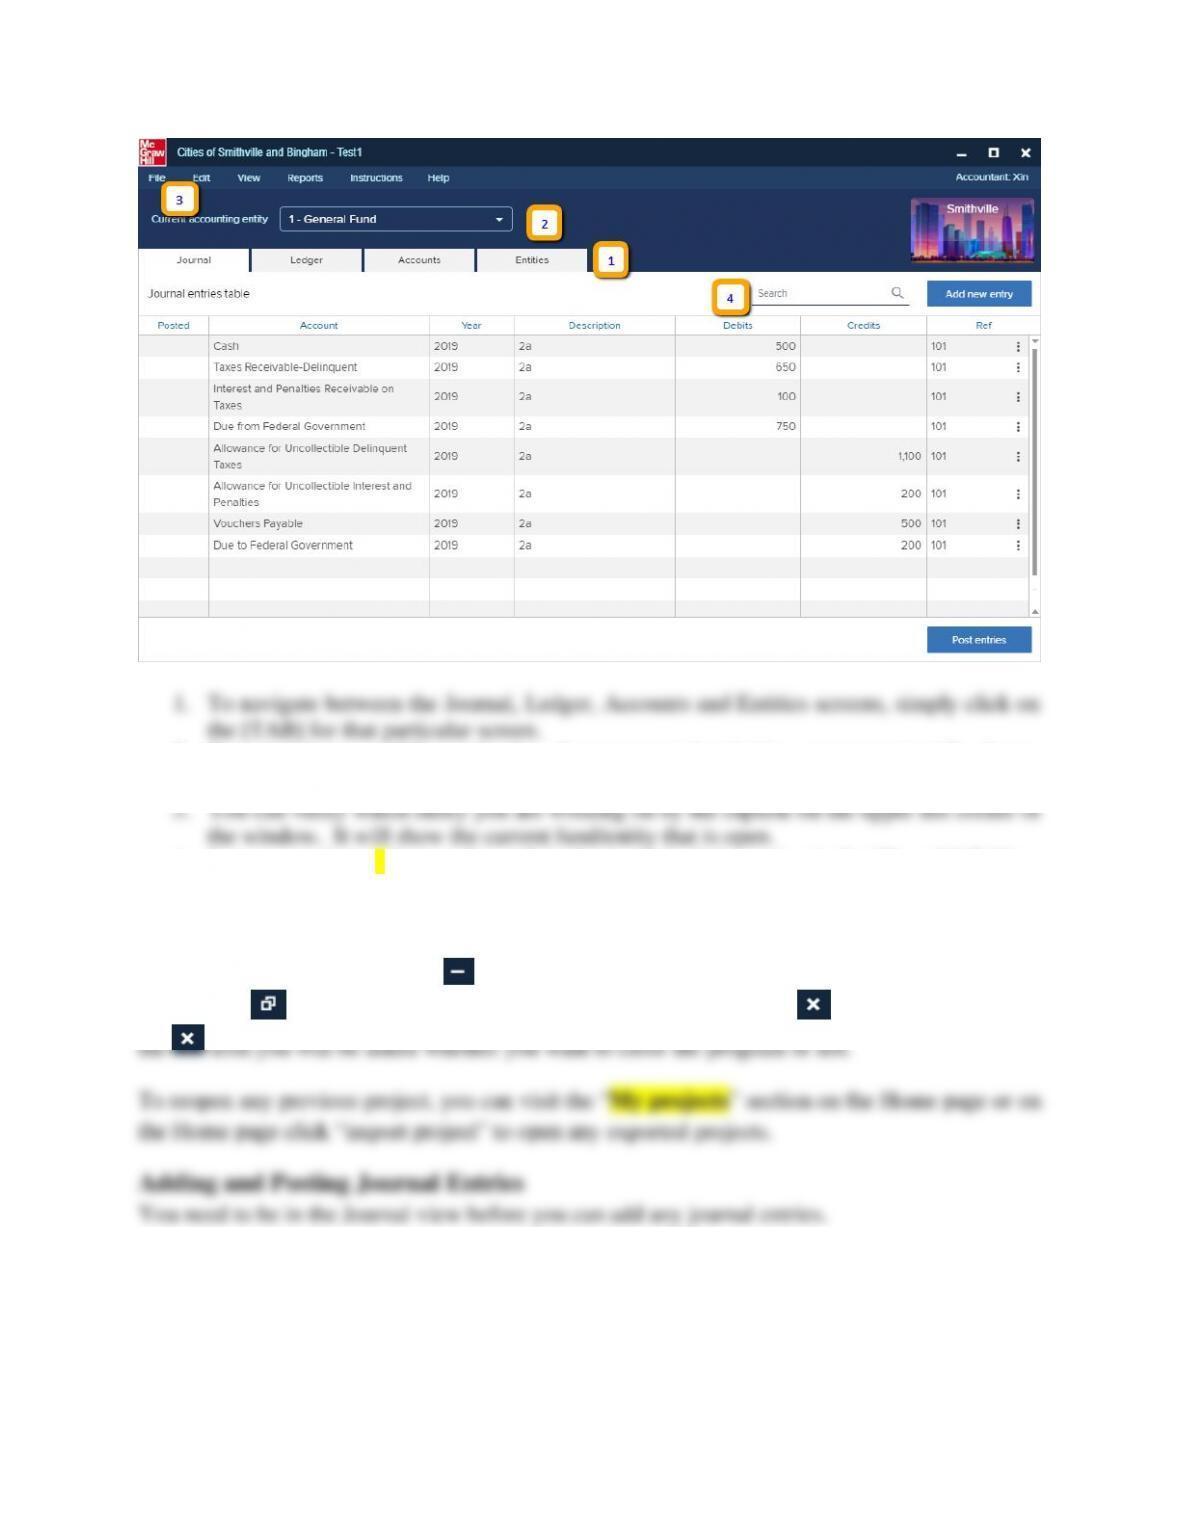
2. To switch between different funds and governmental activities, government-wide, choose
the desired entity from the drop-down menu.
4. You can perform a keyword search in the Journal tab by typing in the “Search” field on
this screen.
The main window has the same standard window controls as most other applications. To
minimize the screen click on the icon on the upper right corner. To maximize your screen,
click on the icon. To close down your project, simply click on the icon. If you click on
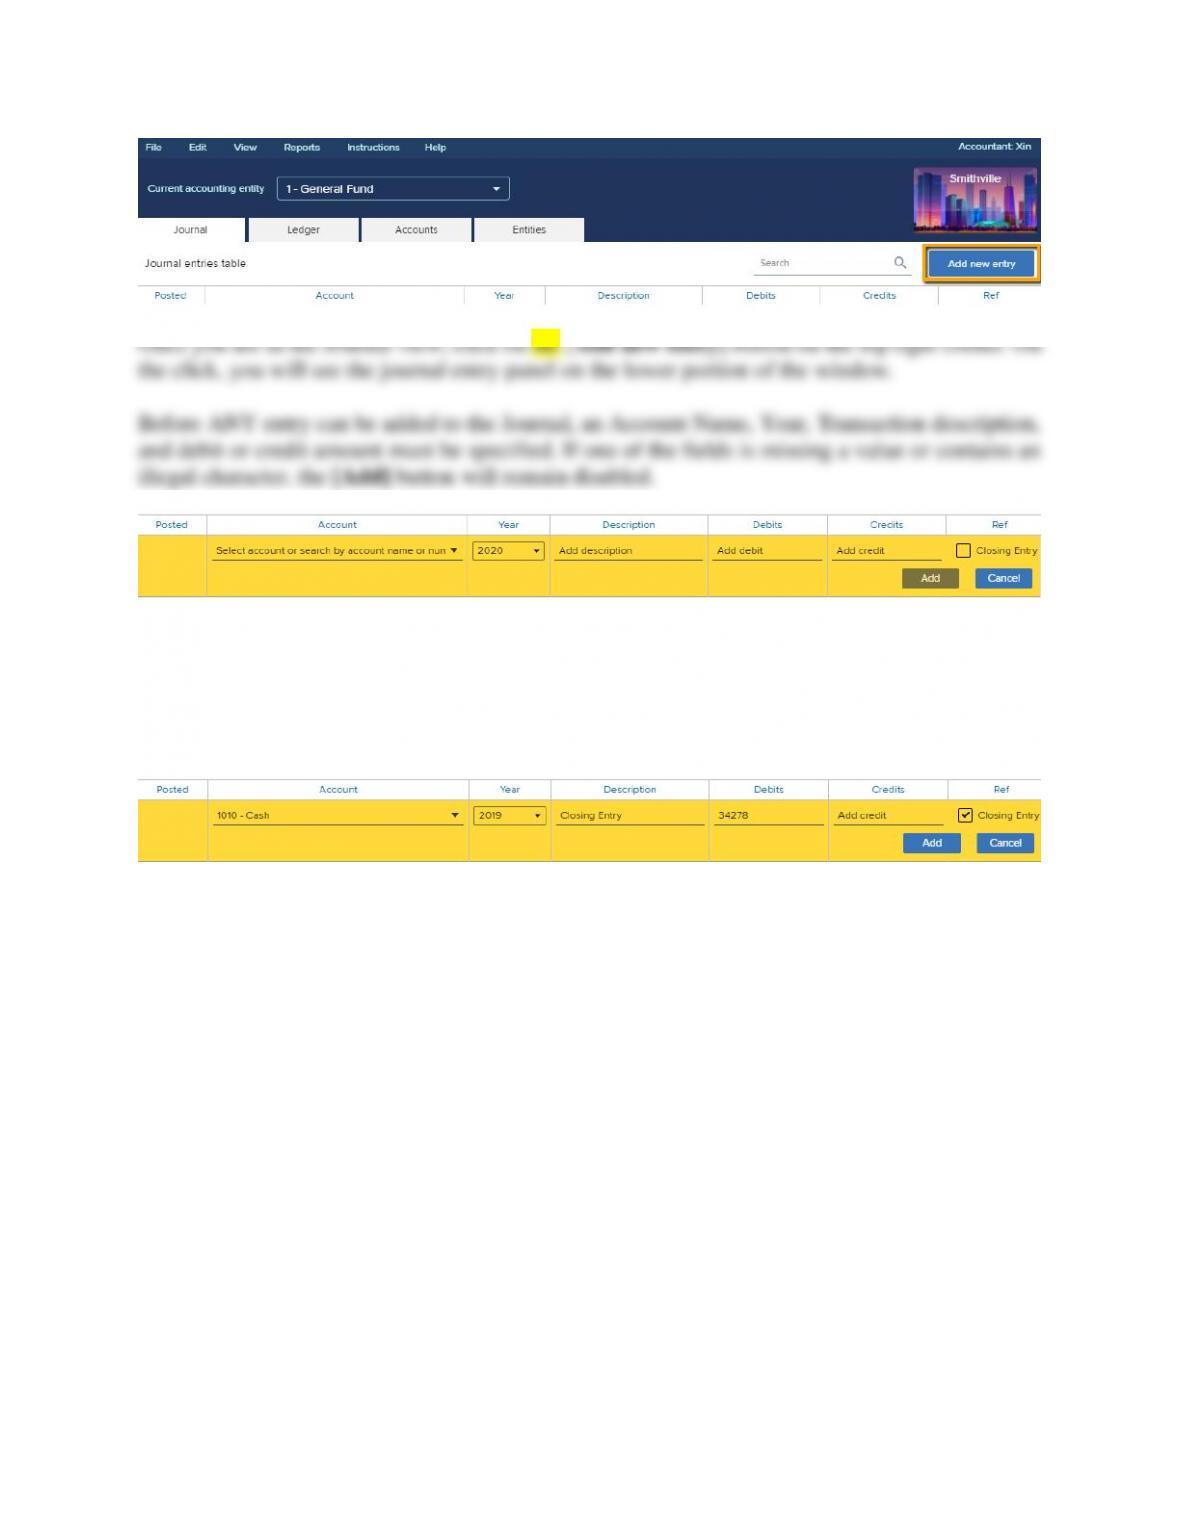
Once you have entered the necessary fields, the [Add] button gets activated. Simply click on [Add]
to add the entry to the journal. If the entry being made is a closing entry, you must click on the
check mark for [Closing Entry]
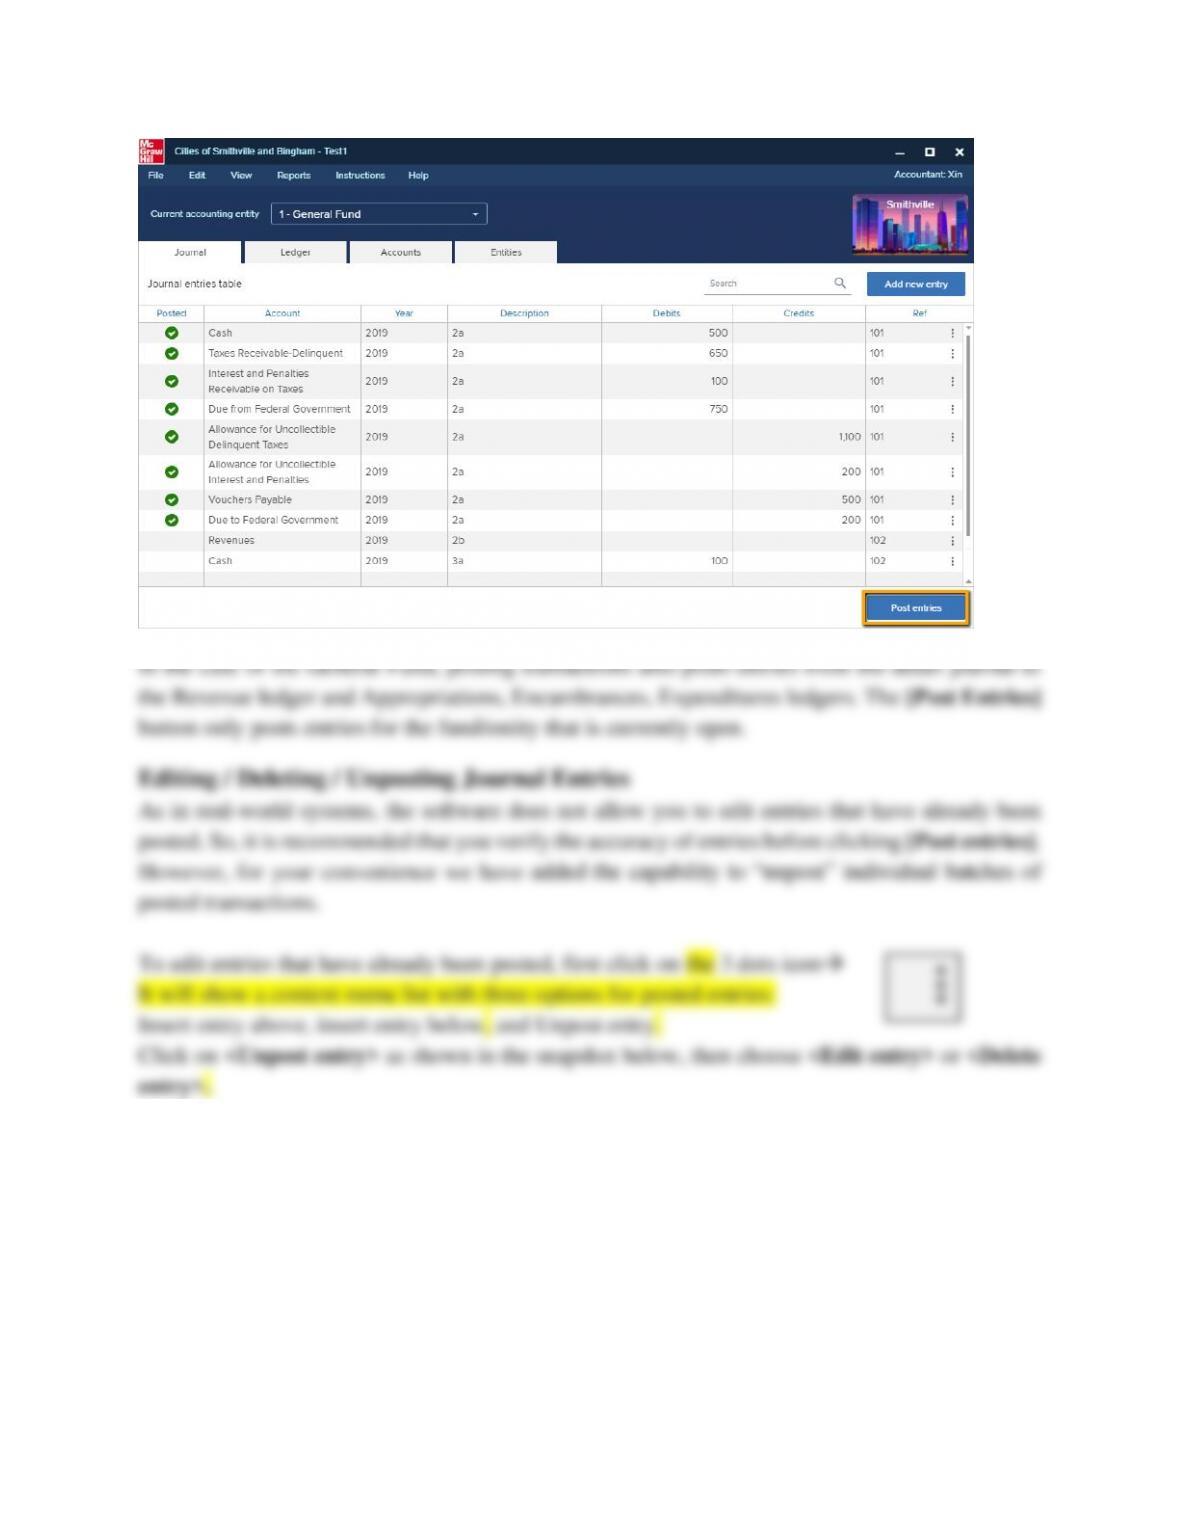
Once you have entered a batch of entries into the system, you can post them to the general ledger
at any time by clicking the [Post Entries] button.
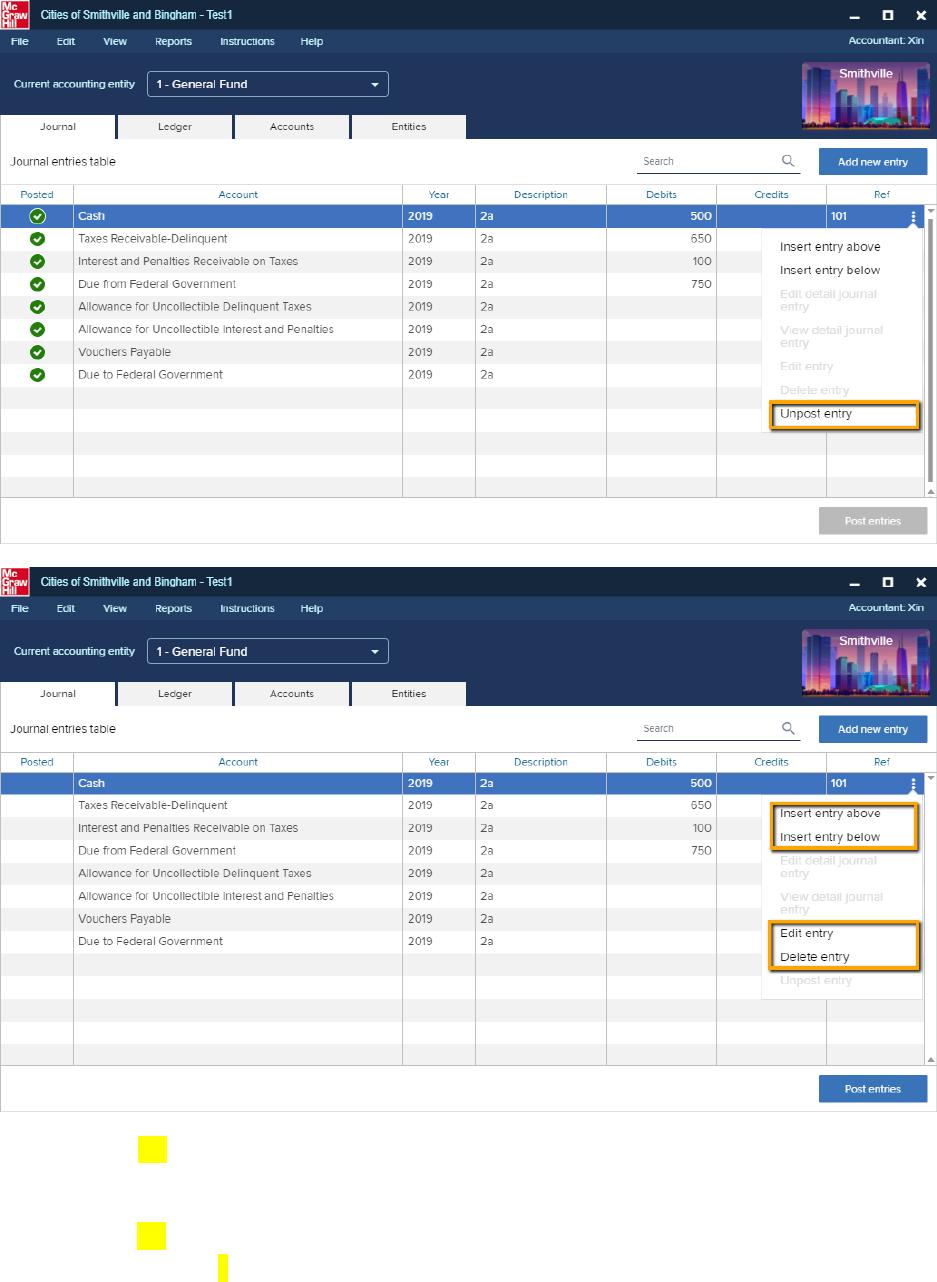
1. Select the <Edit entry> option to allow you to go in edit mode, once the entry is edited,
click the [Save] button to save the entry.
2. Select the <Delete entry> if you wish to delete an entry. It will prompt “Are you sure you
want to delete?” Click [Ok] to delete that journal entry or [Cancel] to cancel your action.