1
Respiration Lab 4
Home-Made Manometer (Noncadaver Lab)
To the Instructor:
This lab shows your students how to make and use a manometer. This is actually a pretty
convenient clinical tool that I have used quite a bit. It can be taken home with a client as a way
for him or her to monitor progress in improving subglottal pressure.
Materials required to make a manometer:
plastic cup
tape
Respiration Lab 4
Home-Made Manometer (Noncadaver Lab)
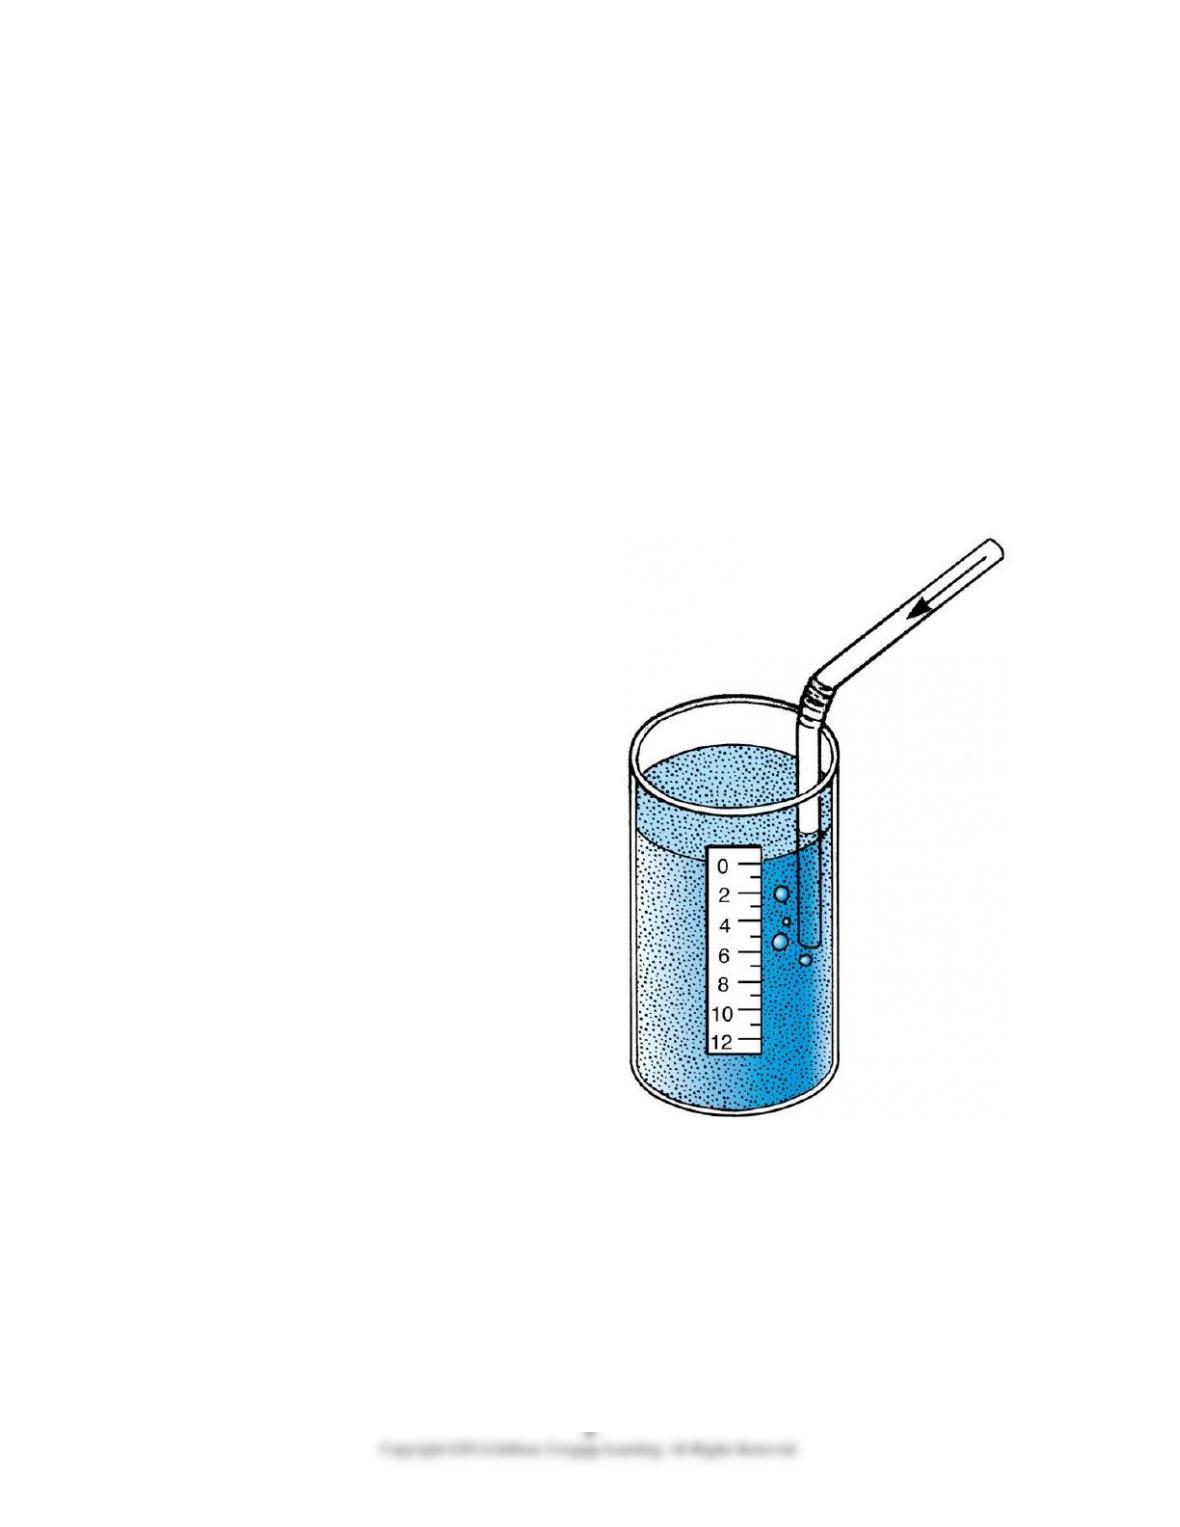
Remember that intraoral pressure is equal to alveolar pressure if the vocal folds are open. The
vocal folds require 3–5 cm H2O pressure sustained for around 5 seconds for soft speech. A
manometer is a way to test that ability.
Stick tape on the side of the cup, running from top to bottom. Place a mark about 1 cm from the
top, and label it “0.” Now use the ruler to mark 2-cm increments down the tape.
Fill the cup with water to the 0-cm mark. Poke a pinhole in the straw as a bleed hole. (This
portion should not be submerged in the water; the bleed hole accounts for airflow, which is
negligible in the task without the hole.) Now
push the straw down in the water and blow
bubbles.
The level to which you can blow bubbles
(typically the entire glass for a normal, healthy
person) indicates the minimum pressure you can
generate. Now take a small inhalation (you can
try a tidal inhalation) and then exhale passively
into the straw. You will get virtually no
movement at 2 cm. If you inhale more and
passively exhale, you can demonstrate greater
pressures, but you will not be able to sustain
them. This may start to give you a notion of
relaxation pressures, as well as the force required
to generate pressure. A person with significant
spastic paralysis may not be able to sustain 2 cm
for more than 1 or 2 seconds, at best. This is a
great device for treatment as well as assessment.
© Cengage Learning 2014