Basic Course Access Instructions for AWS Workspaces
For the CIS 360 course, you are being given access to an Amazon Web Services virtual workspace to work in. This
environment will have SQL Server, Tableau, Office and ACL within to facilitate your coursework.
DOWNLOADING WORKSPACES CLIENT AND CONNECTING TO CIS360 COURSE
Go to https://clients.amazonworkspaces.com/ and download the workspaces client for your devices operating system
and run the installer.
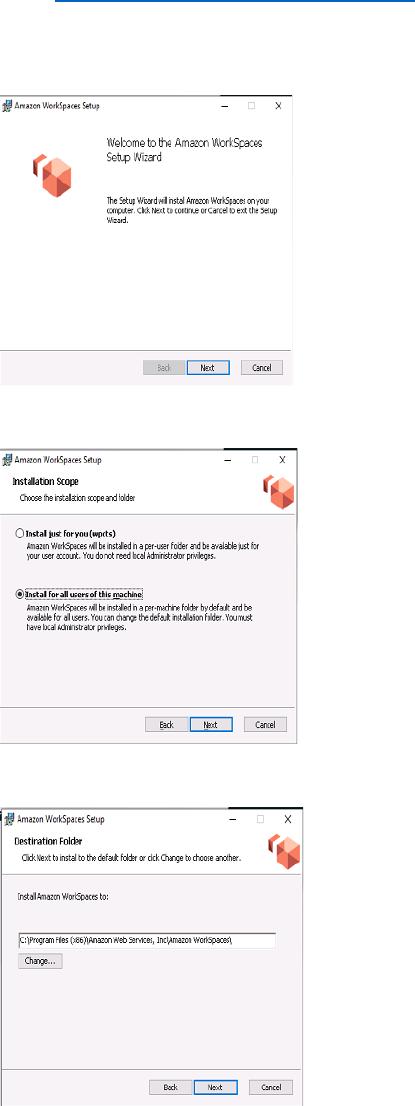
1. Click Next.
2. Select install for all users of this machine
3. Click next to install the program in the default directory
4. Click “Install” then Finish.
5. Open Amazon Workspace. You will be prompted to enter the registration code specifically for the CIS360 class…
Registration code = WSpdx+Q3BRLF
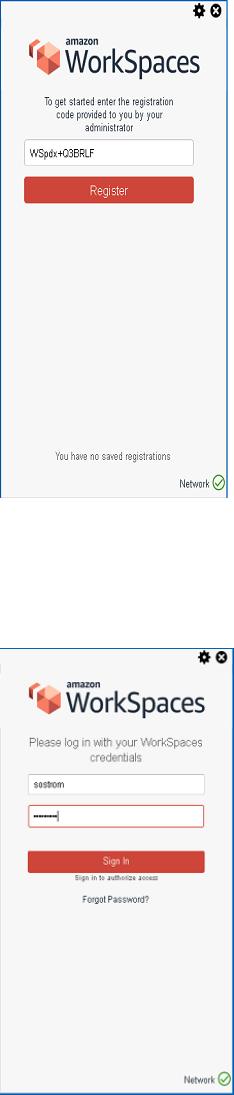
6. Click the Register button when ready for login. The program will the prompt for a username and password. You
will receive this information via an automated email from ‘donotreply@cloud.wpcarey.asu.edu’. Usernames are based
on your ASURITE ID, and the password is randomly generated with 8 characters. Enter your info and click “Sign In” to
launch the workspace.
***NOTE: The workspace environment can take about 5 minutes to launch. Each workspace is set to go to sleep after 1
hour of inactivity. You can experience an up to 5 minute delay when relaunching. The workspace window may produce
an error of “Not Connected” when relaunching the environment. Be sure to give it about 5 minutes before attempting
to log back in to your Workspace.
Should you get a Firewall error indicating that anything is blocked, check all the given program boxes and Allow Access.
If you get a message in the Virtual Desktop that asks if you want your PC to be discoverable, you can click Yes if you are
not using a public computer.
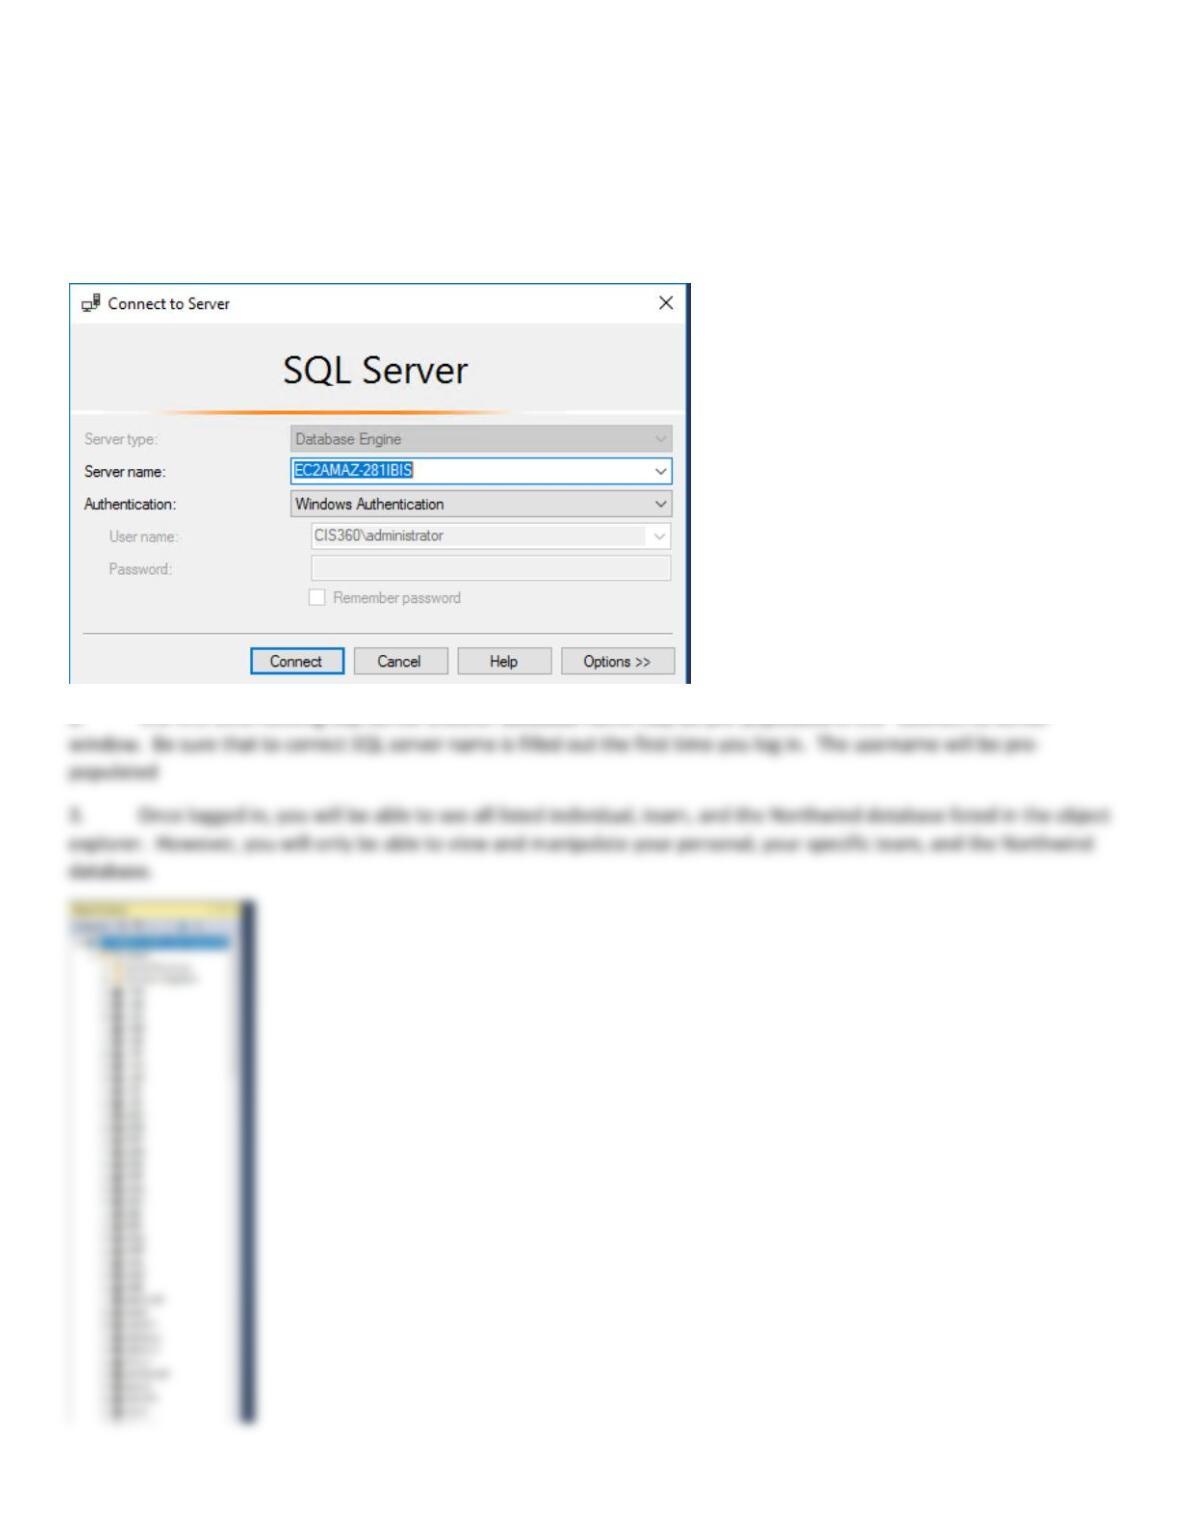
CONNECTING TO DATABASES WITH MICROSOFT SQL SERVER MANAGEMENT STUDIO
You have been given access to a Personal Database named after your ASURITE ID, a Team Database and the Northwind
database on the AWS CIS360 SQL Database server. You have access to these databases through Windows
Authentication based on your CIS360 Domain account.
1. Open Microsoft SQL Server Management Studio then select the “Database Engine” as the Server type. Then
enter the CIS360 SQL Server name: EC2AMAZ-281IBIS